


I think most people would agree that there are 3 main areas with cars, especially supercars, they are, how it looks, how it drives and what I’m going to focus on with this episode, how it sounds!
A lot of people think that the rear muffler section of an exhaust is what makes it sound different and to a certain degree that is true, however it’s the design of the headers that go from the engine to the mufflers that really make the most difference to the base sound of an exhaust. A great example of this is the Subaru WRX that became famous for its unique sound, however if you look at this video on YouTube ‘WRX Exhaust comparison’ you’ll hear what is referred to as “equal length headers” that sound nothing like the original sound / exhaust that Subaru designed.
This is due to the pulses of exhaust gases exiting the exhaust at different times due to the length of each pipe in the main headers, so for most applications you want to try and make sure each pipe is about the same length to give the exhaust a “smooth” sound. It’s not necessarily as easy as it sounds as a lot of production cars have very limited space around the engine so you see some really creative designs to work around space limitations. Luckily we don’t have the headache with our car and so access is significantly better so that’s made life easier.
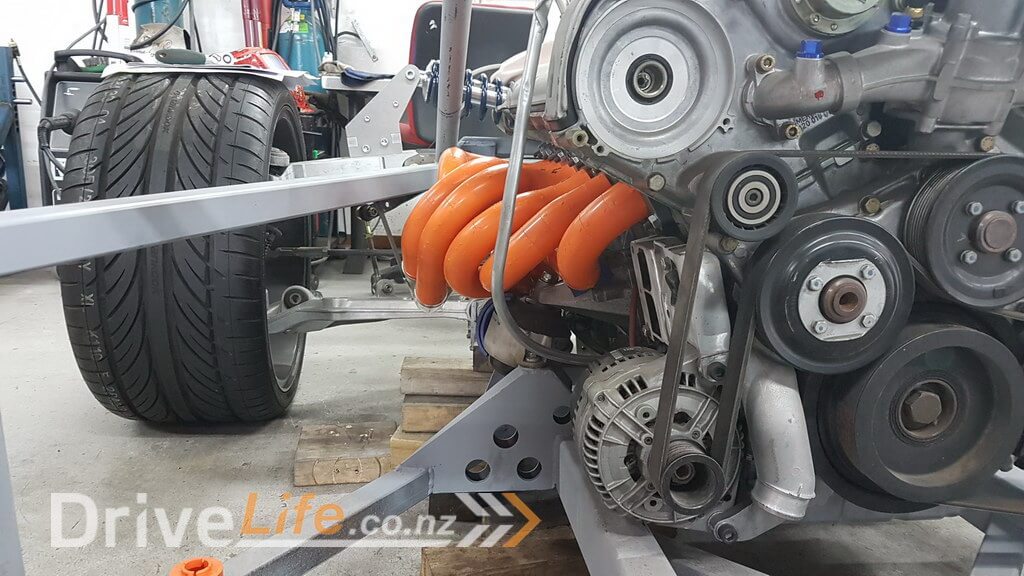
Here is the design of the original headers from Mercedes. As you can see these are 3 cylinders into 1 pipe in a very short space and then later on down the line Mercedes joins 2 of these into a single pipe. With a V12 engine that means you end up with 2 exhaust pipes out of the rear of the car. For our design we’re doing something very different.
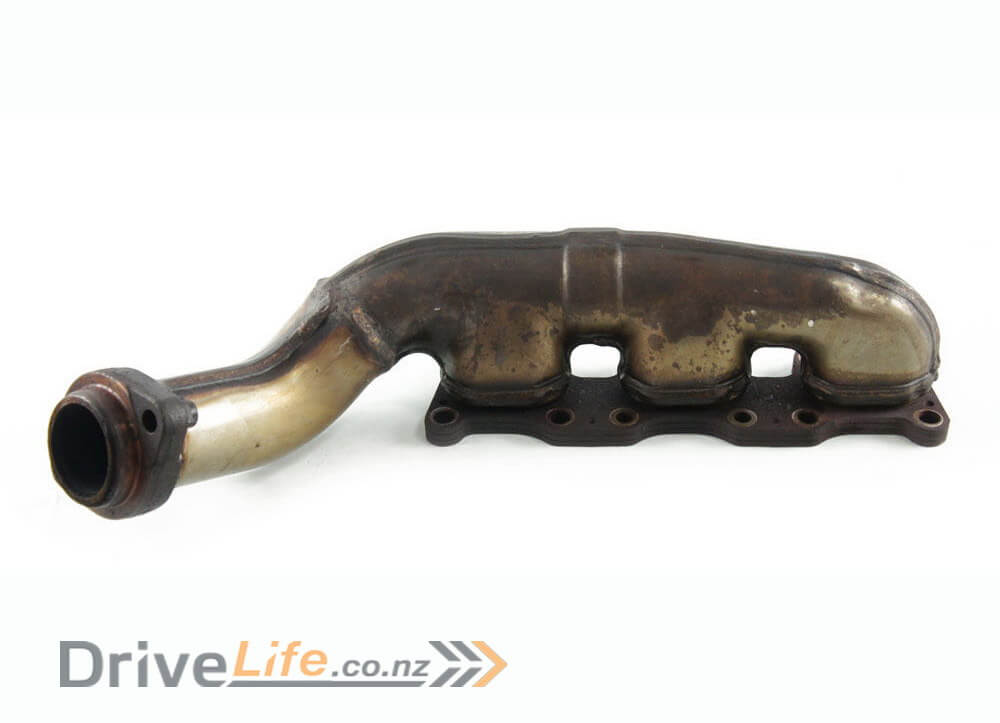
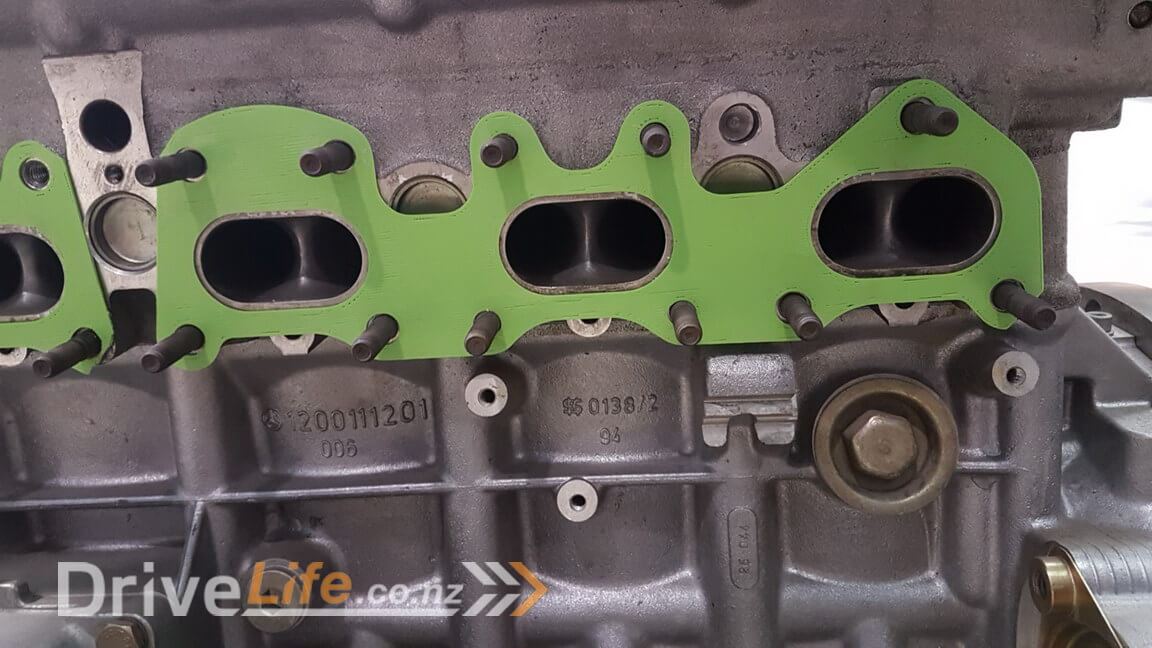
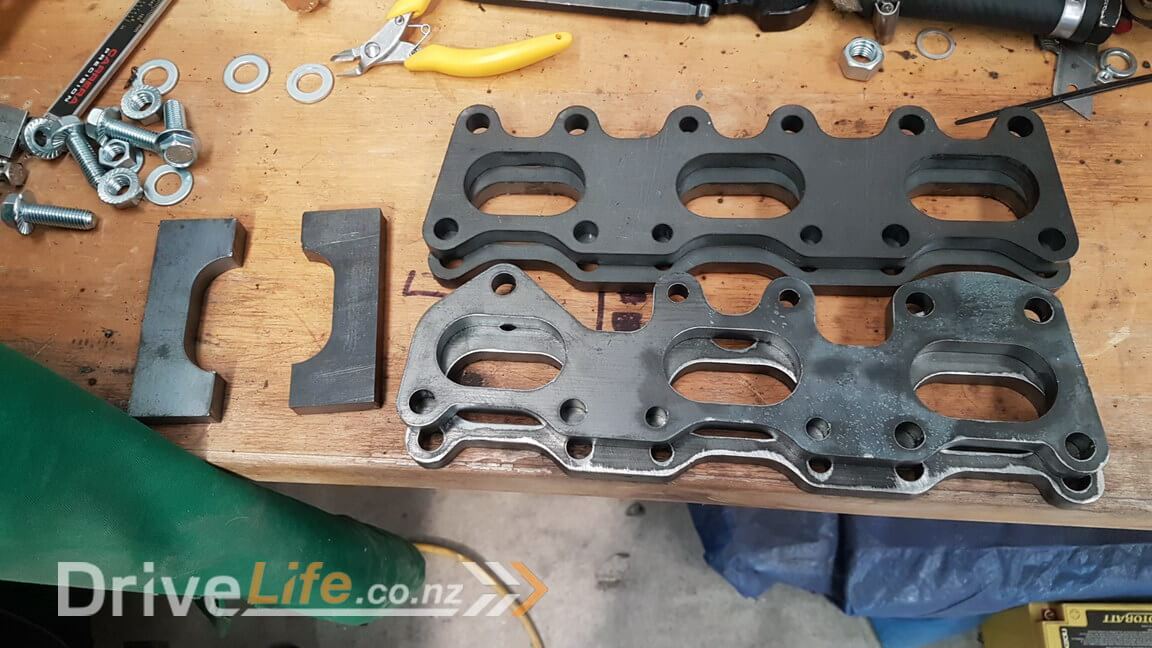
The first part of the process starts with header flanges that bolts to the engine. I had salvaged the flanges from some OEM manifolds as our engine didn’t come with them, but due to the way that they were welded I wasn’t able to get all of the measurements I needed, but they were a great starting point.
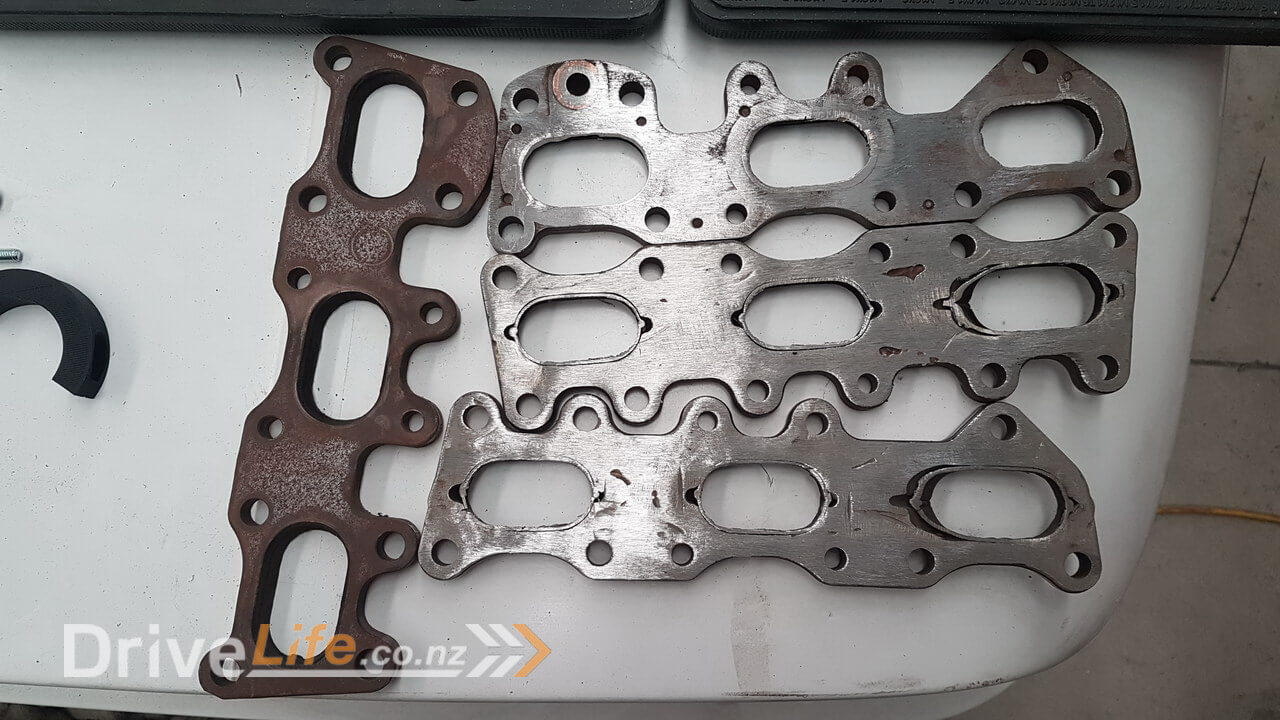
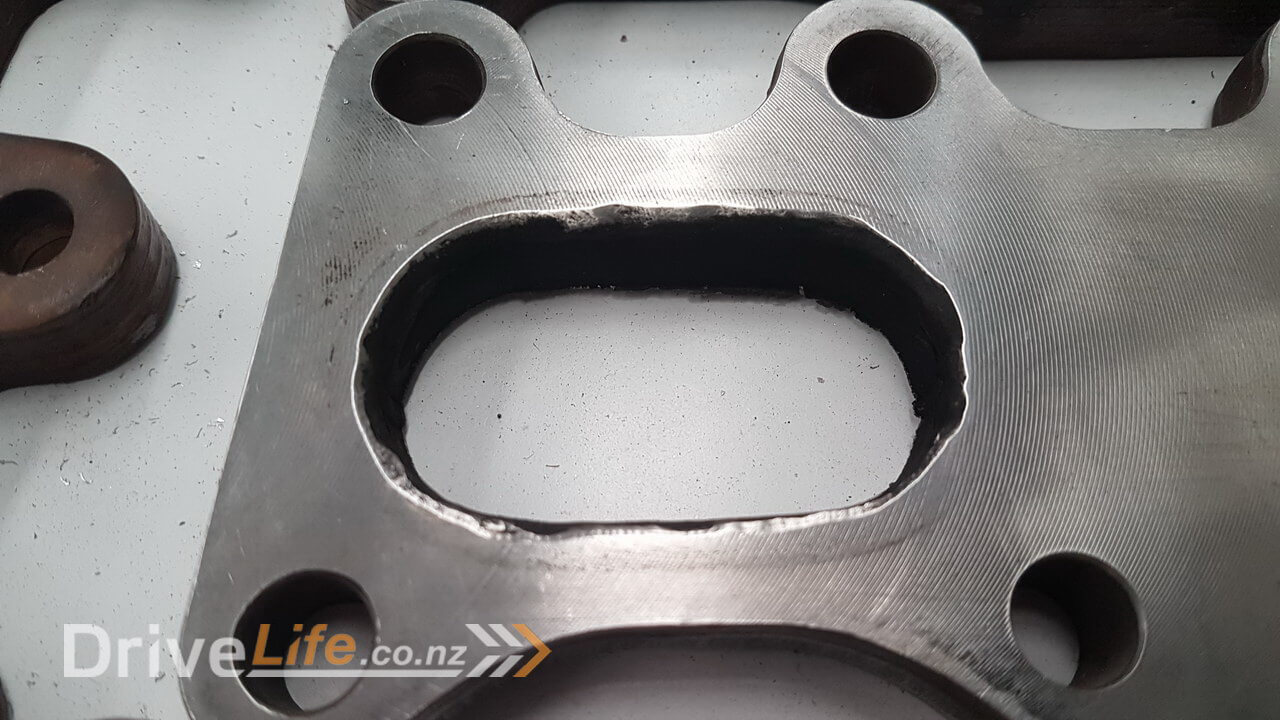
Once I had the OEM header flanges I was able to use Fusion 360 software to draw up the parts into a 3D design. From those designs I used my ever useful 3D printer to make some parts and checked them to see how they compared. Once I had all of the main bolt holes lining up perfectly I was able to focus on the actual exhaust ports. These required much more trial and error (12 versions in fact) to get the gaps perfect as previously mentioned, the OEM flanges had welding in the original spaces so I had to go back and forth with new 3D prints and then make small adjustments and reprint and on and on! This was a final version.
Next I simply exported a 2D cutting file from Fusion 360 and forwarded this to Mitch at Orrsum Laser Services who promptly laser cut us 2 of each cutting file to give us 4 total flanges to use for our new headers. He also cut out some clamps that we will use to squash the original round tube down to the same shape as the exhaust port. I will be doing an episode dedicated to O.L.S as they’re better known and Melbar engineering who have both been a massive help with laser cutting and CNC milling and bending for this project.
Now, we were capable of making up these custom headers, however due to a few time restraints for both myself and Zac I decided that I would turn to a friend of ours called Ash from Kaizen Works. He used to work for Speedtech Motorsport and then eventually started his own business and as you’ll see is a very capable fabricator of anything.
Both Ash and myself had purchased a clever little tool from Icengineworks that saves literally days of work and frustration when making new headers. They’re not overly cheap, however I knew it would save days of time and even days of my own time would have been worthwhile but saving days of Ash’s time was even better value. As mentioned luckily Ash had also purchased the same kit and so we were able to put our 2 kits together to allow us to mock up more ports at once. The 3D printer also got some more use as I printed some blocks that Ash needed to help later on when cutting the actual stainless tube……certainly got my money’s worth out of that tool !
Here’s what the system looks like when it’s all clipped together.
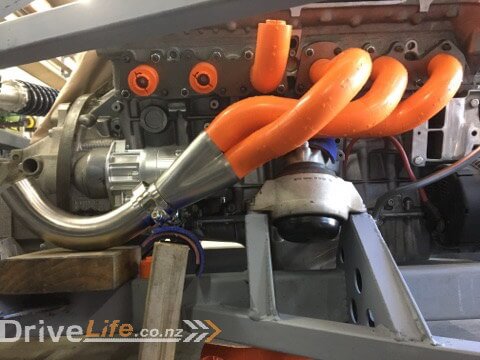

Each section of the mock up system is made to clip into the next. There are different radius bends you can use and that makes it easy to unclip later on in the process and then match those up with real tube to be cut, simple.
At the beginning of this episode I described the equal length header vs unequal length header argument and in our case we’ll be going with equal length. This is very simple to calculate with this mock up kit since you just have to count the amount of blocks you use and that means each header will be the same length. Once we were happy with the lengths of the design it was just a matter of Ash breaking the blocks apart into the straight and angled parts and then cutting them out of real tube and then tack welding it all together.
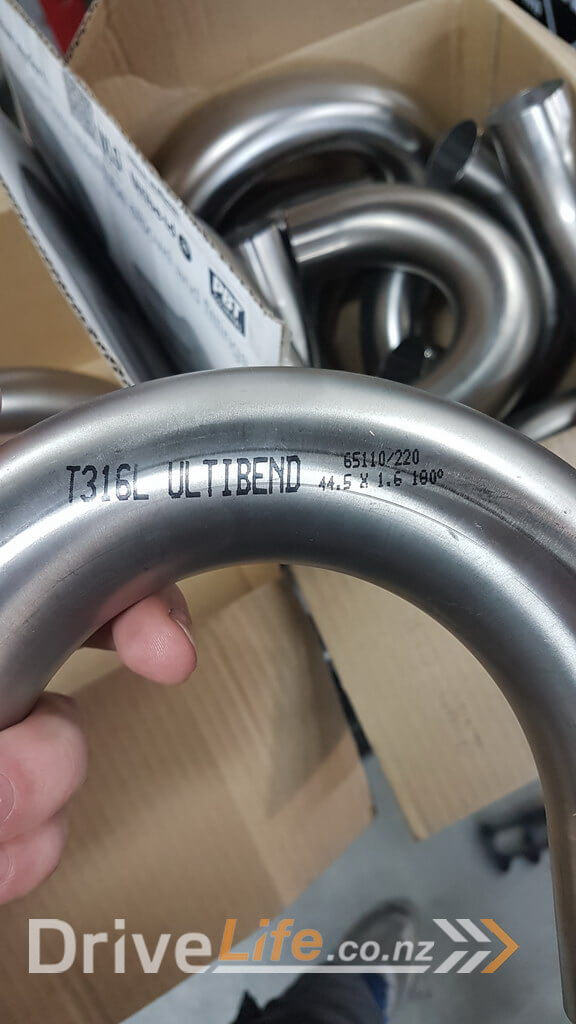
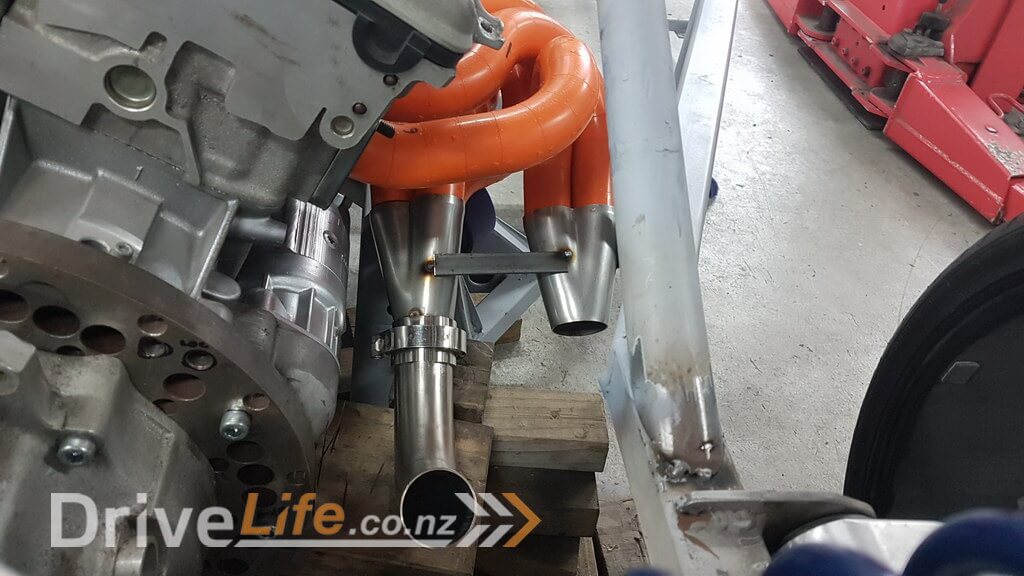
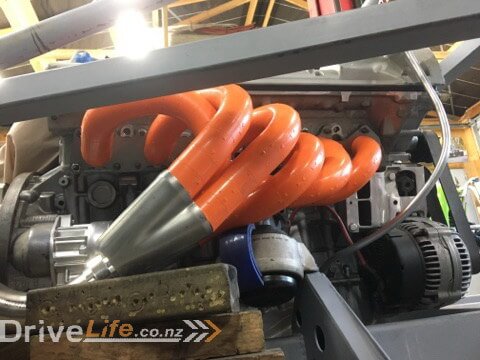
We decided to use 316 grade stainless steel. Now this type of stainless steel is usually used for medical or salt water type environments and is more expensive than 304 stainless steel, however we had access to this material and we felt it would give us a better end result, but either 304 or 316 is going to give you a great look and when welded well will be reliable.
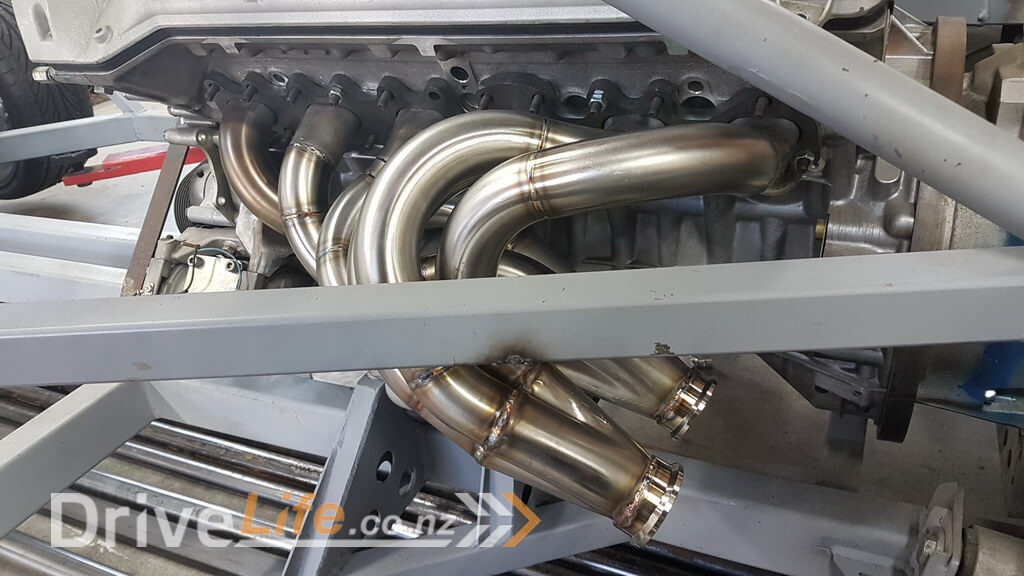
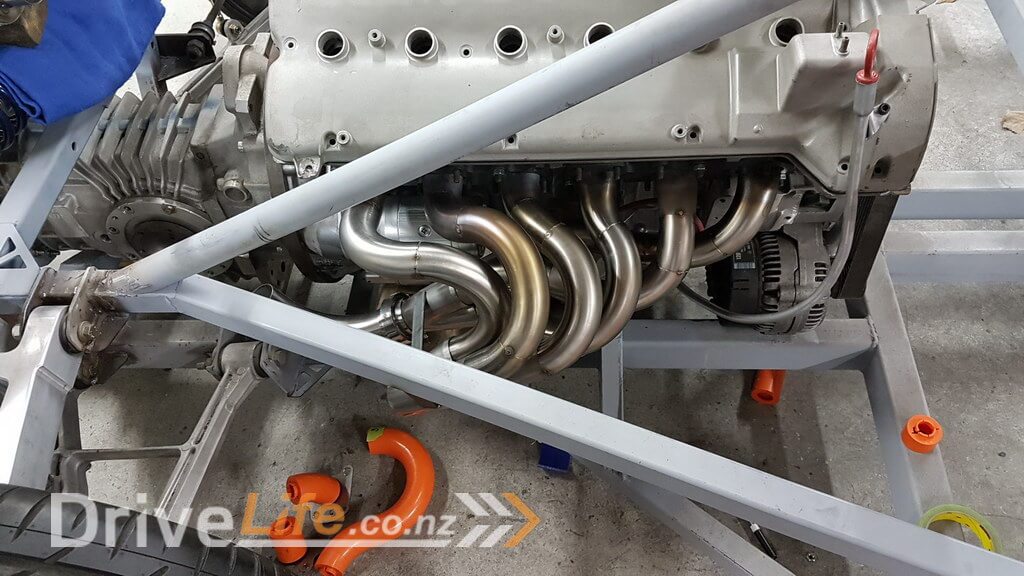
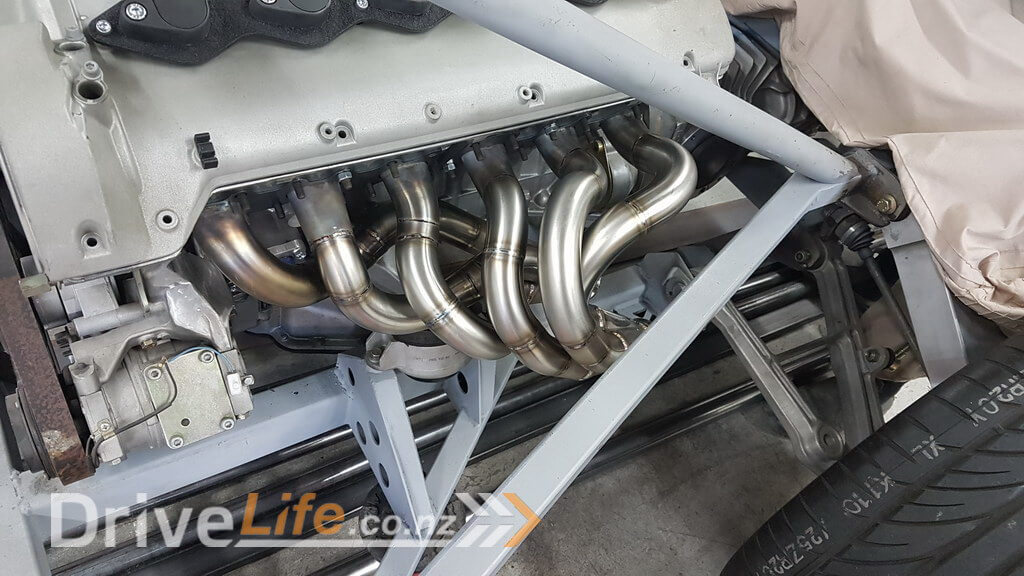
It’s quite hard to see it from these pictures, but the overall design will be 3 into 1, and then each of those will run to its own separate muffler and then out of the back of the car, so we will have 4 separate exhaust pipes which is quite different and is the same way that Pagani uses this same engine in their cars so we’re hoping it will sound amazing !
I think you’ll agree that Ash has made an amazing job so far with more to come in the next episode.
There’s a newer entry in this story, please click here – FZ12 – Part 20
If you’ve missed the last part of our story then click here FZ12 – Part 18
or if you want to go right to the beginning then click here FZ12 – Part 1


