
Cooling is something that I’ve been very aware of since the start of this project. That V12 is hopefully going to get a regular workout and it’s going to produce some heat.
As with quite a lot on this project cooling is really an unknown variable. I know some out there would say I could sit down and do some crazy mathematics to get a more accurate number for what we’re going to need, but we’re just going to take a “best guesstimate” shot at this as I’ve usually got it right with our NSX racer and other road car projects so I think I’ll get pretty close here too.
We will be running a reasonable oil cooler on the left of the car at the rear, but this episode is going to focus on the twin radiators at the front.
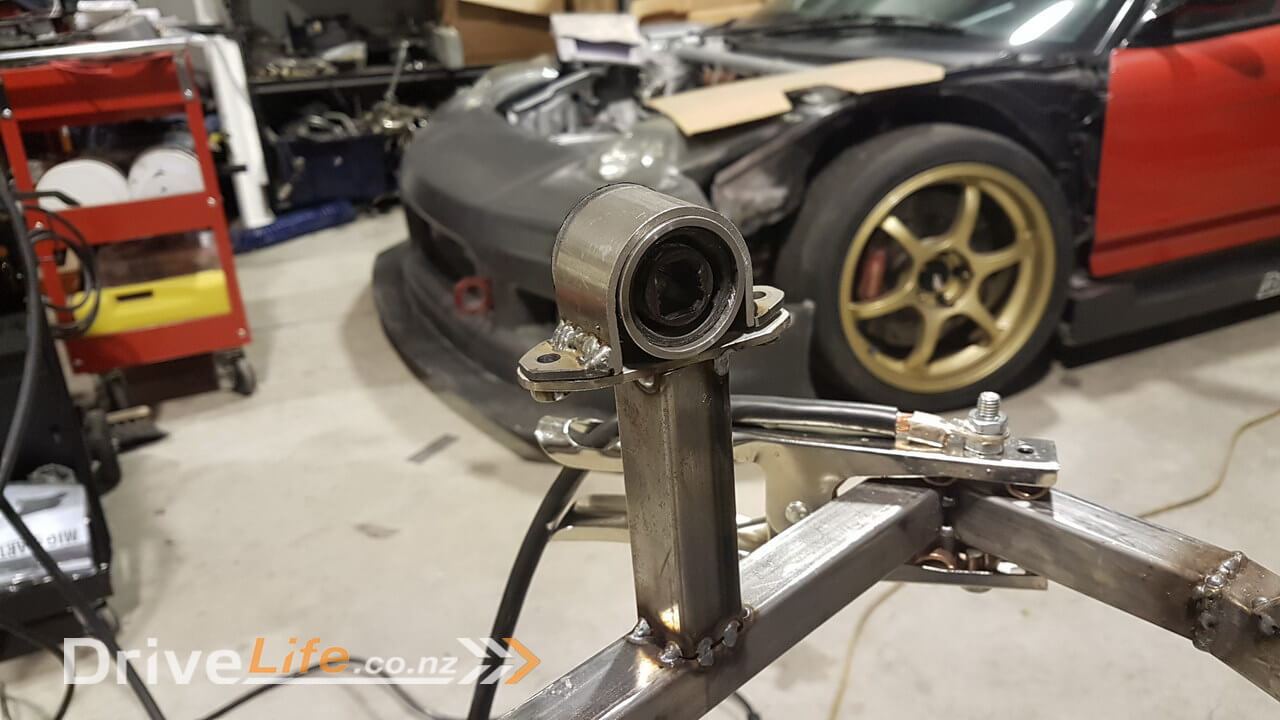
Before I could really do anything else, I needed to make a light frame to support the radiators, but also give me some reference when the front end wasn’t on the car. It’s not easy to put on and off on your own, well it’s impossible, so I needed to put it on, measure and make the frame and then remove it. All of the steel from the steering rack forward is thin wall steel as it needs to be “crushable” for the low volume certification regulations so it’s not heavy even though it might look meaty.
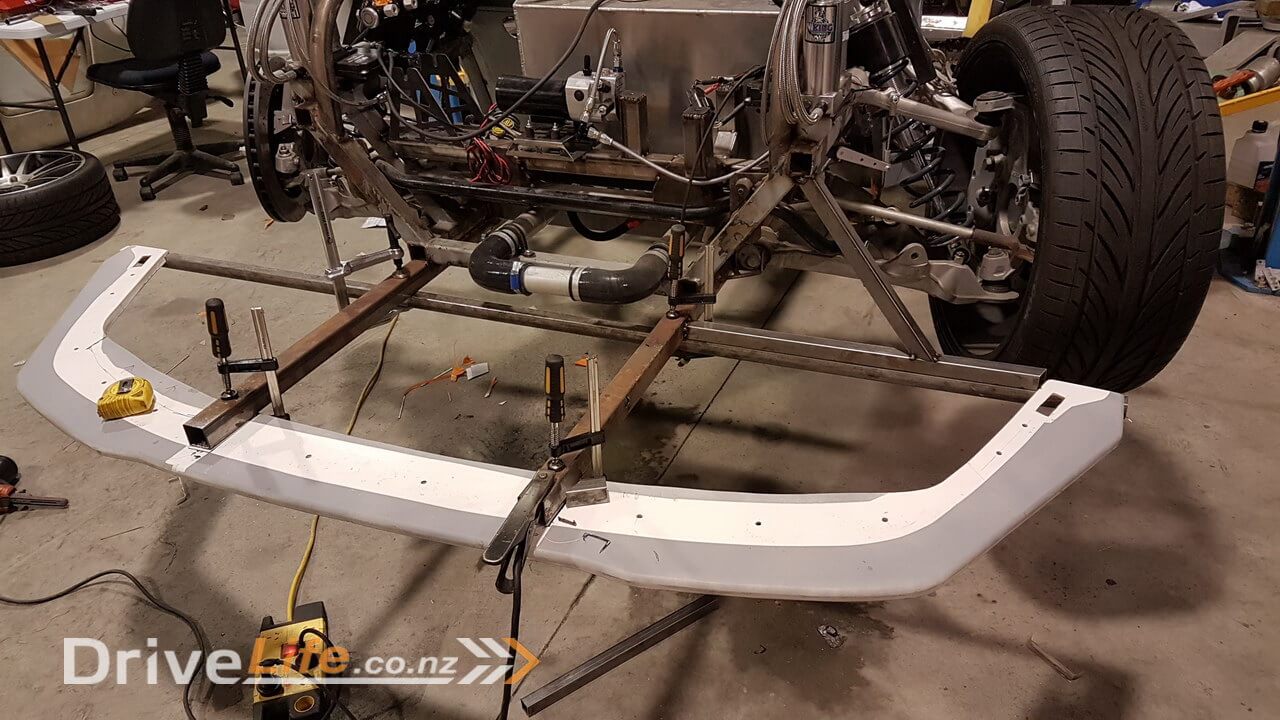
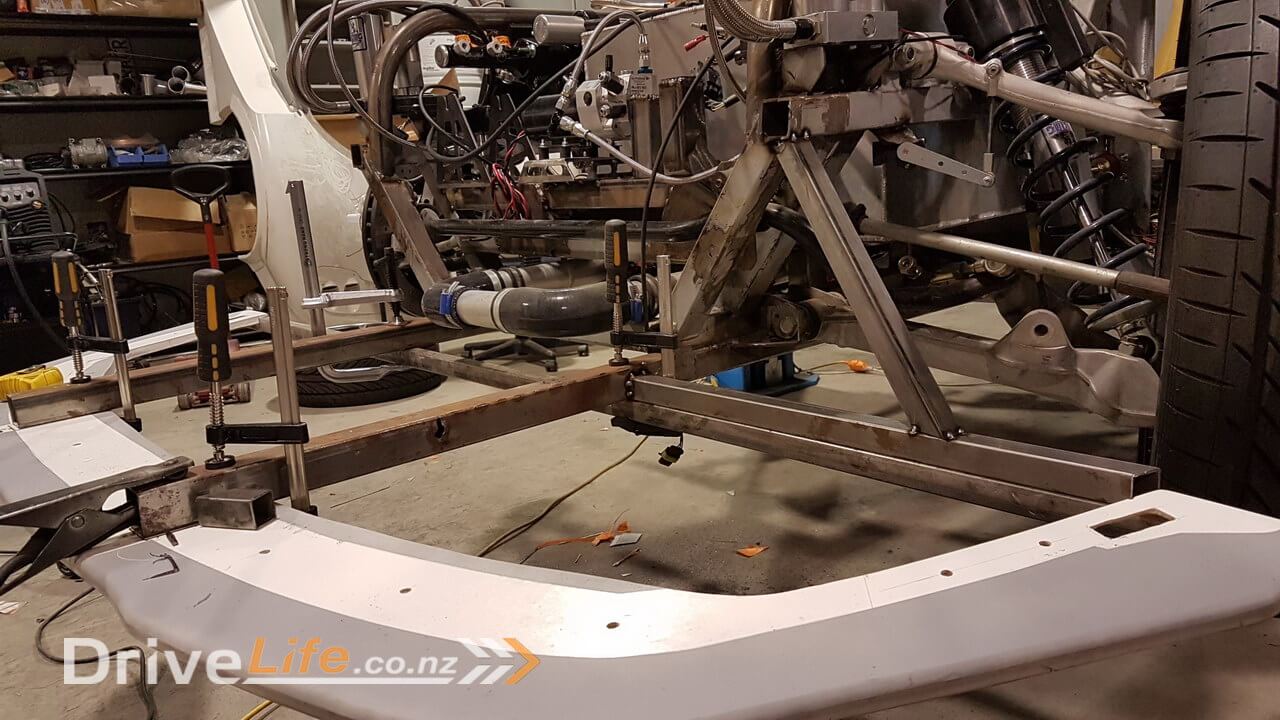
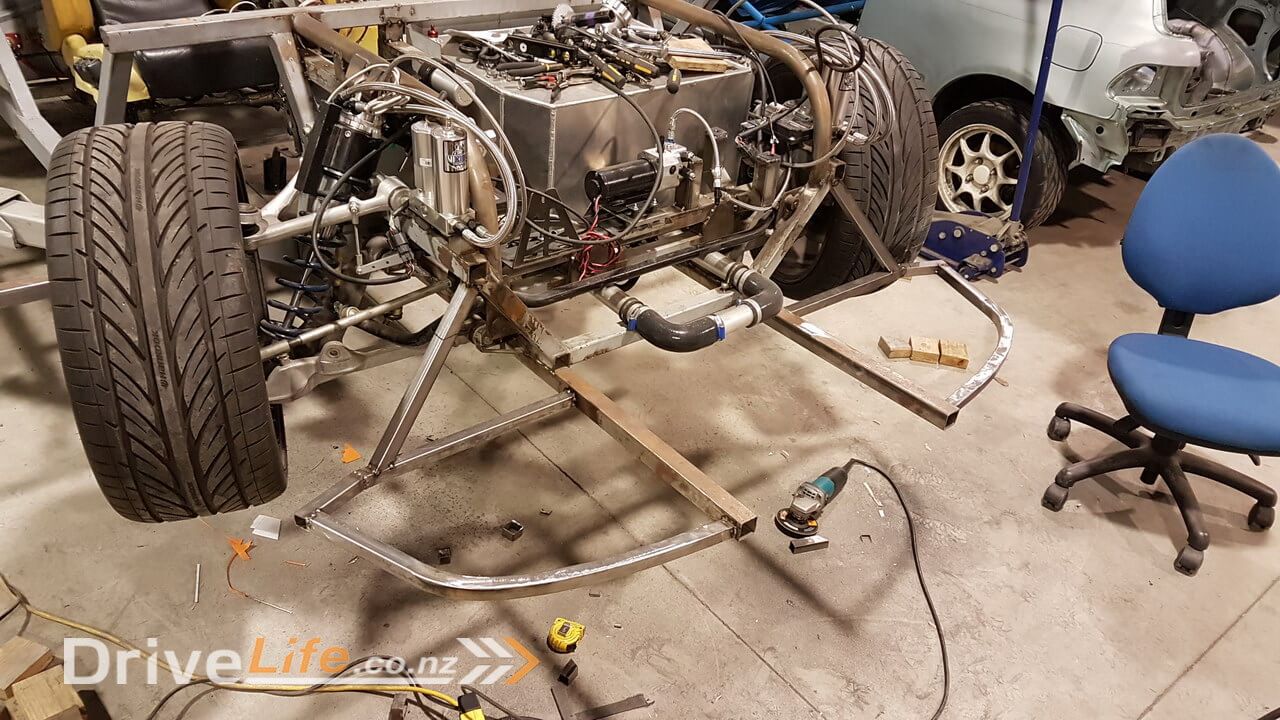


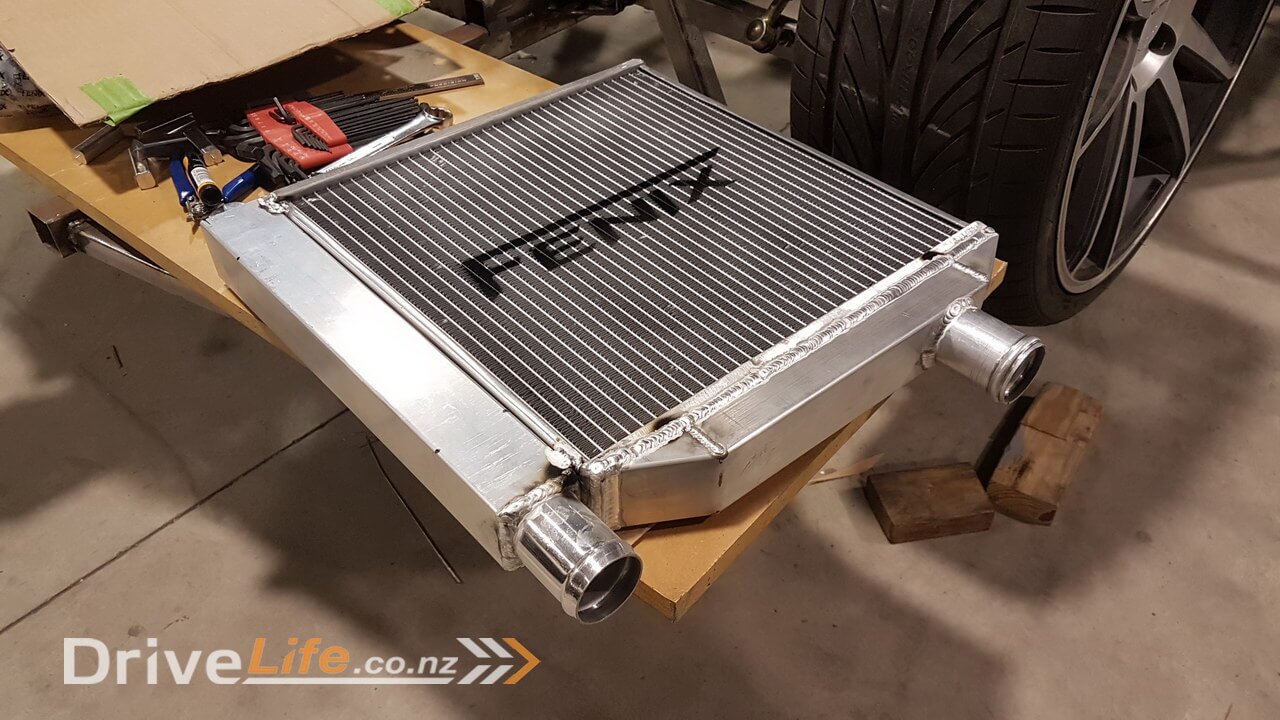
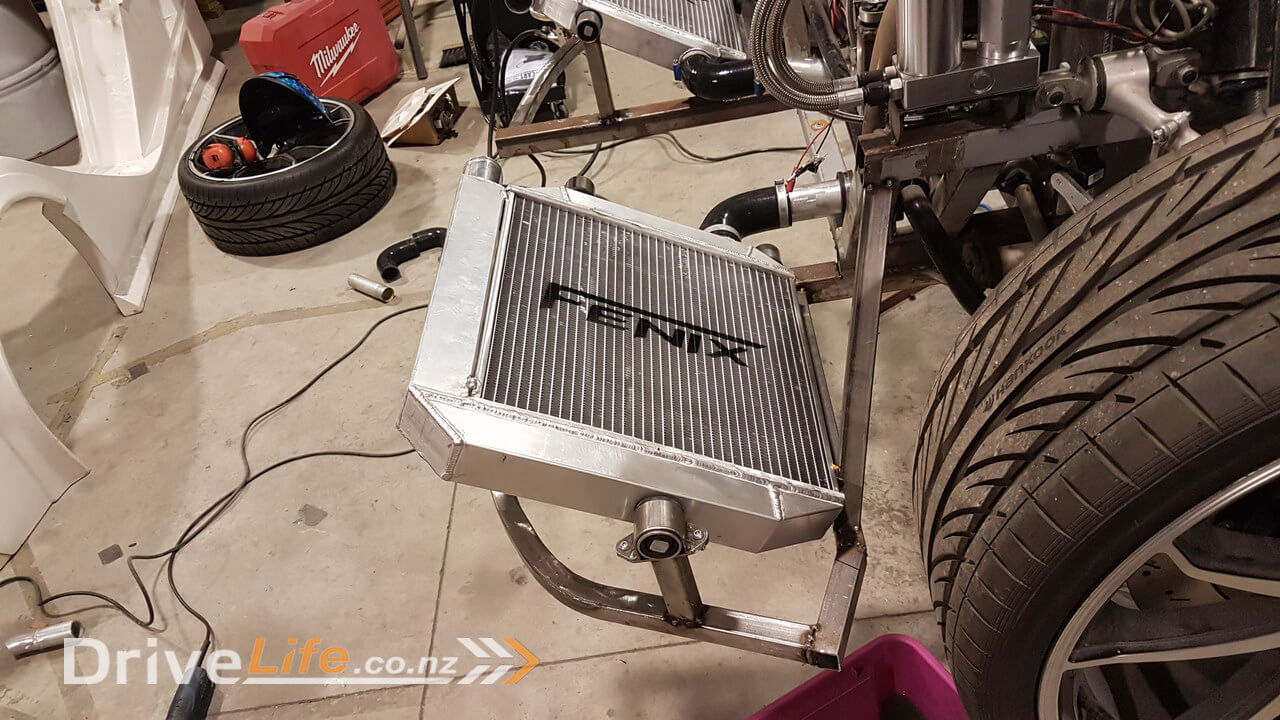
Now I could take some rough measurements to get an idea of how much space I had between the front of the front tyres and the front of the car, and to be honest it wasn’t anywhere near as much as I thought it would be when I had to take into consideration clearance for steering etc. Regardless of the size, it was all that I had and there was very little I can really do about getting more, so I settled on two of what are a very common size radiator for a Honda Civic. Our friend Reuben from R’s Garage supplied us with these Fenix units.
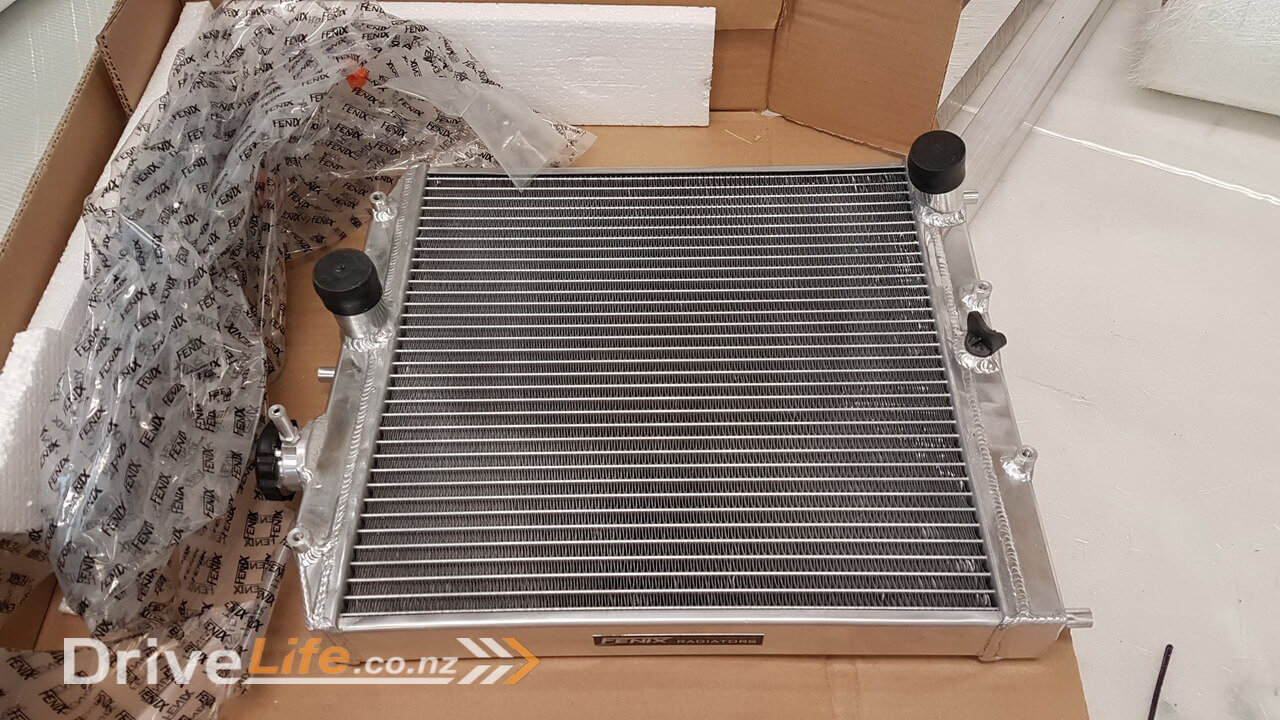
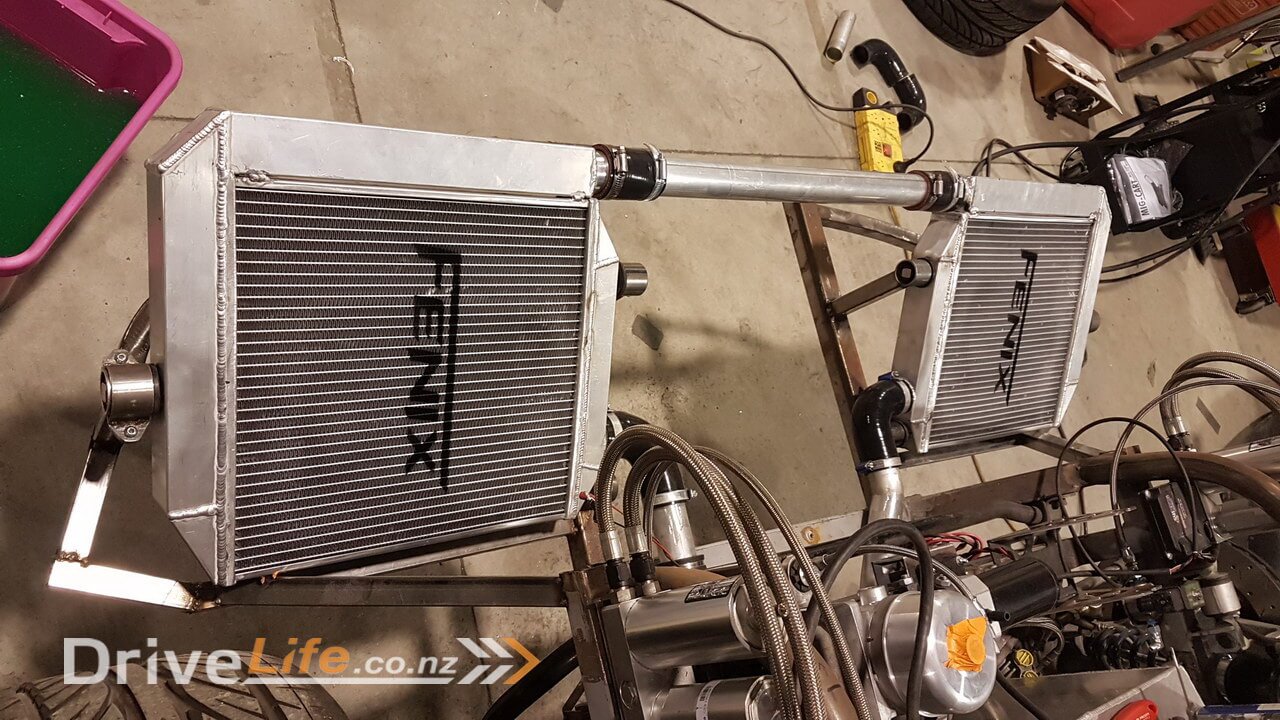
Some would argue that we could have just ordered a “custom” radiators, but I really didn’t know if what I had in mind was going to work, so this was actually the cheapest way to go. We started by cutting off the existing end tanks. Since the engine is in the rear, there is a small header tank with the engine and so we didn’t need the seperate filler caps or bleeders as the system will self bleed from the header tank.
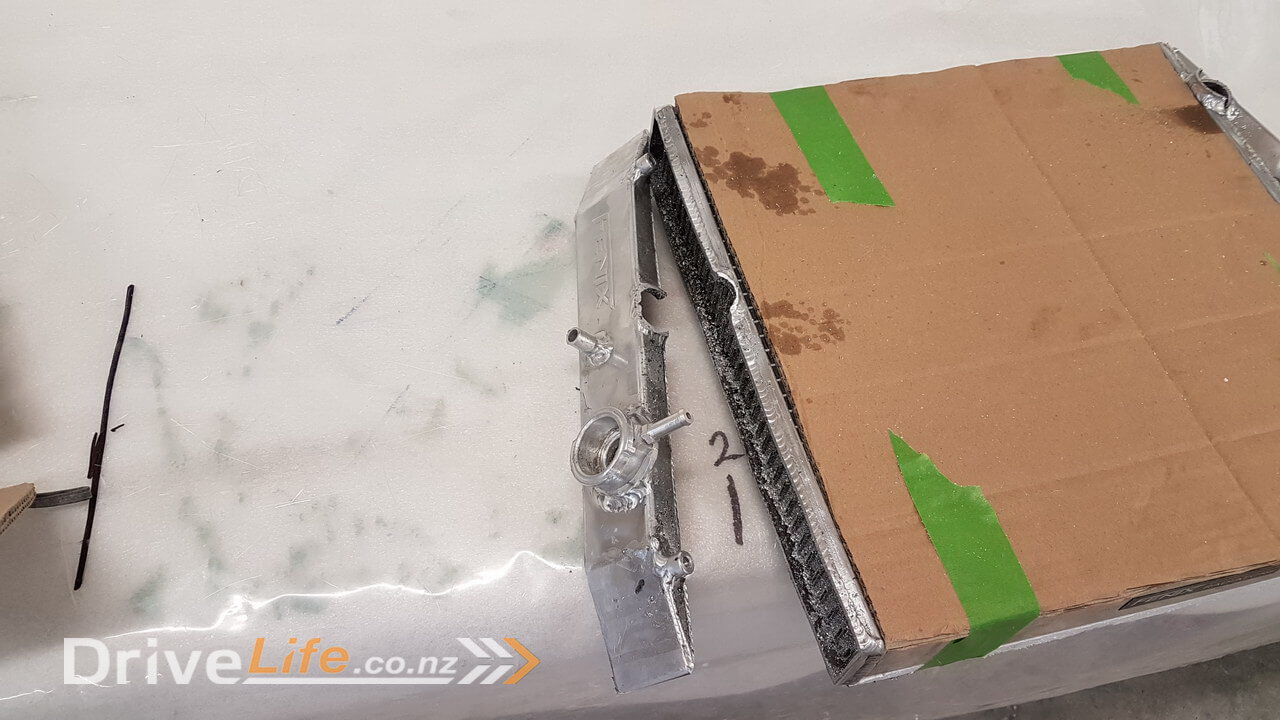
Next we needed to create some new tanks. This was reasonably easy by purchasing some box section and then just using the trusty bandsaw to cut it and then fold. I already had some 45mm tube we could easily weld in to attach the incoming and outgoing water pipes to.
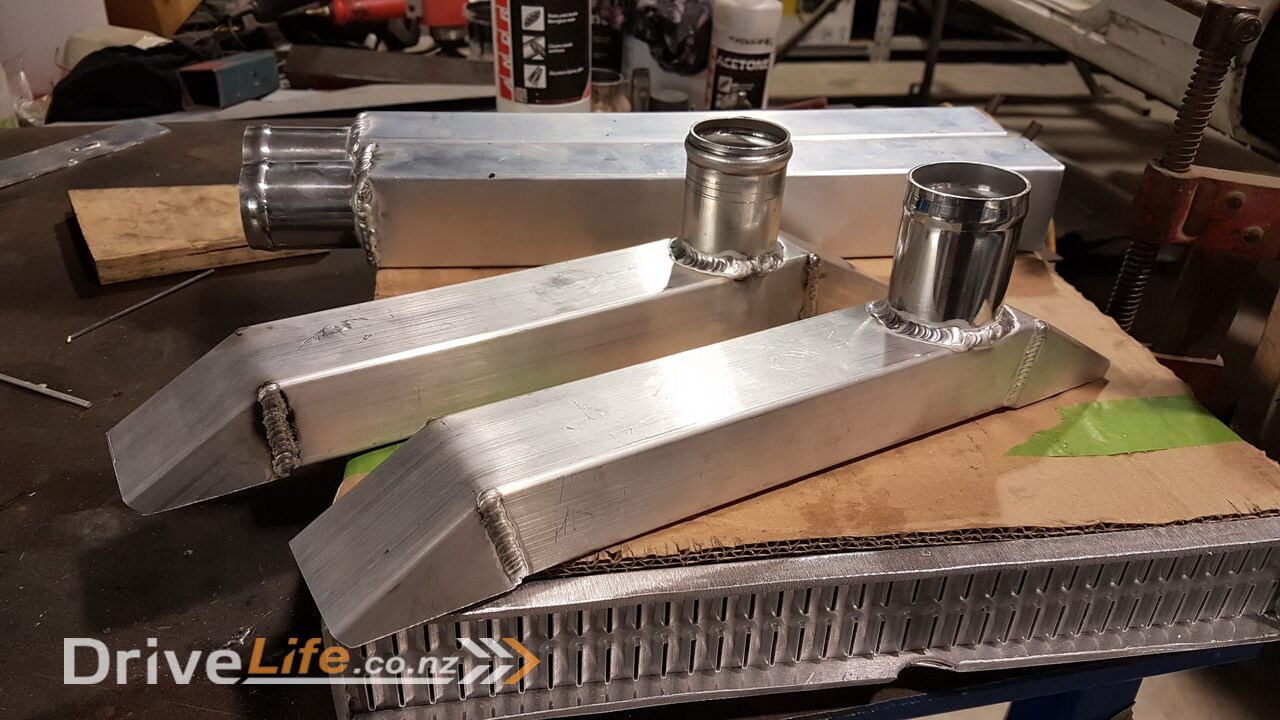
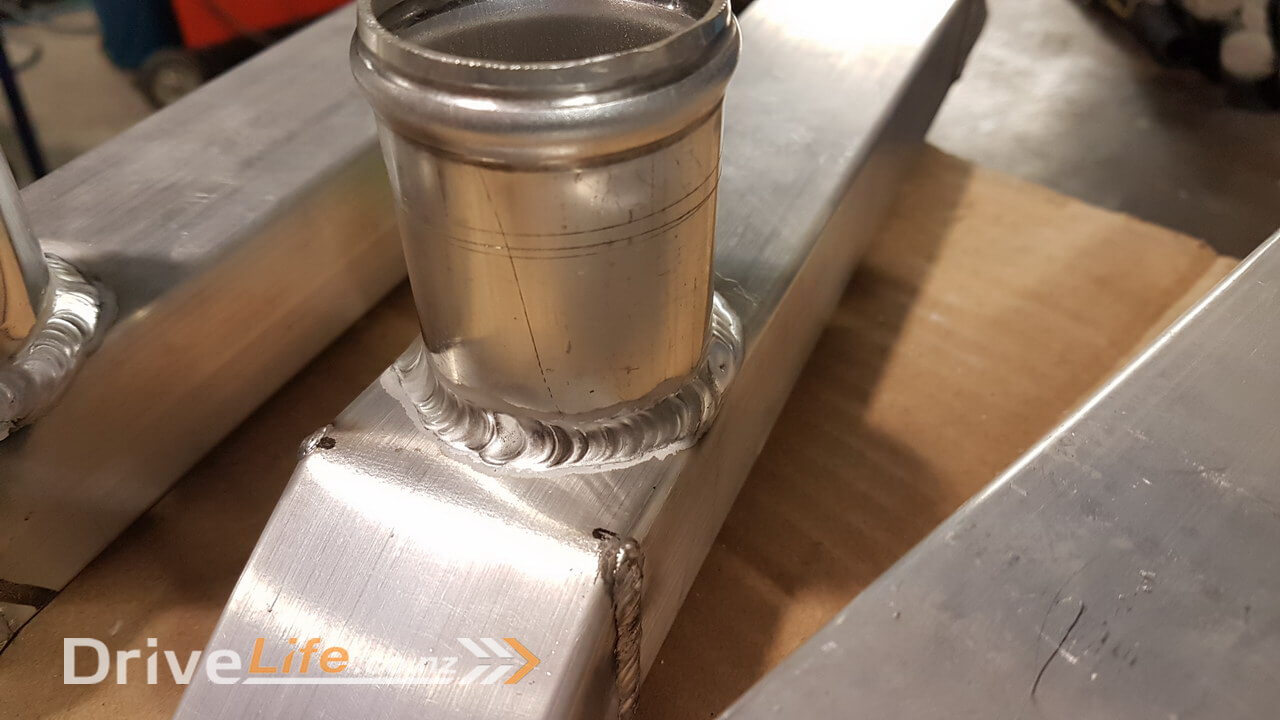
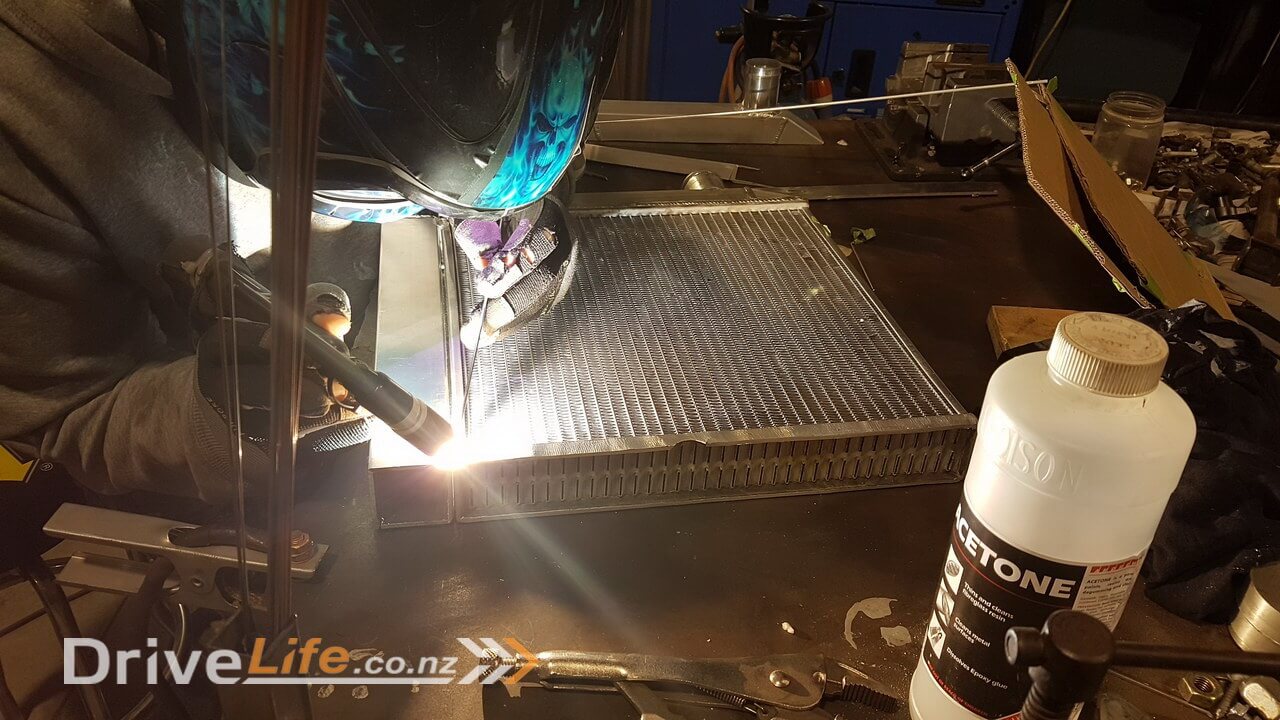
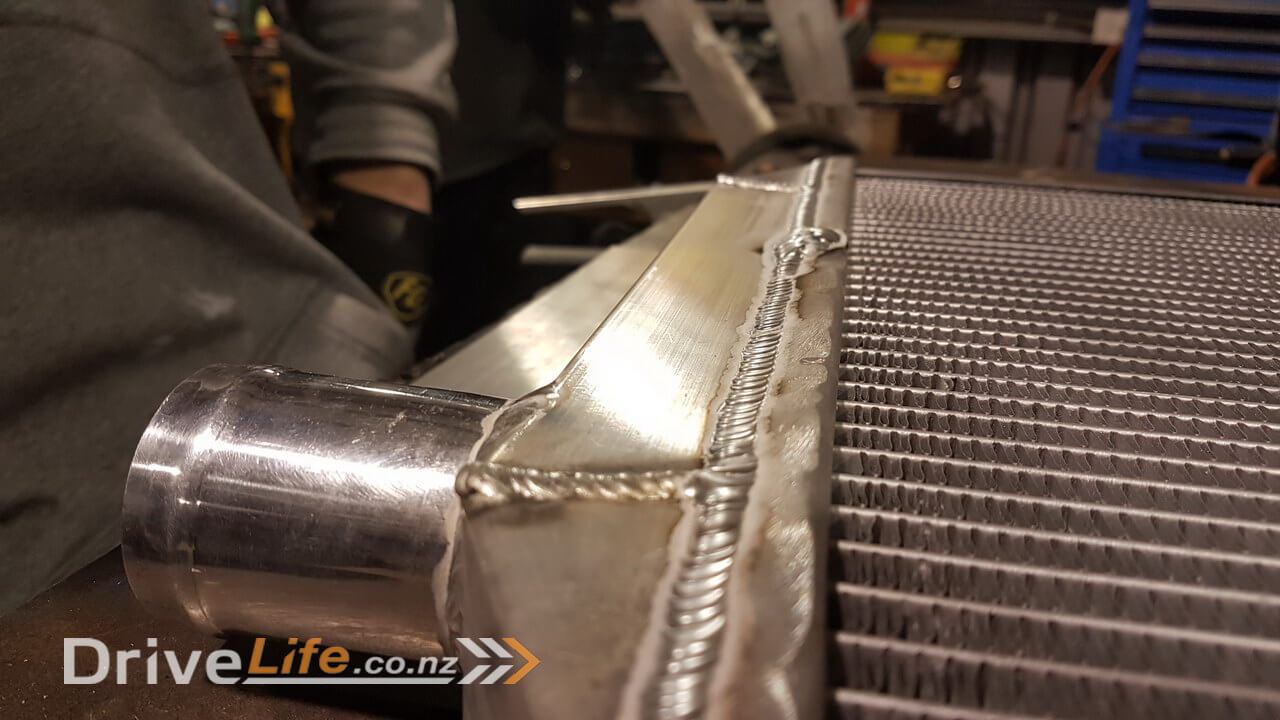
Next Zac released some of his TIG welding magic to weld the new tanks to the original radiators once they had been cleaned up.
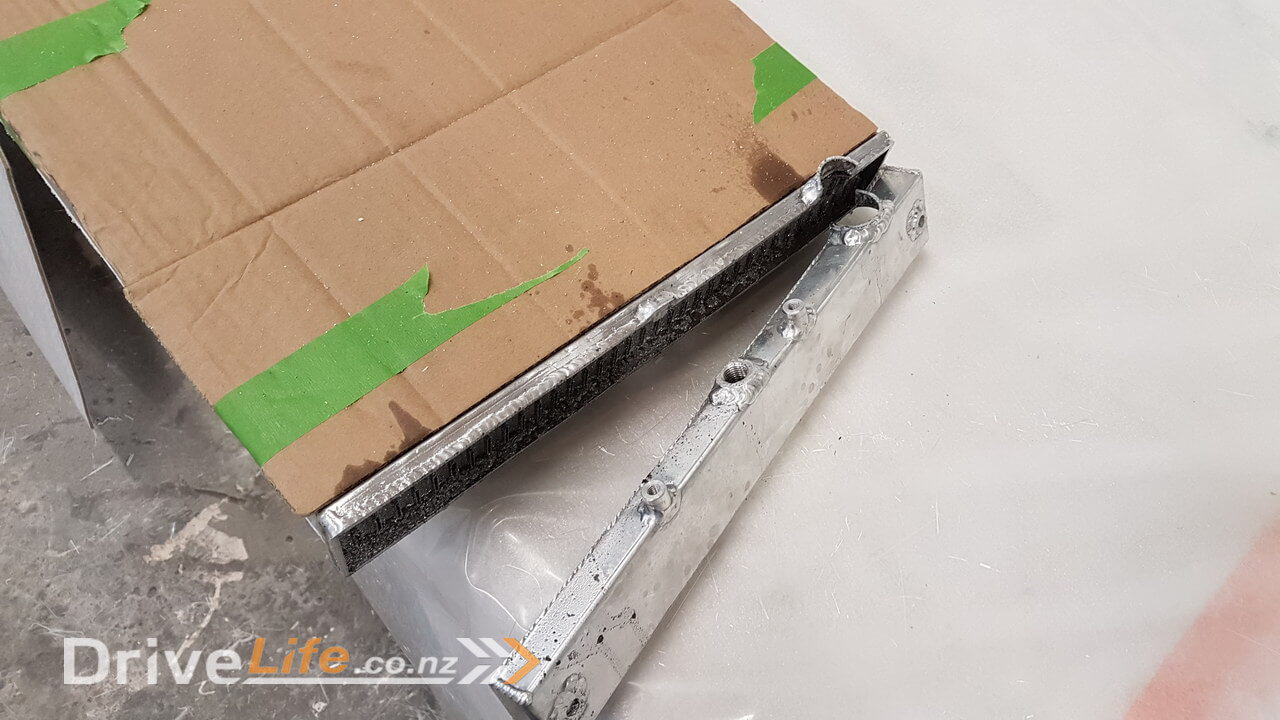
One thing that is unique about our design is that we needed the inlet and outlet on the same side of the radiator. The reason for this is because we will have 2 radiators facing each other, so the water will flow into the left radiator, then out of the left radiator into the right radiator and then head back up the car to the engine. To resolve this issue we simply created a tank that ran from one side towards the top of the radiator, then carried on across the top of the radiator. This way the water comes from the inlet side, through the radiator, then travels up to the top then back towards the inlet side. Obviously on the other radiator it’s the opposite. Water flows in at the top, travels along and round the radiator, then through the radiator and back out.
We could also have possibly used a split tank design where the water goes in and out of the same tank, but Zac and I both felt it was much more difficult to do as he would have had to weld much closer to the very thin cooling fins and it had disaster written all over that plan so we played safe. This is the end result.
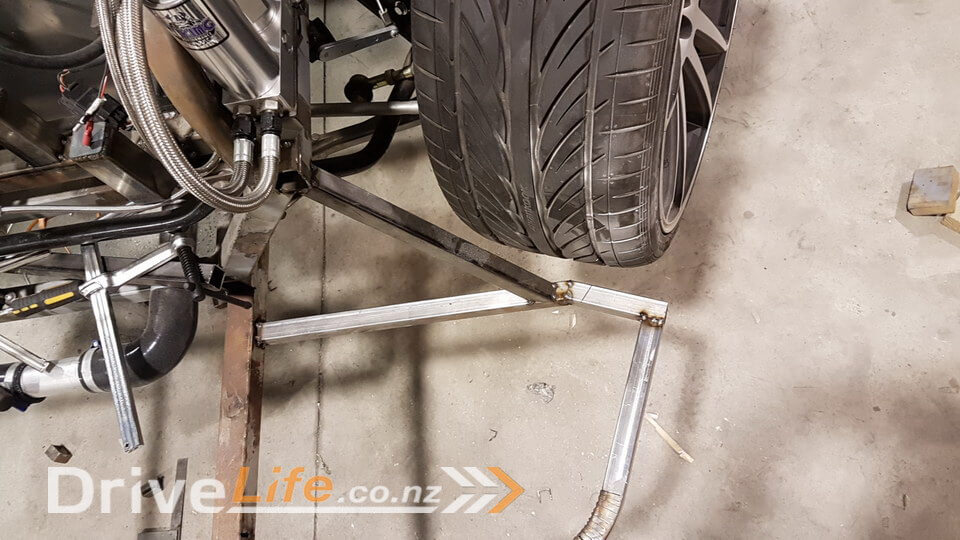
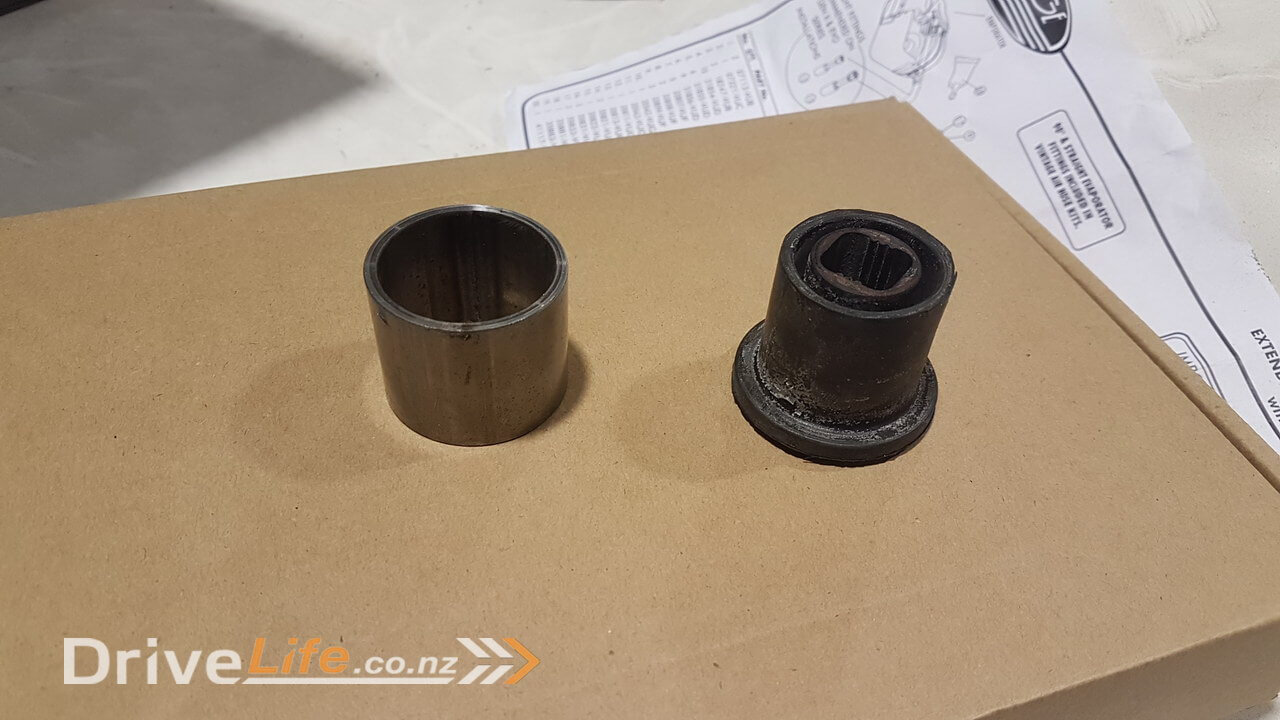
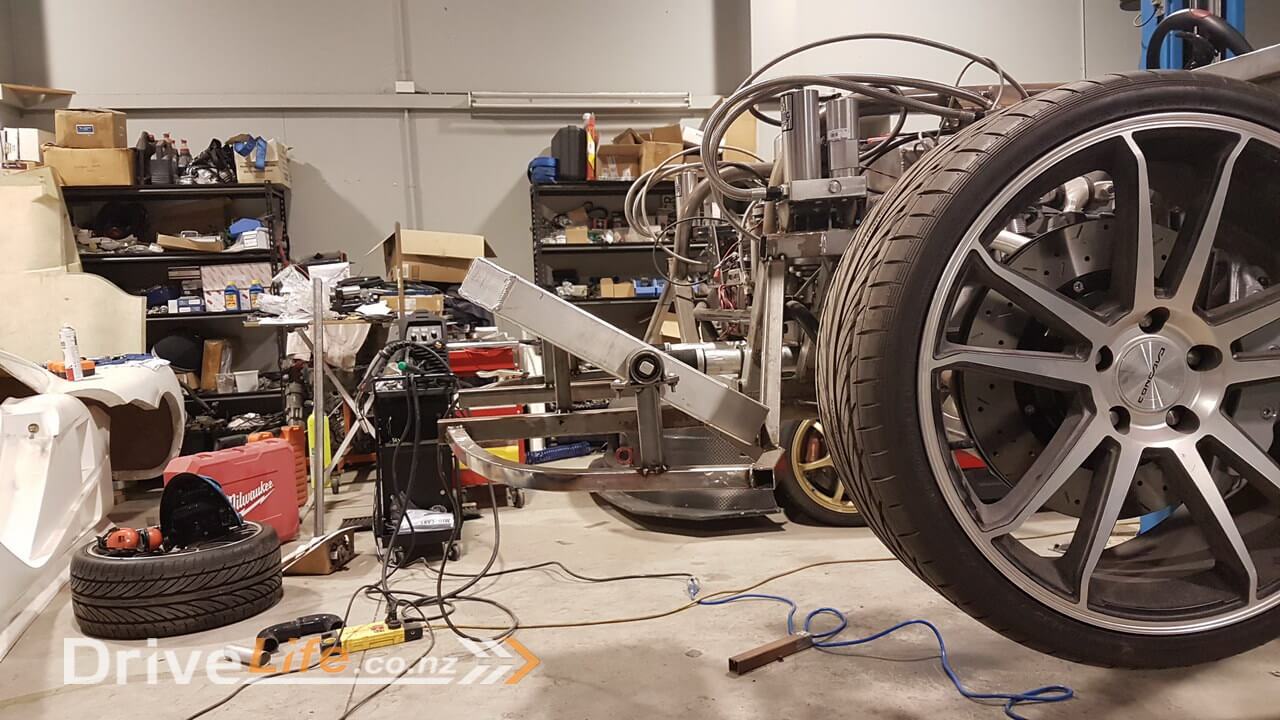
The next task was to mount the radiators onto the frame I mocked up earlier. I had already got rough measurements for where it would need to be positioned to clear steering, intake vents, bumper, headlights etc. What I did need was some basic rubber floating mounts. Hunting around on Ebay was the easiest way to find what I was after. They are for an Hyundai Tucson but were just what I needed, something generic in shape I could work with. I parted off some conveniently sized rollcage tubing to make a carrier for the new rubber mounts.
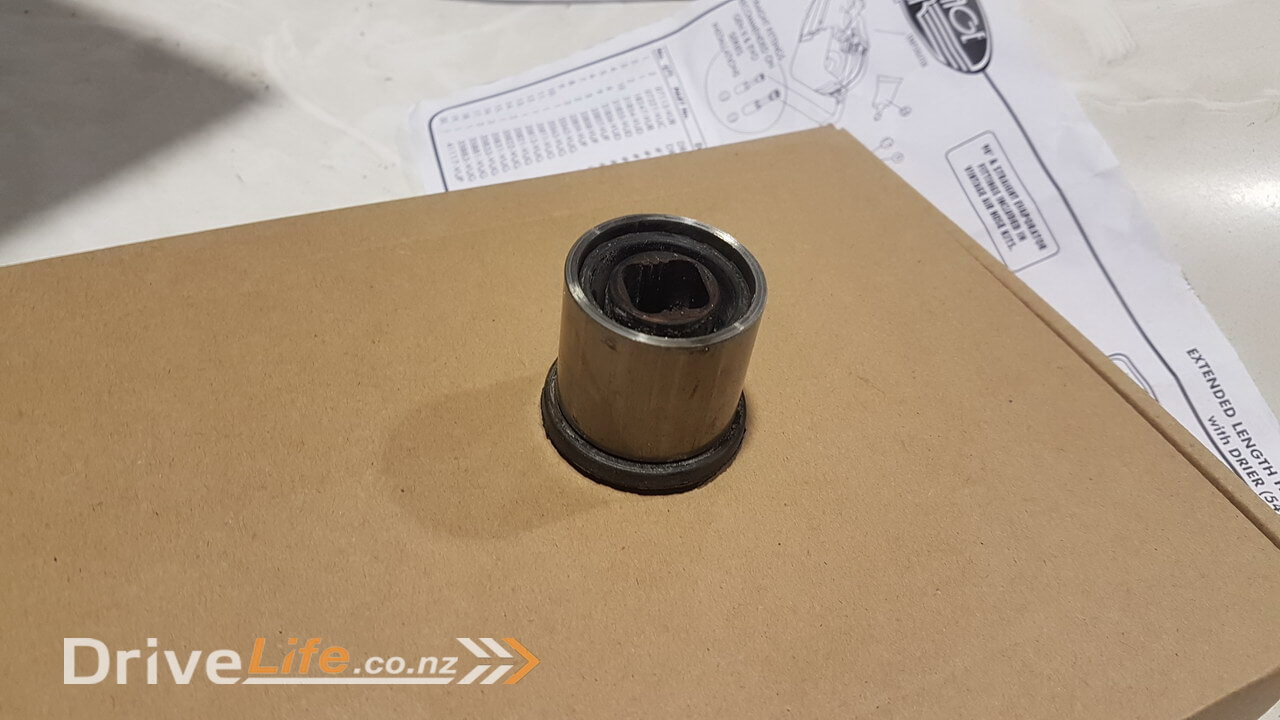
Next Zac welded on some solid bar to the tanks so that I had something to sleeve inside the rubber mount. Now I used a strange combination of whatever I could to prop the radiator in place with so that I could free my hands to cut some small box section and this is the result.
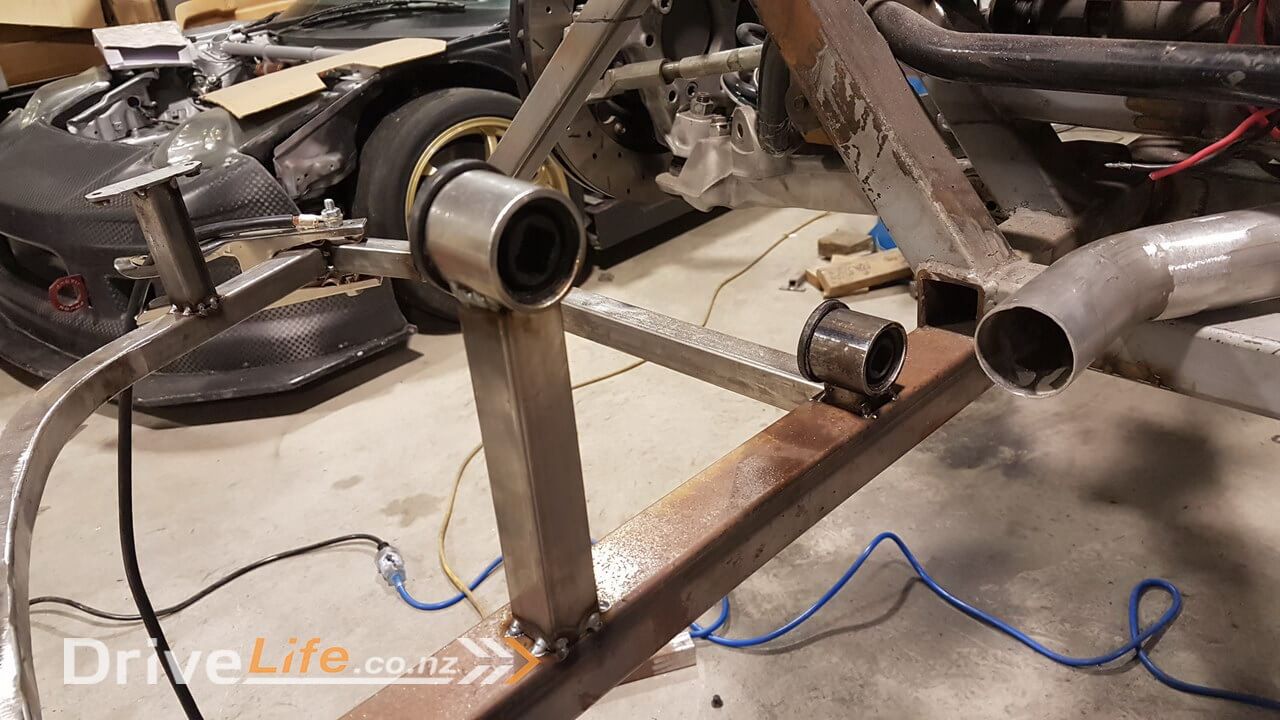
Obviously the two mounts above aren’t going to move, so if I made the other side like that then I would never be able to get the radiators in or out, so the next mount needed to be removable. I didn’t want to reinvent the wheel as such, so I essentially just put a platform between the box section and the tube holding the rubber mount. When the bolts are done up, the tube is clamped in place, but when the bolts are undone, the tube and in turn the radiator is now easily removed. Simple but effective I think !
Putting it all together after many hours of measuring, positioning, tack welding, more repositioning and I think we’re finally there.
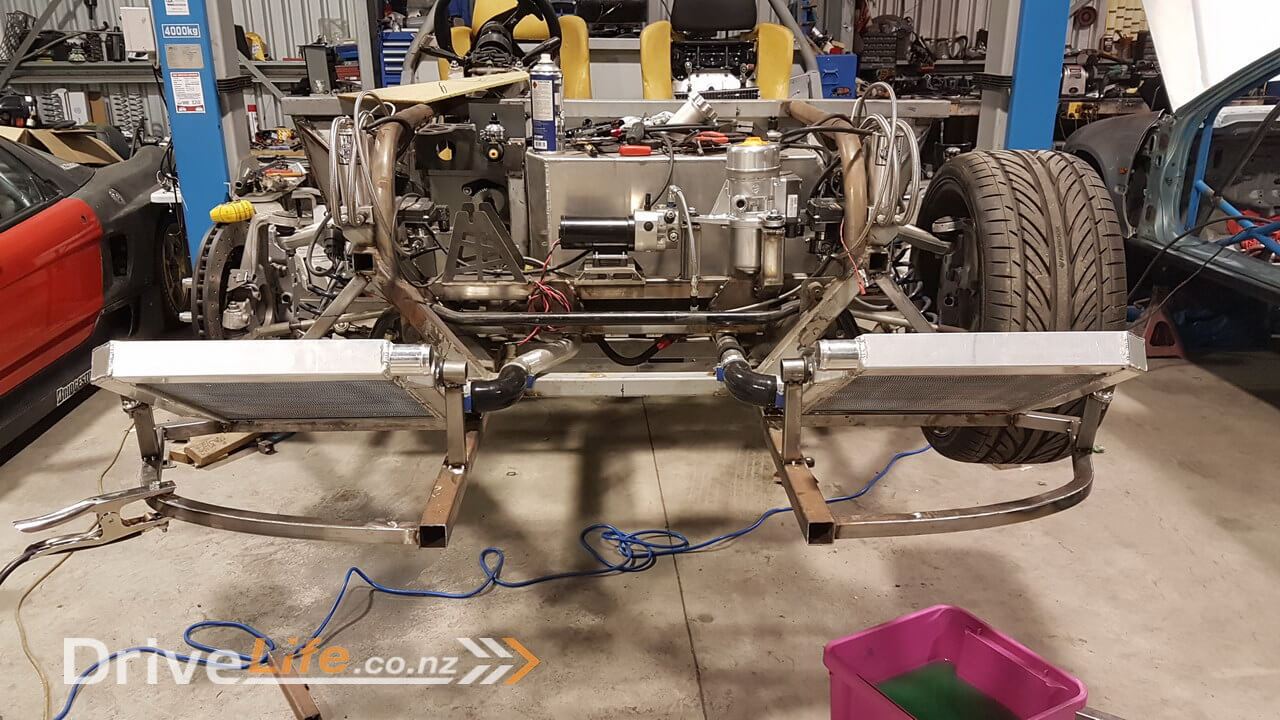
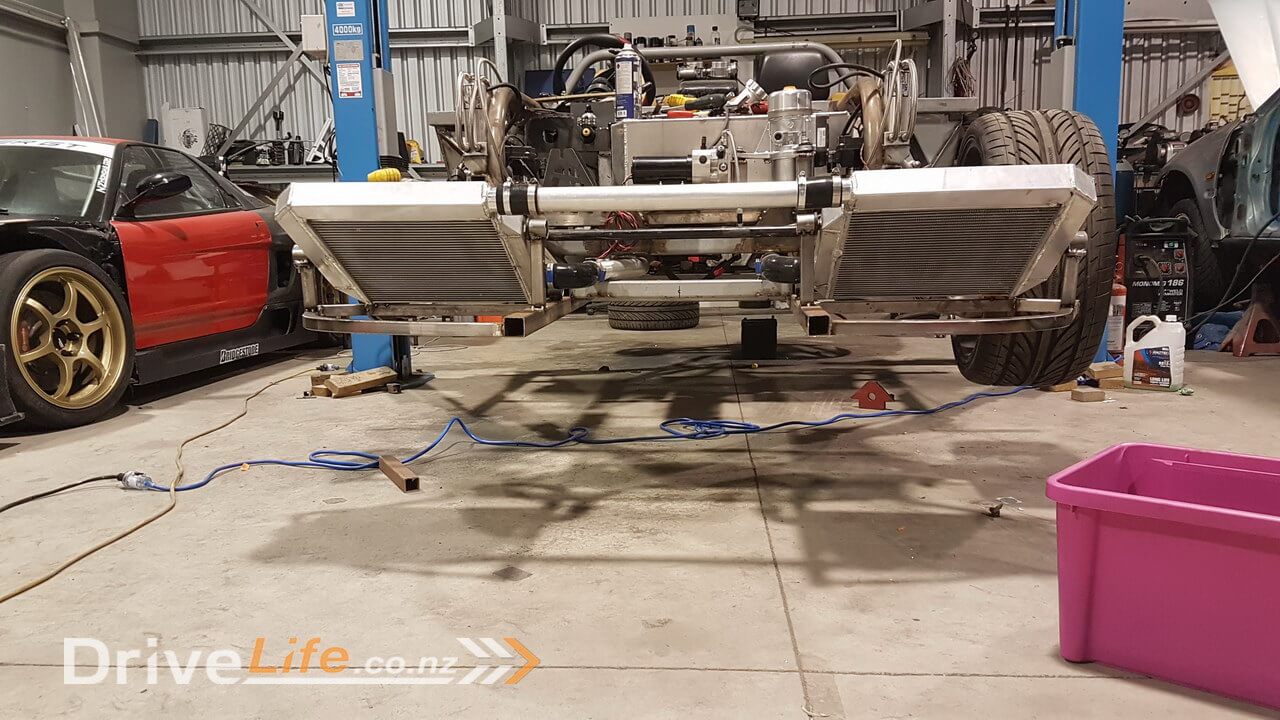
The pipe that joins the two radiators together is only temporary as the final one will go forward a little inside the front bumper as it will free up the space in between the radiators as this is going to be a “front trunk” for storage since there isn’t any real storage anywhere else.
If you’re wondering about the angle that they’re mounted, this was for a few different reasons really.
The first is that by laying the radiators down we can use a larger radiator than if they were stood vertically like most radiators.
Secondly, there is a reasonable size intake on either side of the front of the car and so by angling the radiators this allowed those vents to clear the radiators.
Lastly, we will be making a duct for each radiator to duct the airflow from each front vent directly to the radiator to make sure the air is forced through, but on the back side we will also have another duct which will take the hot air away and up and out over the front tyres, the extra angle of the radiator makes getting that air flow up over the tyres much easier.
We will also be adding an electric fan on the back of each radiator, but we’ll cover that in another episode.
Well that’s the end of what was actually a mammoth exercise. I am really really happy with the results and we have had the car running OK with just one of these small radiators, so I’m quietly confident that we’re pretty close to being right with two and also the electric fans and the oil cooler going too, but we won’t know for sure till it’s on the dyno at the end of the project !
Please feel free to comment or ask questions, I really love sharing and discussing our build and cars in general with other readers.
If you’ve missed the last part of our story then click here FZ12 – Part 37
or if you want to go right to the beginning then click here FZ12 – Part 1