


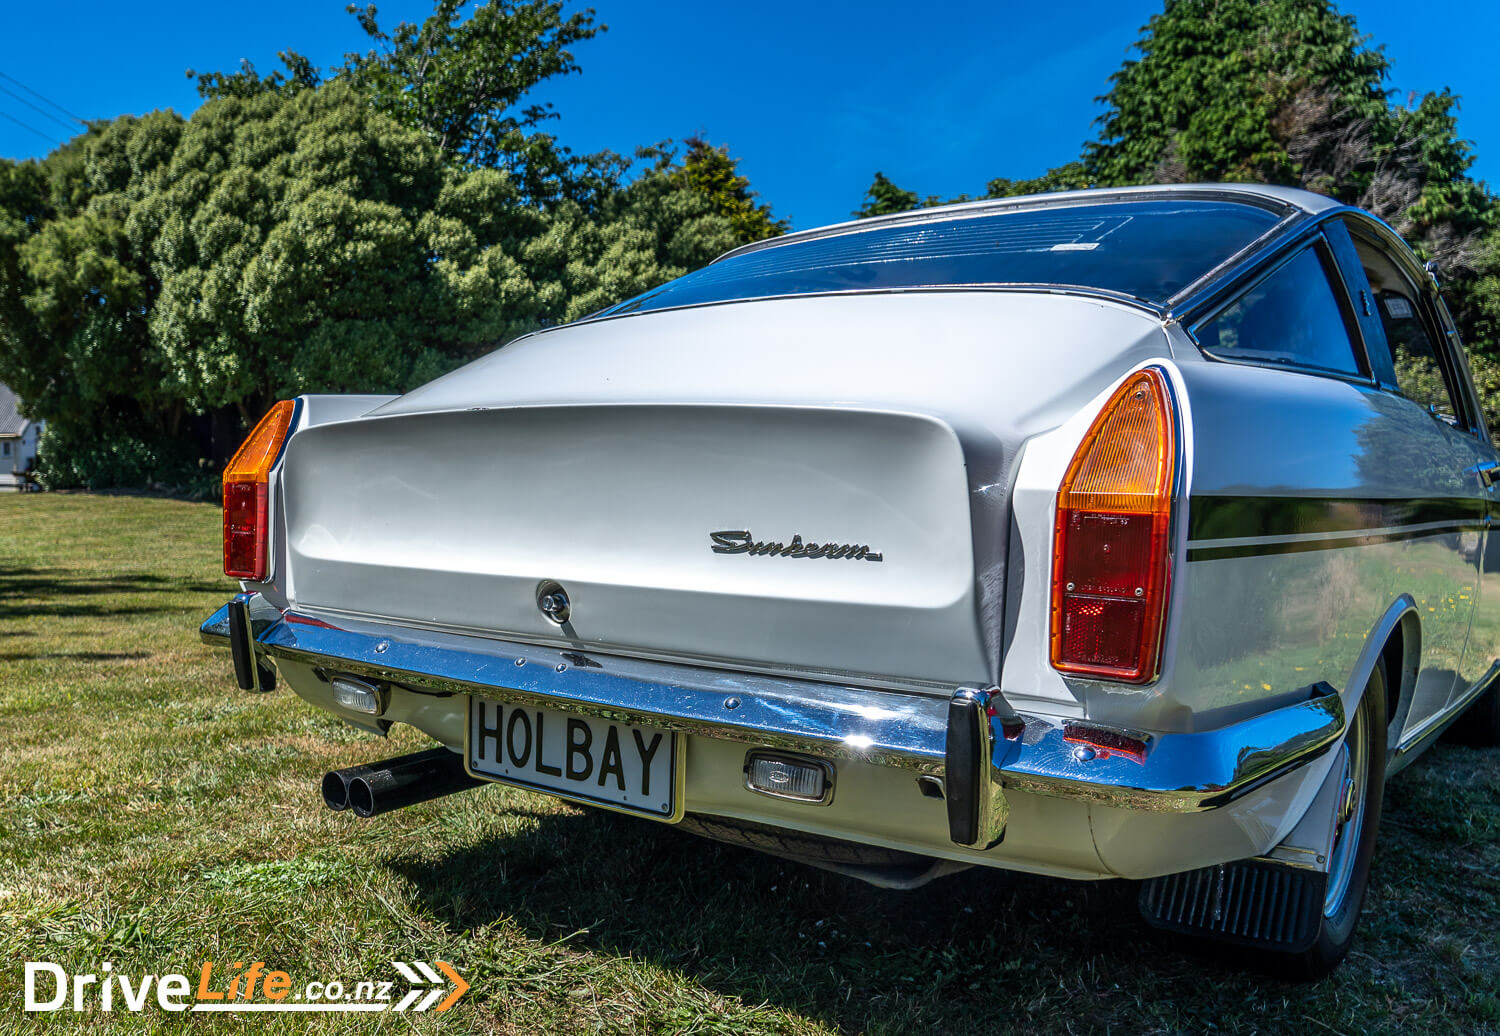
You might remember from Part 1 that the next step in our project was for me to sell my beloved 1965 Sunbeam Tiger. At a point in December, I listed the car online and it was sold in 90 minutes, sold sight unseen. I thought that was surprising, but then again it’s an incredibly rare and original car. Now we have cash in the bank and space in the garage to complete our project car.
As mentioned in the first article, we will be seeking input from our LVVTA Certifier every step of the way. We want this project car to both be safe and legal, and that means certifying any changes or modifications that need it.
This is why it’s important to engage an LVVTA Certifier from the outset. They can assess the list of proposed changes, make suggestions where needed, and advise as modifications are carried out. You’ll see later on in this article we’re going to do exactly that, with our crossmember etc mods.
We’ve all heard some horror story from that mate who went to get something certified after doing all the work and had to pull their car apart, or remove all the (for example) body panels so their Certifier could inspect the vehicle structure.
We can’t stress this enough. Anything you are going to change that needs certification, get an LVVTA Certifier onboard early. It will only save you pain, time, and money later on.
Project V8 Sunbeam Rapier Fastback: Seat Selection
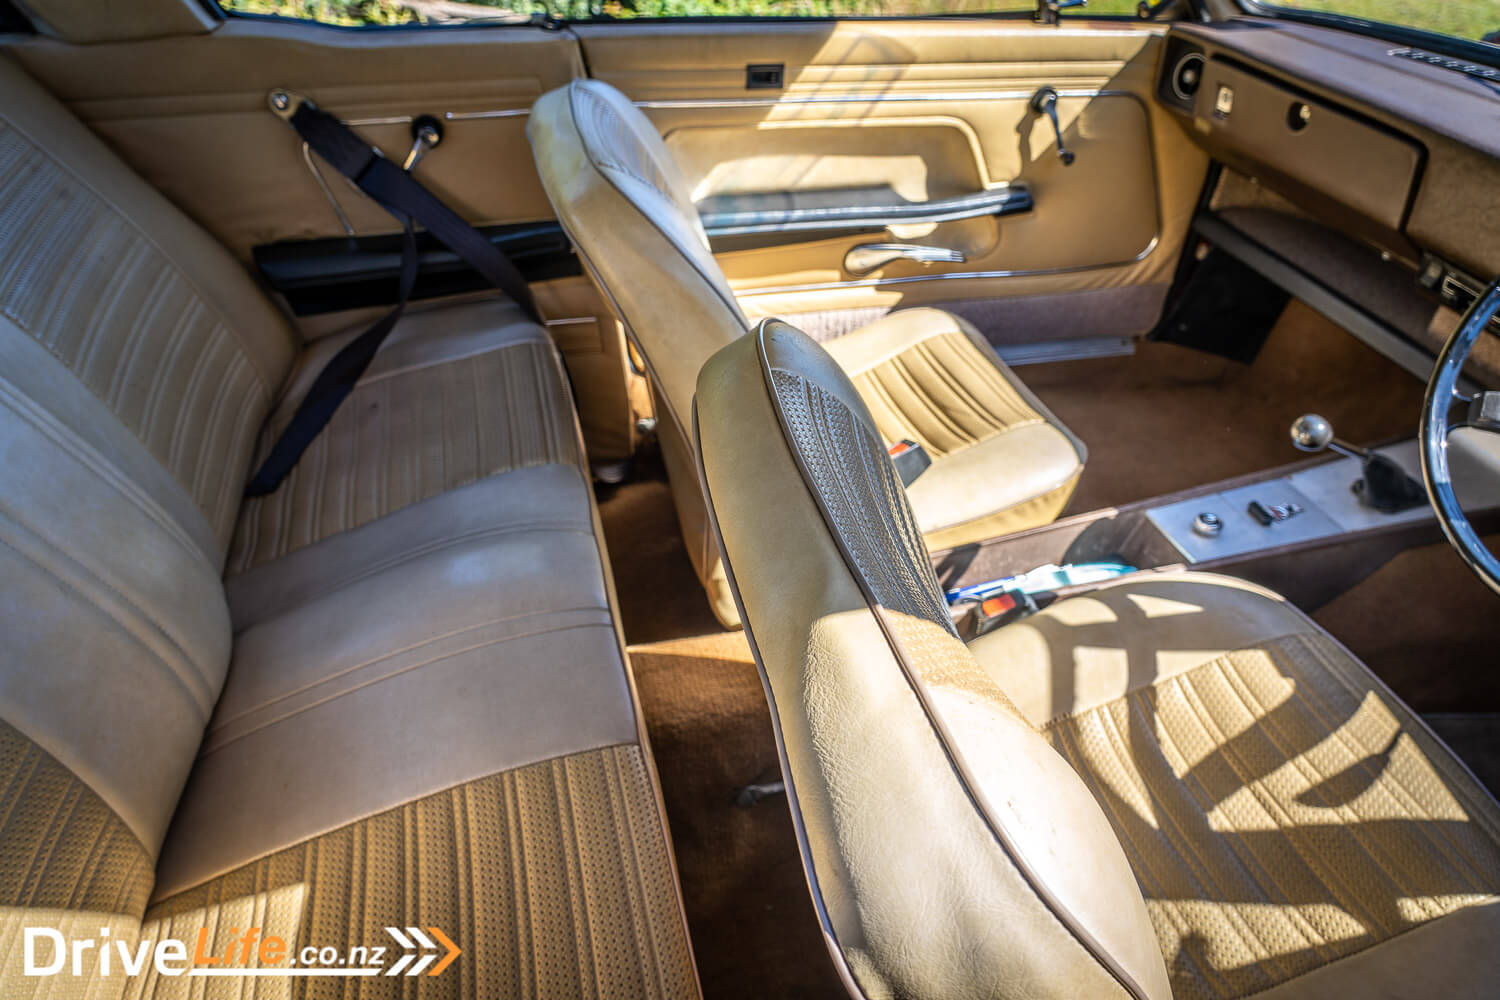
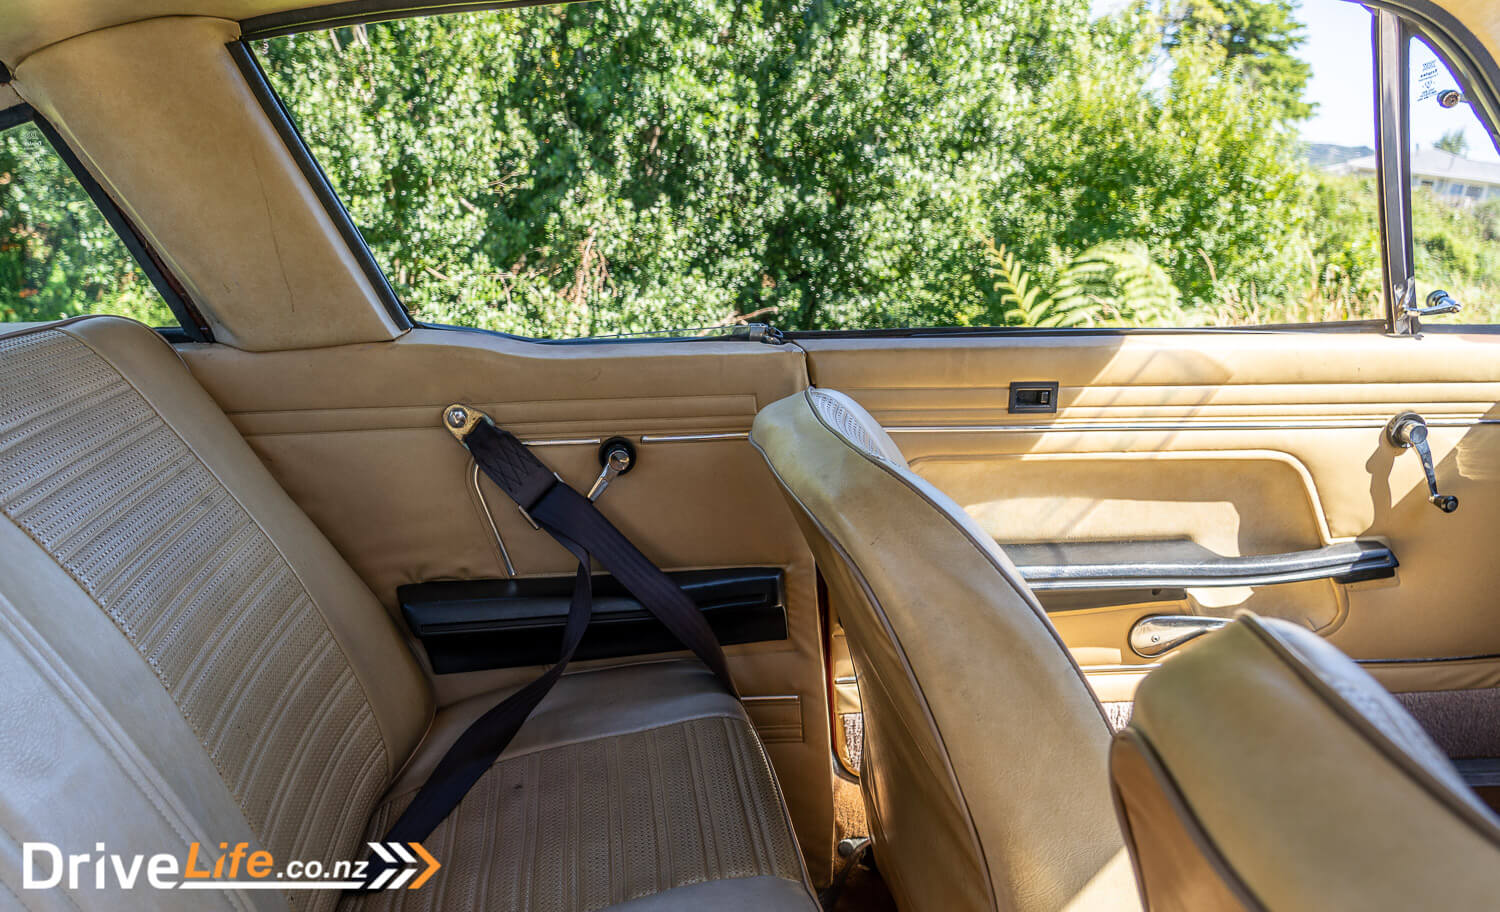
We’ve orgainsed a Ranger Wildtrak X tow car (thanks, Ford NZ!) and had set a date for a weekend in February to drive to the Far North and pick up our 1973 Sunbeam Rapier Fastback. While waiting, it was time to buy some stuff for our project car. One of the things we’re keen to replace are the seats; The current (standard) seats are terrible; they’re thin, vinyl, uncomfortable, and just plain nasty. Also, the front seatbelts in the Fastback are mounted almost in the rear of the car, right next to the rear window winder. This means whenever you grab the seatbelt (and it’s a long reach back), it gets caught up in the window winder handle. It’s painful, to put it in a family-friendly way.
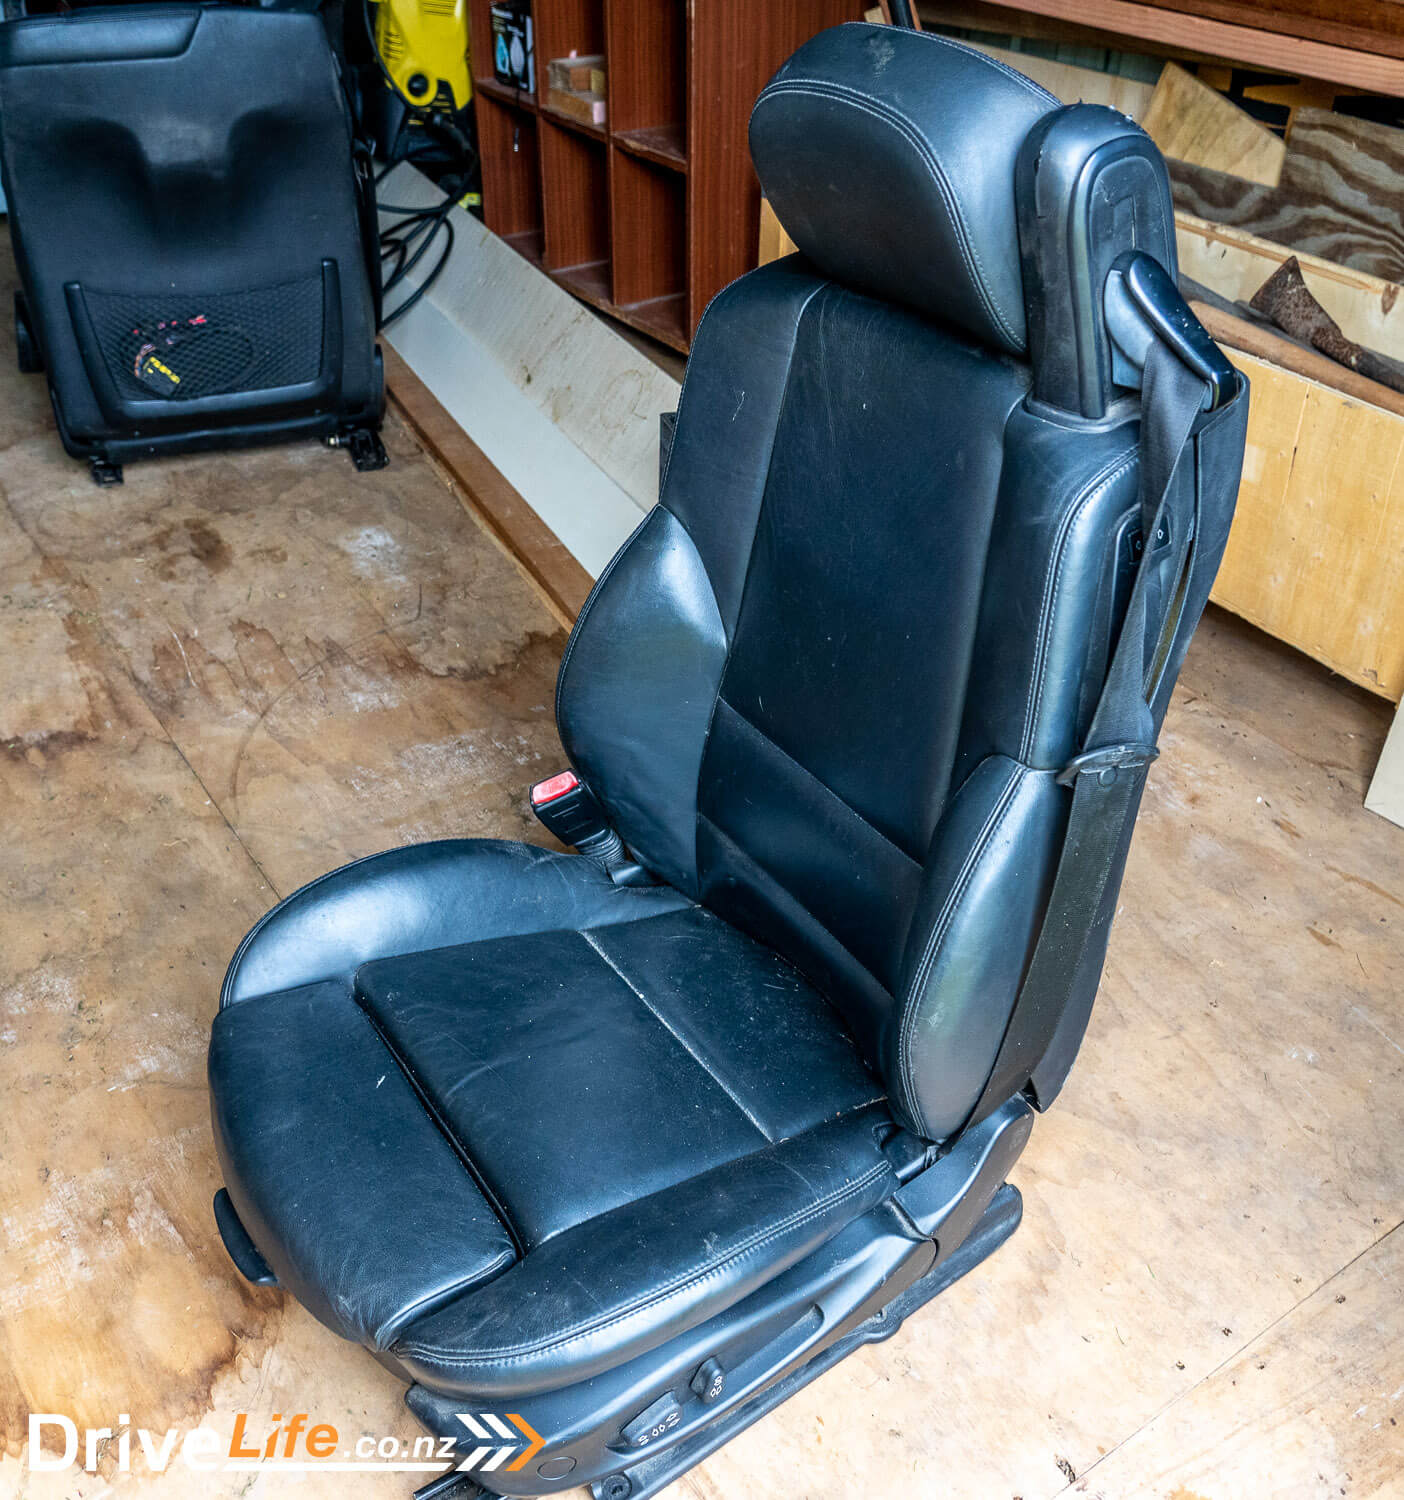
With this in mind, we started hunting for some seats that have built-in seatbelts. They’re out there, but a little rare, but we did stumble across some in Auckland on TradeMe from a BMW E46 M3. They’re electrically adjustable – nice – and just as we wanted, the seatbelts are integrated into the seat. There will be certification requirements around these, so we’ll need to be very careful on strengthing the floor under the car to take the ‘fully stressed’ seats. We’ll work with our LVVTA Certifier to make sure it’s done right, but the end result will be so worth it. We’ll have modern, comfortable seats with electric adjustment and no more ugly and painful flappy seatbelts.
With that in mind, we paid for them and got them picked up by a friend who happened to be travelling from Auckland to Wellington with an empty Range Rover. After picking them up, he sent a text to say; “going to need a V8. They are heavy!”. At around 40Kg each, they are heavy, but we were already sold on the idea of built-in seatbelts so these seats will definitely (eventually) be going into the project car.
Project V8 Sunbeam Rapier Fastback: Temporary Wheels
Our donor car that’s been parked up for 25 years has no wheels – I took them off to use on another car, so one of our buying sprees was looking for some rims. Since we’re flying to Auckland to pick up our Ranger tow car I’d need to buy rims in that area, but this simply means more to choose from. I need to keep in mind that these wheels are only temporary; once we have the new diff and front hubs sorted, I’ll need to buy some 5-stud rims as the final wheels.
I could have bought 4 boring steel wheels, but we don’t do boring here at DriveLife and so I found these old-school ROH mags online. They’ve got legal rubber on two of them, but that doesn’t concern us – we only need them on the car to push it about the place until the new diff is in, and then can sell them on. Or the more likely scenario is I’ll put them in the back of the garage for that “one day…” scenario, and they’ll never see the light of day again.

Project V8 Sunbeam Rapier Fastback: Dashboard
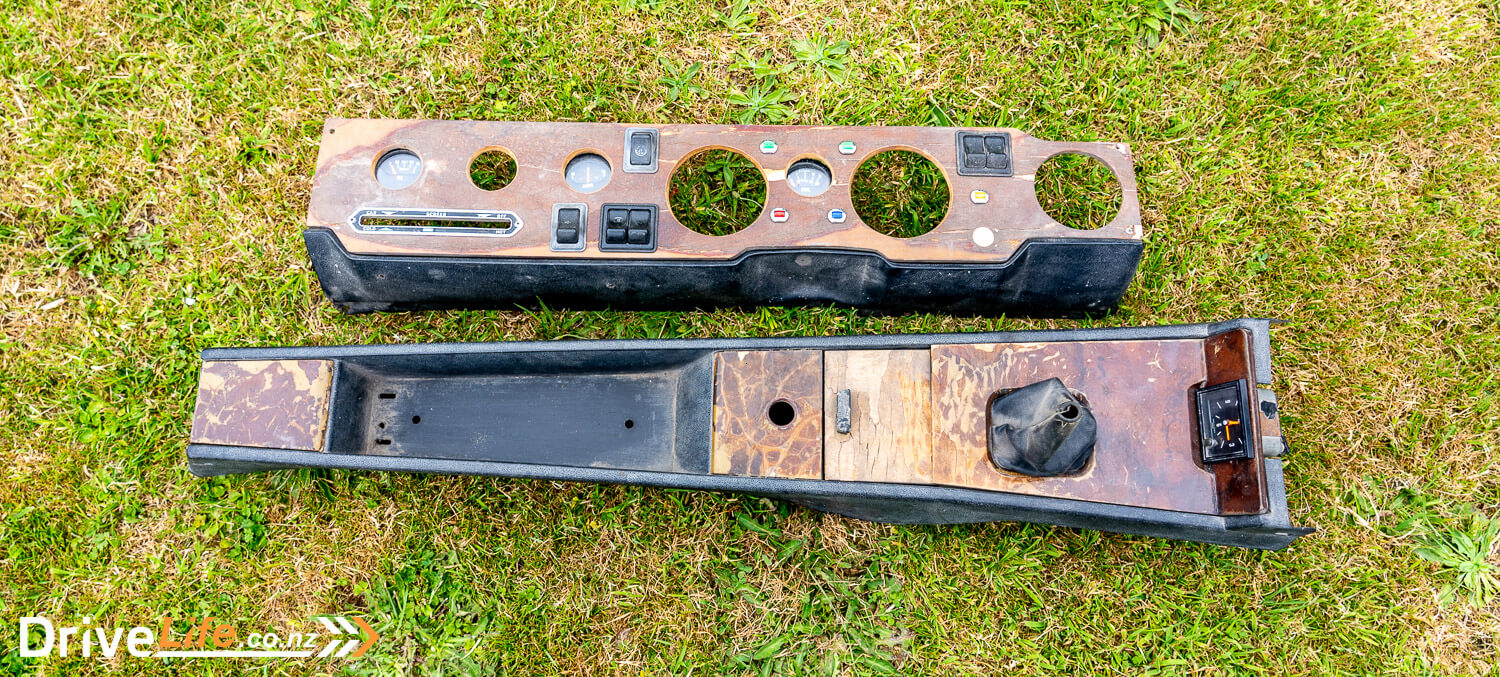
I also went hunting for a Humber Sceptre wooden dash. Who doesn’t love a wood dash – call me old school – and the Sceptre one should bolt straight in. But they aren’t easy to find, especially in good condition. Regardless, I stuck a post on a Humber Facebook page and got a response from someone in Auckland. Yes, he has a Humber Sceptre dashboard somewhere in a shed, and he also has a Rapier Holbay H120 boot lid, and did we want to buy that as well?
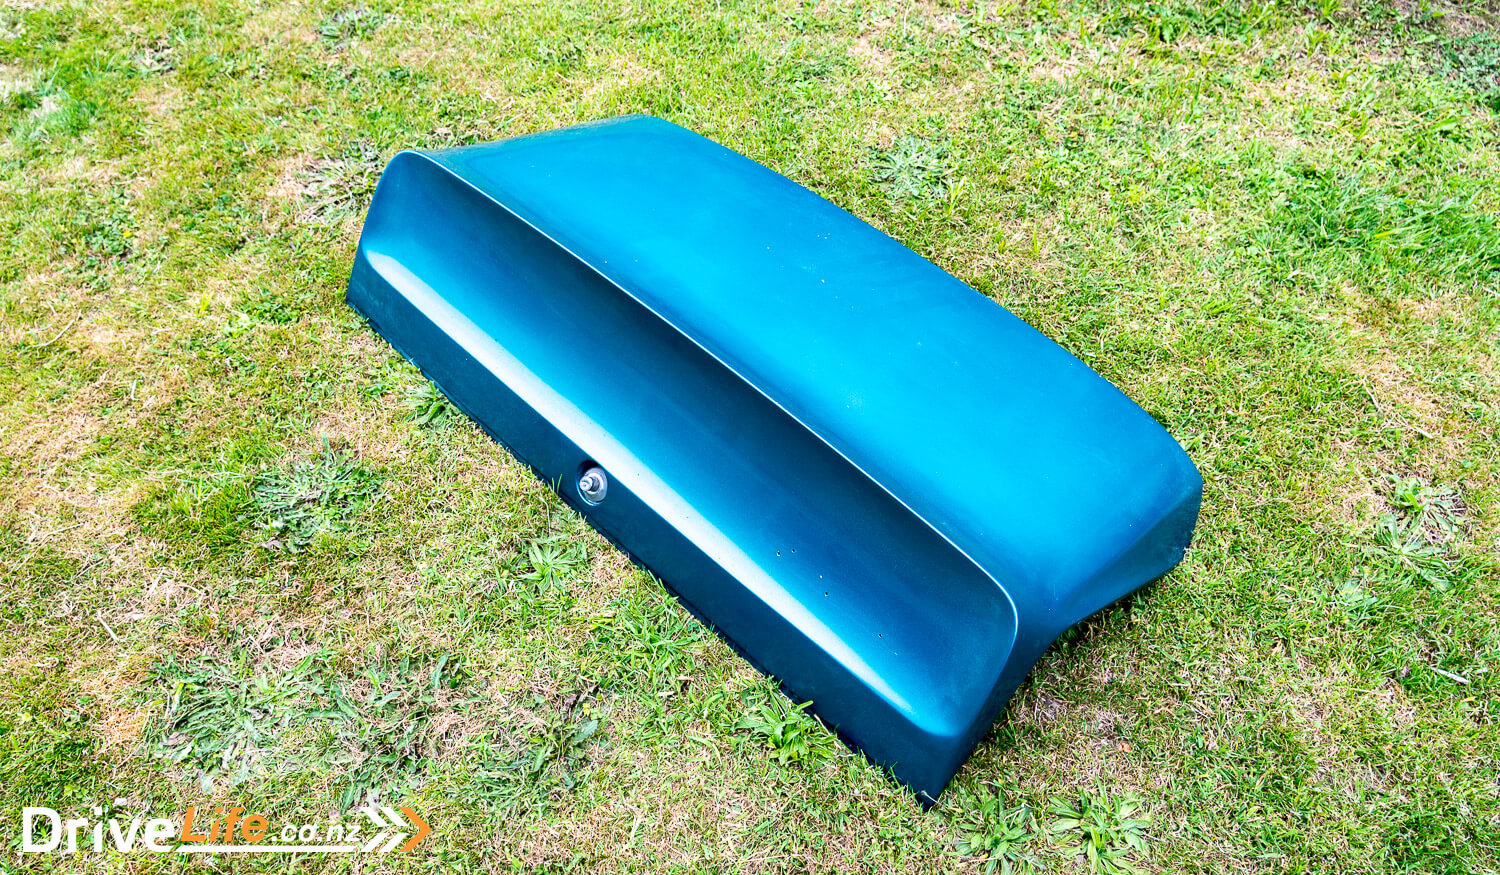
Hell, yes! The Rapier Holbay H120 is a rare car – there’s only a handful in New Zealand. They’re fitted with two twin-throat Weber carbs, and among other changes over the standard Rapier, have a boot lid with an integrated ducktail spoiler. They look cool and retro, and I’d never seen a boot lid for sale before. We agreed on a price and wondered about getting the boot lid and dash down from Auckland, but the seller was travelling through Wellington in a few weeks and could deliver to us. Even better.
As you can see, the dash is going to need a lot of work to get it usable. Still, it’s wood, and wood can be fixed. I’ll still need to hunt down things like missing switches, gauges, and air vents but at least we have the main part we needed, even if it’s only used as a template.
Project V8 Sunbeam Rapier Fastback: The Rear End
While I’d love to alter a lot of the rear of the car to modernise it, I need to keep our budget in mind. Intricate panel work and modifications on the rear of the Fastback – which is quite technical in design – could end up costing many thousands of dollars.
We’ve already outlined some of the changes for the car’s rear, and have come up with some others. Here’s the list as it stands:
- Fit the H120 boot lid with its retro ducktail spoiler
- Remove the boot lock button (we might put a reversing camera there instead)
- Possibly remove the bumpers, or at least remove the over-riders
- Cut off the rear jacking points (we’ll carry a bottle jack instead) and fill in the holes
- Look at fitting a simple roof spoiler, or even old-school window louvers if we can find some to fit
- Push the exhausts right through the rear valance
The only other change I want to make is to the taillights, and it’s a simple change. Since the Fastback was sold in the USA, it had to have all-red taillight lenses there – no orange in them at all. They look kinda cool and different and we’ve managed to find some that are new-old-stock (NOS) for under US$100 delivered, and have them in our hot little hands already. A five-minute job to fit them, but they will make enough difference to be worth it.
Project V8 Sunbeam Rapier Fastback: How To Mount The Engine
A couple of days after Boxing Day, I took a Tesla Model 3 Long Range up to Hawera on a fact-finding mission. The aim of this trip would be to – hopefully – decide what diff, hubs, crossmember, engine mounts, and steering rack to use on the project car.
I met up with my friend Lance, who has a wealth of knowledge on LVVTA requirements and also engine conversions, suspension, and steering, not to mention everything else car-related.
It also happens that Lance has a couple of Sunbeam Rapier Fastbacks we can use to measure up since we haven’t got ours down from the Far North yet. In a previous meeting, Lance suggested that it was worth checking out the Rover SD1 crossmember to see if it would bolt in, or close to bolt in, to the Fastback. Using an unmodified factory crossmember should make the certification process easier as we aren’t creating something new or modifying something existing. This is all sounds good to me – keeping it simple is a great mantra to work by.
We’re also going to (hopefully) decide what steering rack to use. The Sunbeam Rapier Fastback uses a worm and roller steering system, and it’s crap. You can swing the wheel left and right by 20 degrees, and nothing happens. It doesn’t have much steering feedback either, and so one of our ‘must haves’ is rack and pinion steering. I’ve done a lot of research on converting a Fastback to rack and pinion steering, and none of it was good. It all seemed pretty bloody hard, actually, and this was one of my main concerns around this whole project car.

There’s also the certification process to consider here; I can find some steering rack to fit whatever crossmember we use but would need to modify the mount points, make sure there’s clearance, and also consider things like bump steer. However, Lance does seem to have a simple solution: Whatever crossmember we use, including the steering rack and front suspension from that crossmember. That way we aren’t creating something new, and so again, certification should be more about adaptation, not invention and creation, thus being kinder to the Certifier. Sounds too good to be true but we live in hope.
You might think that finding a Rover SD1 crossmember to measure up against the Fastback one is going to be hard to find, but Lance also has a Rover SD1 so we can check. I spent an afternoon at his workshop checking out things like front and rear track, clearance from engine mount points to the firewall, chassis width, etc. With these Fastback measurements written down, I wandered through his workshop and lifted the bonnet on a racing SD1 Rover. But no go – the chassis on the SD1 is a lot wider and I’d have to do a fair amount of modifications to make it work. It’s possible and an option, but not ideal.

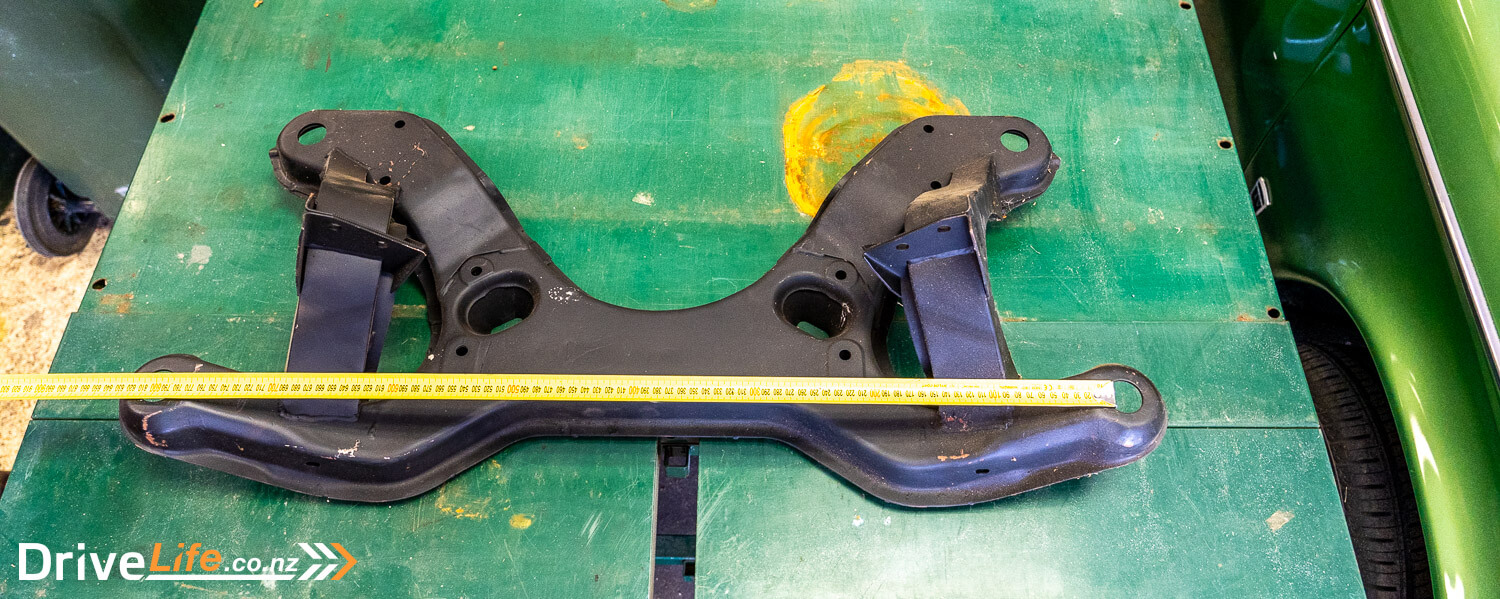
We sat there going through cars that had a Rover motor as standard, and there are many. One we thought of that could be around the same size as the Fastback is a Triumph TR7 or TR8. Of course, the TR8 has the Rover V8 as standard, but the TR7 uses the same crossmember. And what does Lance have in one of his sheds? A brand new Triumph TR8 crossmember. We grab it and do some measuring, and it looks good – good enough that it’s now top of the list of options. It’s physically bigger than the Fastback crossmember, but that’s not going to interfere with mounting it. But our issue is we don’t know some of the measurements without seeing the crossmember in a TR7.
There’s a simple solution to this; Lance has access to a TR7 in another shed across town. We head there and check some more measurements, and it’s looking very promising. But the new crossmember he has is just that – a crossmember, without the rack and pinion steering that we need. No problem, as the rusted TR7 we are looking at is a parts car, so we can buy the crossmember including steering rack from this parts car. DriveLife will buy some TR8 engine mounts and by using those factory parts, we should be able to get certification easier as the Rapier’s original body shell and pick-up points would be unaltered. We’ll cover this off with our LVVTA certifier to get his view on it, of course.
I note that the TR7 strut centres are 50mm wider overall than the Fastback but decide that I’ll fit adjustable front tophats to allow for this, and this will also allow us to easily, if allowed, use platform springs and lower the front of the Fastback. Currently, it sits way too high but by using adjustable front struts, we can (hopefully) easily and legally lower the front of the car and retain fully adjustable front wheel alignment. All too easy (and famous last words). So using adjustable tophats will overcome the extra 25mm (each side) width at the top of the struts, but that won’t fix the issue of the track being 50mm wider at the bottom. I’m not too concerned here; I want to blister the guards anyway, so we can accommodate 50mm extra easily in the guards, and the increase in the track can only help the car’s handling. As standard, the Rapier’s wheels are tucked well under the guards.
I’m feeling a lot more confident now, as this feels like the right path to take. But what about the diff in the Fastback? We take our Fastback measurements and go to another part of the workshop where there’s a Toyota Hilux 2wd. Checking against our measurements, the Toyota diff is around 50mm wider. This is perfect; as already mentioned we’re going to blister the guards, so this 25mm per side is simply not going to be an issue. We measure another Hilux for safety and get the same results. So I’ll use a Toyota Hilux diff/rear axle, since it sounds like they are pretty robust, and use the existing Fastback leaf springs. Using the existing leaf springs should mean easier certification, as I’m not changing any leaf-spring mount points; all I’m doing is bolting them to the Hilux axle. I’ll also convert the brakes to disc (they are currently drums), and use lowering blocks – if necessary – to level the ride height in the rear of the car.
At this point, I thought we’d have to start hunting for a Hilux diff, but Lance already has a spare one, and a choice of different ratios, and some of the spare Hilux diffs he has are Limited Slip, which I am really aiming for.
Then we started talking about steering columns and assistance. With a wider track and much wider wheels (the standard Fastback steel wheel is a whole 4.0 inches wide), I’m keen on converting the car to power steering, and ideally, electric power steering since it doesn’t rob the engine of power, and no fluid or a pump and means fewer complications in mounting. Lance is onboard with us here, and is already an electric power steering convert, having used Toyota Corolla electric power steering units from wrecked cars on previous projects.
We also talk about the steering column up through the dash, and the steering wheel and its controls. Again, this all sounds too easy as he suggests we use a Corolla electric power steering column, and I can go buy any Toyota or Lexus steering wheel, as generally, the splines will be the same. This way, I can also take advantage of some steering wheel controls for audio. Perfect! Doing this also means the car will use Toyota stalks for wipers and lights, removing the need for dash-mounted switches that are currently used. It’s sounding better all the time.
There are other things I need to consider; I might have to relocate the brake booster, the battery may need to get relocated to the boot, or there’s an option of cutting down the existing battery mount and using a smaller battery since the Rover V8 has a reduction starter-motor. I haven’t considered the exhaust, but it shouldn’t be an issue. This first part of the process will be simply getting the engine and gearbox mounted, so we can sort the exhaust out later.
We also discussed brakes; the car really needs a dual-master cylinder, and at least upgrade the rear brakes to disc. I’ll also take the opportunity to upgrade the front brakes, maybe to Wilwood, we’ll see how that goes. If it comes to it, Rover SD1 front discs and calipers front and rear can be used.
With all the above at least discussed and planned, we chat about the next steps. I need to get the car back from Ahipara, and Lance suggests we just bring it to his workshop in Hawera, and I do the basic conversion there. This would include the diff, crossmember and steering rack, electric power steering, and likely the front struts. This way, he is close for advice, along with tools and specialists as may be needed (i.e. ticketed welders, etc.).
But before any of the above takes place, I’ll outline the plan to our Certifier at LVVTA to check on their thoughts, and tweak whatever needs tweaking. That way, I know any work carried out isn’t going to be in vain and can collect documents and certificates that are needed along the way. Firstly, I’ll produce detailed drawings of modifications and adaptations along with an overall plan for the Certifier to study and comment on.
The most exciting thing about this path is in almost all steps the original body structure and mounting points of the original Rapier are not altered in any way, with most components being factory – either Rootes, Rover, Triumph or Toyota.
Project V8 Sunbeam Rapier Fastback: Time to Start The Engine
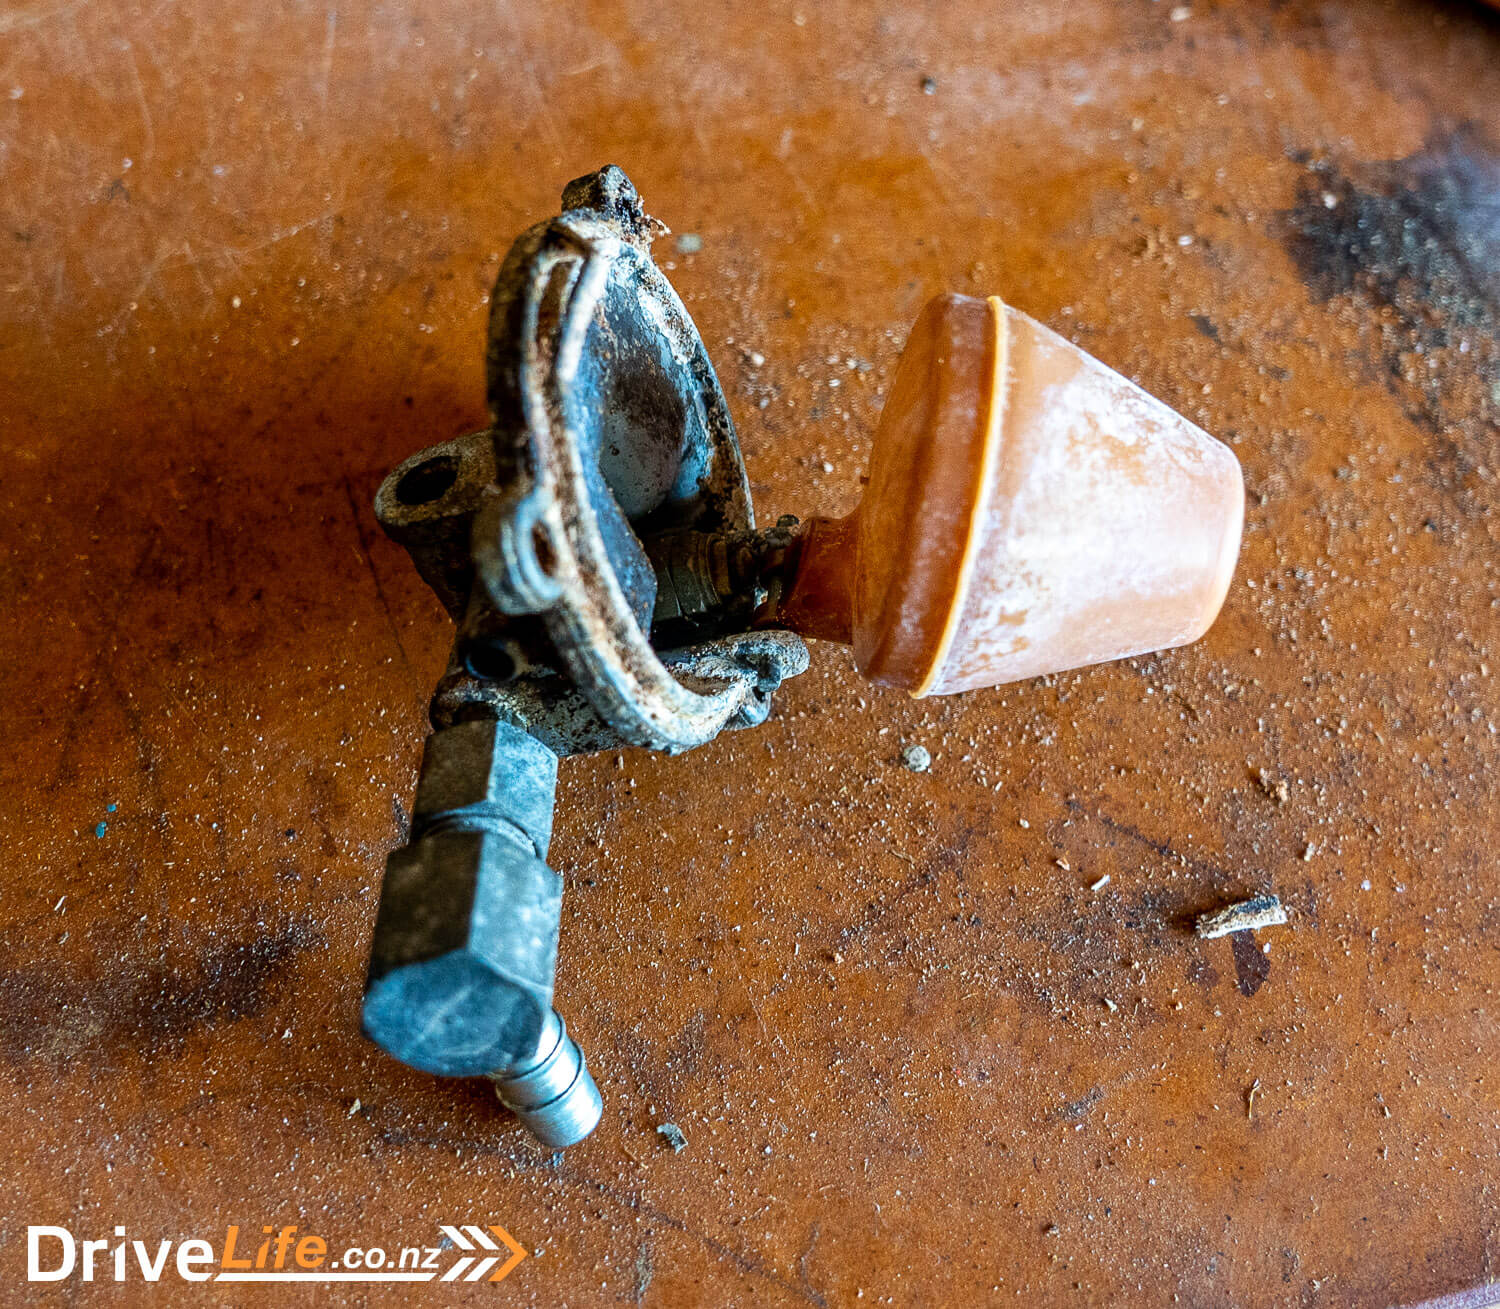
Since we’re now going to drop the Fastback to Hawera and with only days until a planned trip to take the V8 engine and ‘box there, I decided it was time to see if this old Rover V8 actually runs. The first thing I did was take the external float bowls apart, to find lots of crap inside there, and the needles were stuck. It took a while but we got everything cleaned up and the needles looking like they were working. Honestly, if there’s one thing that’s going to stop this engine from actually starting, I believe it will be something in the fuel system.
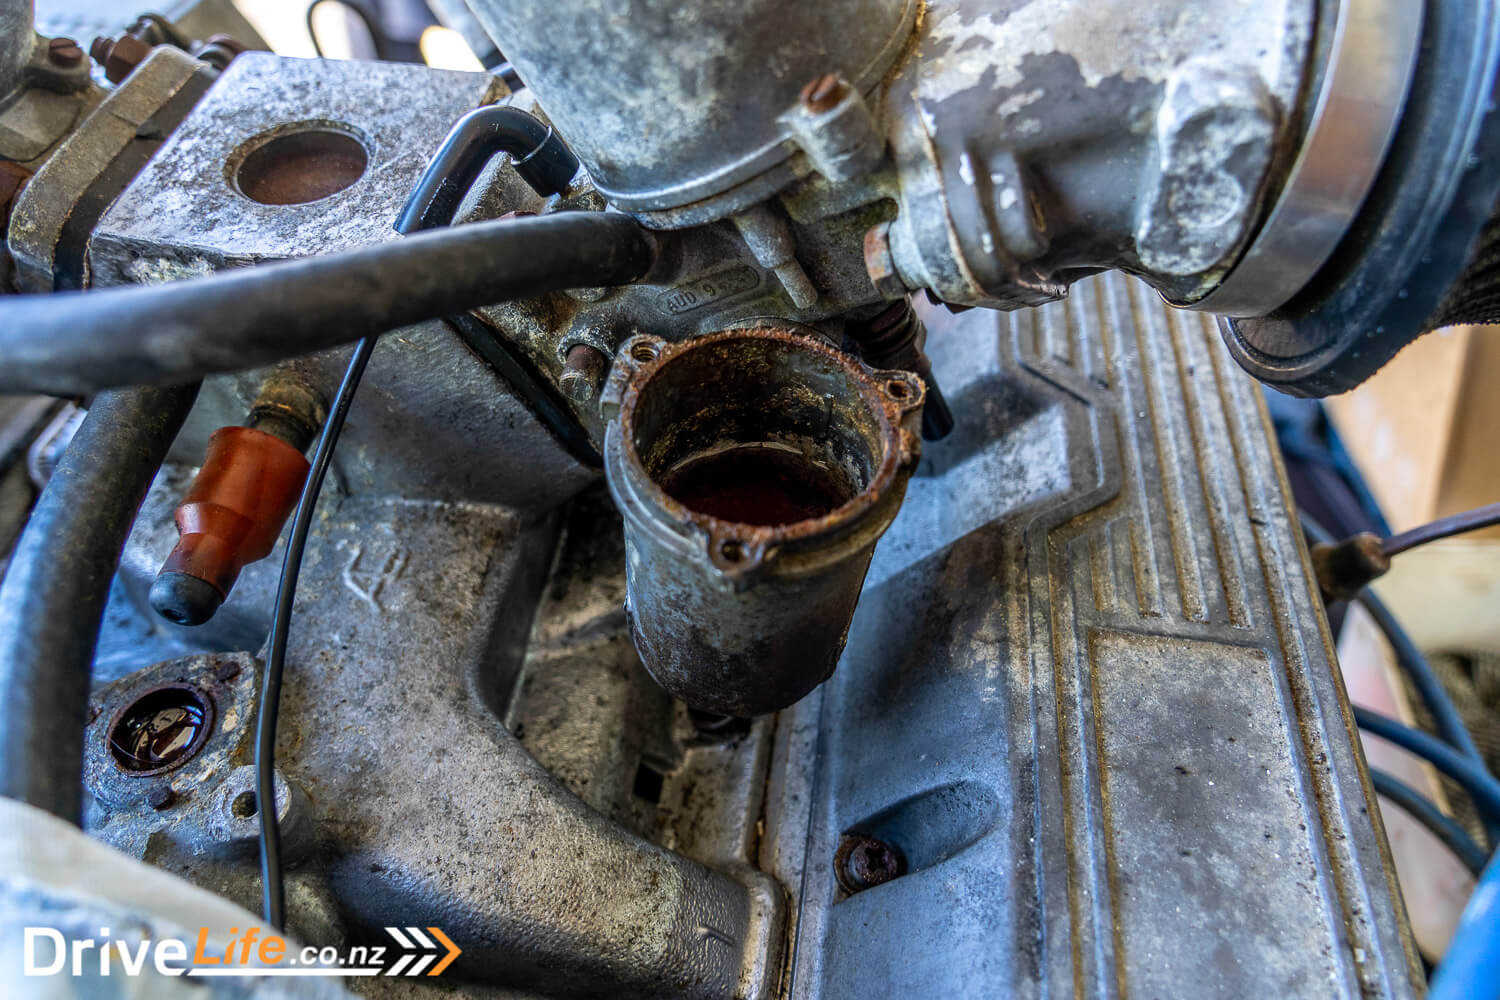
A quick check of the dashpots showed they were sticky, but moving. A little persuasion and cleaning and they start to move freely.
Next, we took the engine off the stand and sat it down on a tyre. The first thing we did was remove the spark plugs; while a cold engine wouldn’t be an ideal compression test, and least we’d get some sort of idea around the condition of the rings. After connecting up a battery, we turned the engine over, moving the compression tester from cylinder to cylinder. The psi results weren’t great, but could have been a lot worse:
- 120
- 145
- 140
- 130
- 160
- 120
- 150
- 120
Again though, this was on an engine that had been sitting for who knows how long, and the rings could be gummed up, affecting compression. Compression test over, it was time to fill the float bowls and hook up a coil. It wasn’t pretty but we got everything ready.
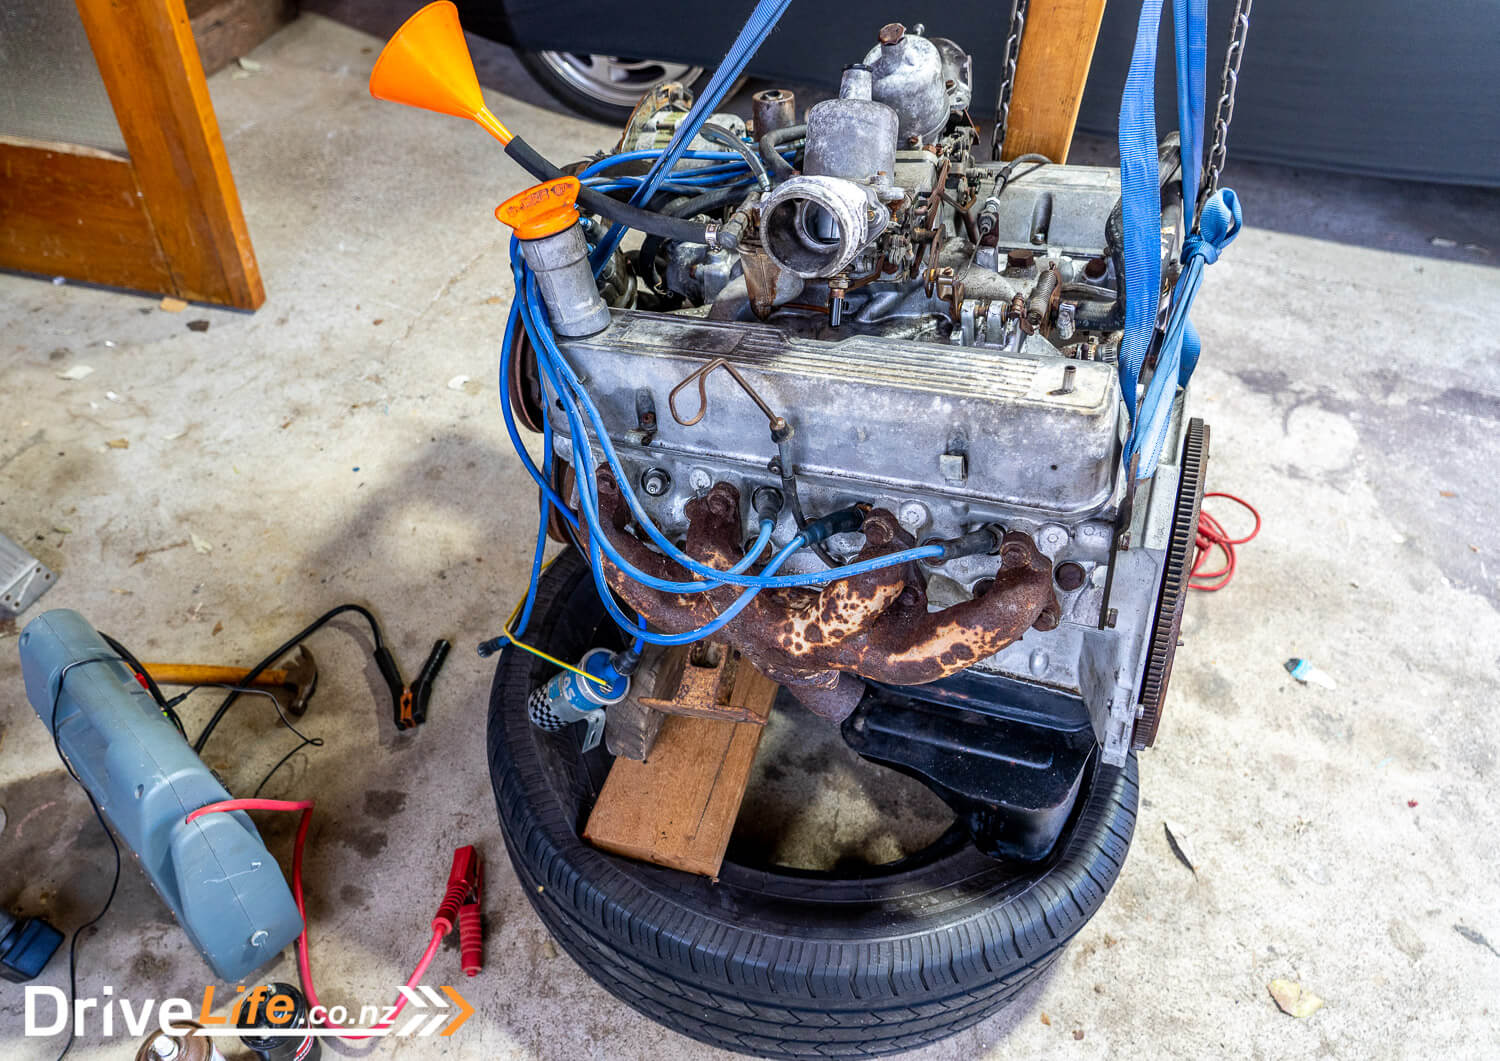
Earmuffs on – there is no exhaust – we cranked it over and incredibly, it started instantly, with zero smoke. Not only that, but it idled perfectly while stone cold. We couldn’t believe it, and still can’t. We gave it a few revs to check it over, finding that the oil pressure gauge wasn’t working, but we were hearing no nasty rattles from anywhere so felt confident we had oil pressure.
Well, that was it – it lives. After killing the engine, we pulled the plug from cylinder one and checked compression again, getting 135psi, where it was 120 before. That was a very good sign, especially since we had run it for less than a minute.
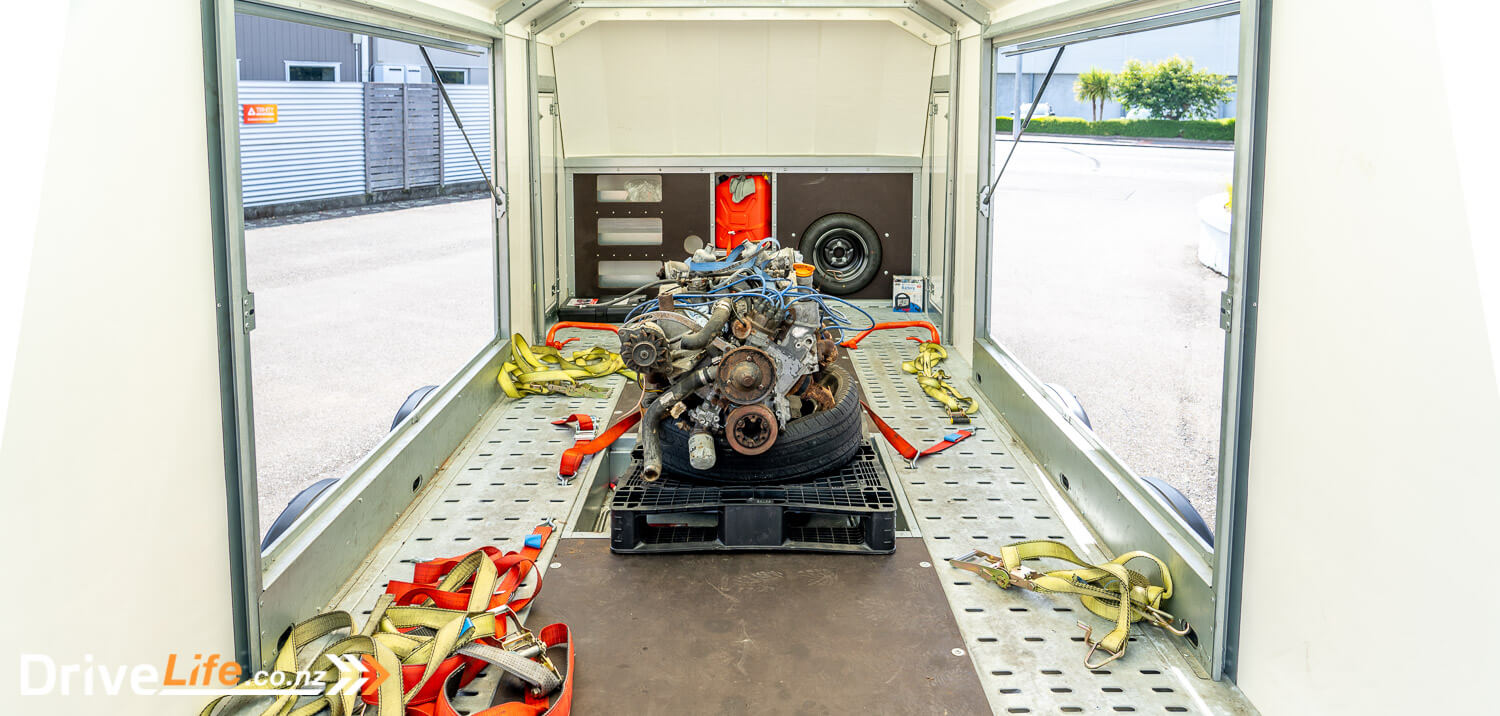
That done, we pulled everything apart and loaded the engine, gearbox, and driveshaft onto a trailer, ready to head to Hawera. By the time the engine and ‘box comes back to Wellington, it should be in the car.
Project V8 Sunbeam Rapier Fastback: Next Steps
There’s not much else to do at the moment but get the engine and ‘box to Hawera, then go and get the car and transport it there as well.
That doesn’t stop me from researching for more ways to (tastefully) improve the car, and maybe even buy some more goodies as I see them. As hard as it is, I must restrain myself from going and buying some new rims right now.
Make sure you join our emailing list so you get a monthly update, and won’t miss a single article in this series.
Please note that you should engage an LVV Certifier from the outset for any modifications or work you / a third party does on/for your own car. The best way to ensure that the modifications you are planning are safe and compliant is to make use of the information on the LVVTA website (www.lvvta.org.nz).
READ PART THREE OF THIS PROJECT


