


Another weekend, another trip to Hawera to work on our project car, this time testing out the new Mitsubishi Outlander VRX PHEV.
Plans for this weekend included getting as much done as possible to get the electric power steering unit installed. It will still need to be signed off by our LVV Certifier, but we’ve got the regulations in hand so will be following those closely. Unfortunately, we couldn’t find the electric power steering unit we were going to use, so will have to wait until the next trip up.
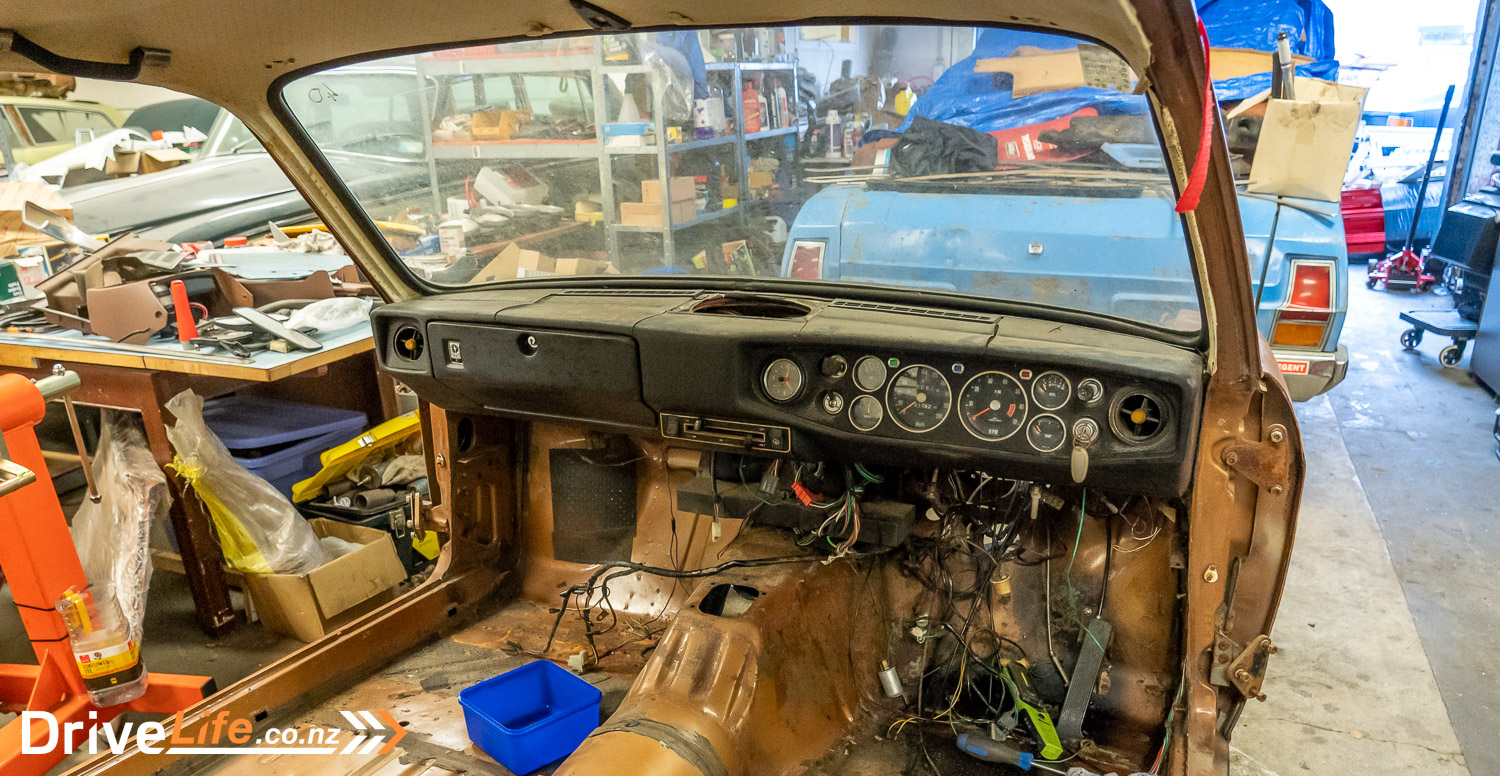
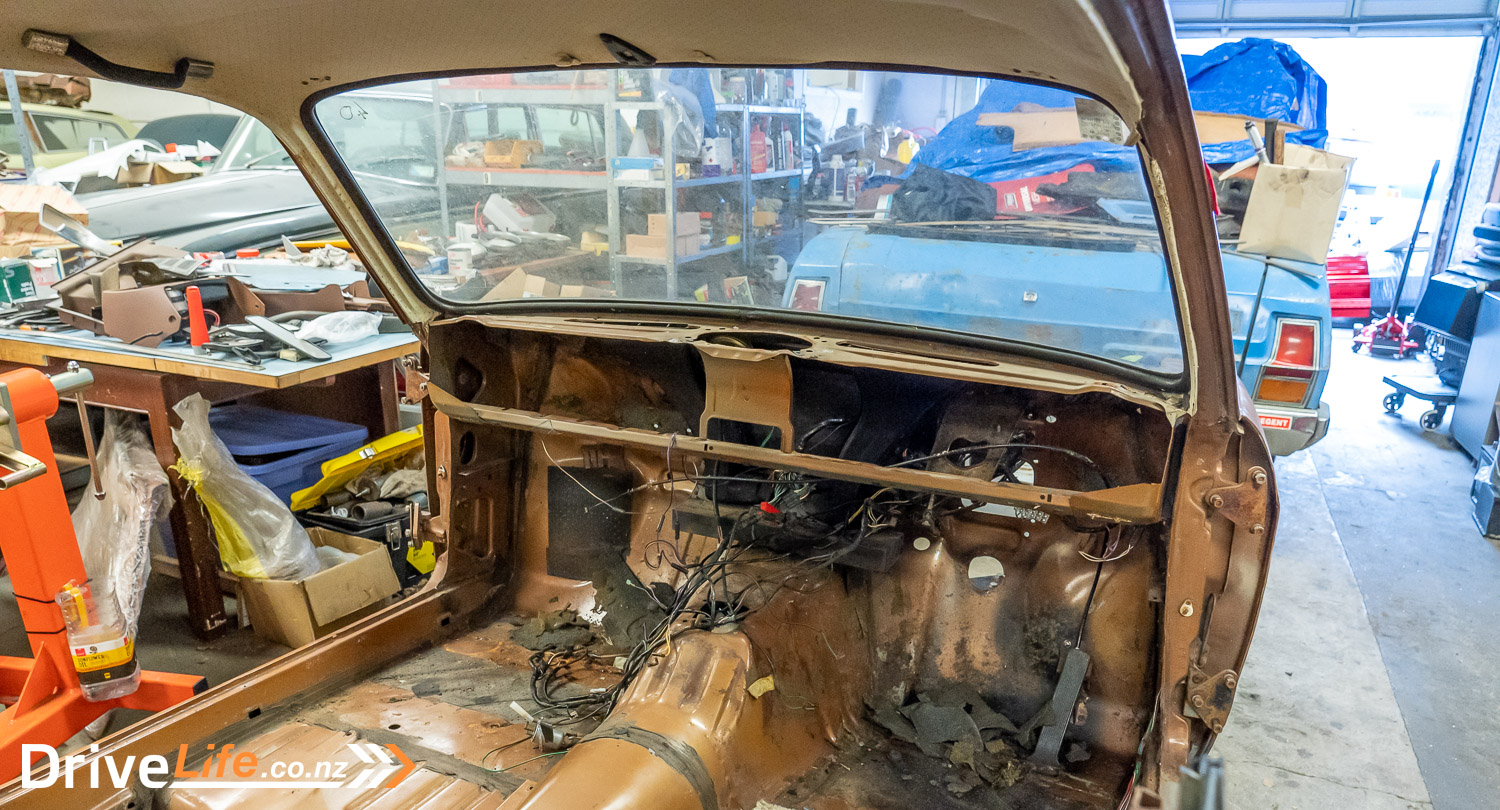
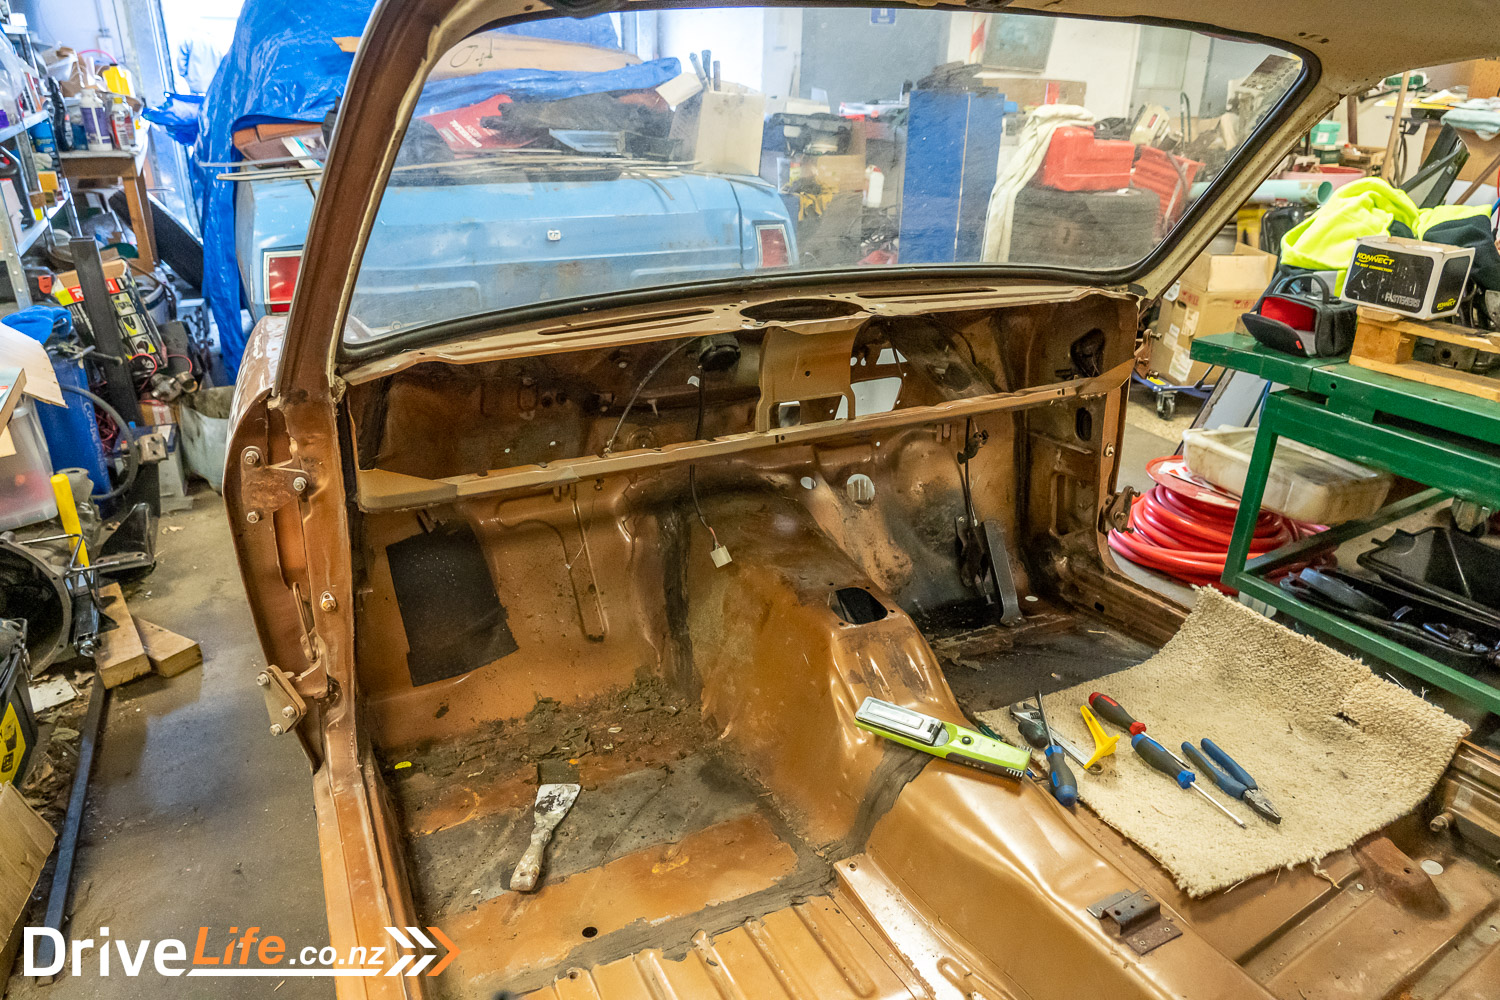
Regardless, my first job will be to remove the entire dashboard from the Rapier Fastback. This is not an easy task, as there’s not much room up behind it. We don’t actually need to remove the dash to install the electric power steer system, but since we’re installing air con into the Fastback, it makes sense to pull the dashboard out. It also means I can clean up all the 50-year-old insulation that is disintegrating and is up behind the dash.
Next was installing the front struts. Of course, the pressure of the antiroll bar made this difficult, especially since our strut mounts don’t line up with the holes in the tower, so they are flopping about the place. Nothing a strop in the right place couldn’t fix. That done, even though the struts weren’t bolted up top, we still put some old TR7 wheels onto the car, just to see how it looks. Like the rear, the front of the car sits far too high, but we’ll put some adjustable struts on the car later, so we can legally and easily lower it to whatever height we want before LVV certification.
Since we’re using the complete front end from a Triumph TR7, the camber is out at the top of the strut tower. We’ve always intended to install some adjustable top hats to allow for this, giving us an easy way to adjust the camber by loosening some bolts. My friend Lance had some Holden Commodore adjustable top hats handy, so we thought “what the hell, they’ll never fit” – but they did. So while the (English) Triumph top hats would not line up, the Holden Commodore ones did. I would have laid money down that wasn’t going to work.
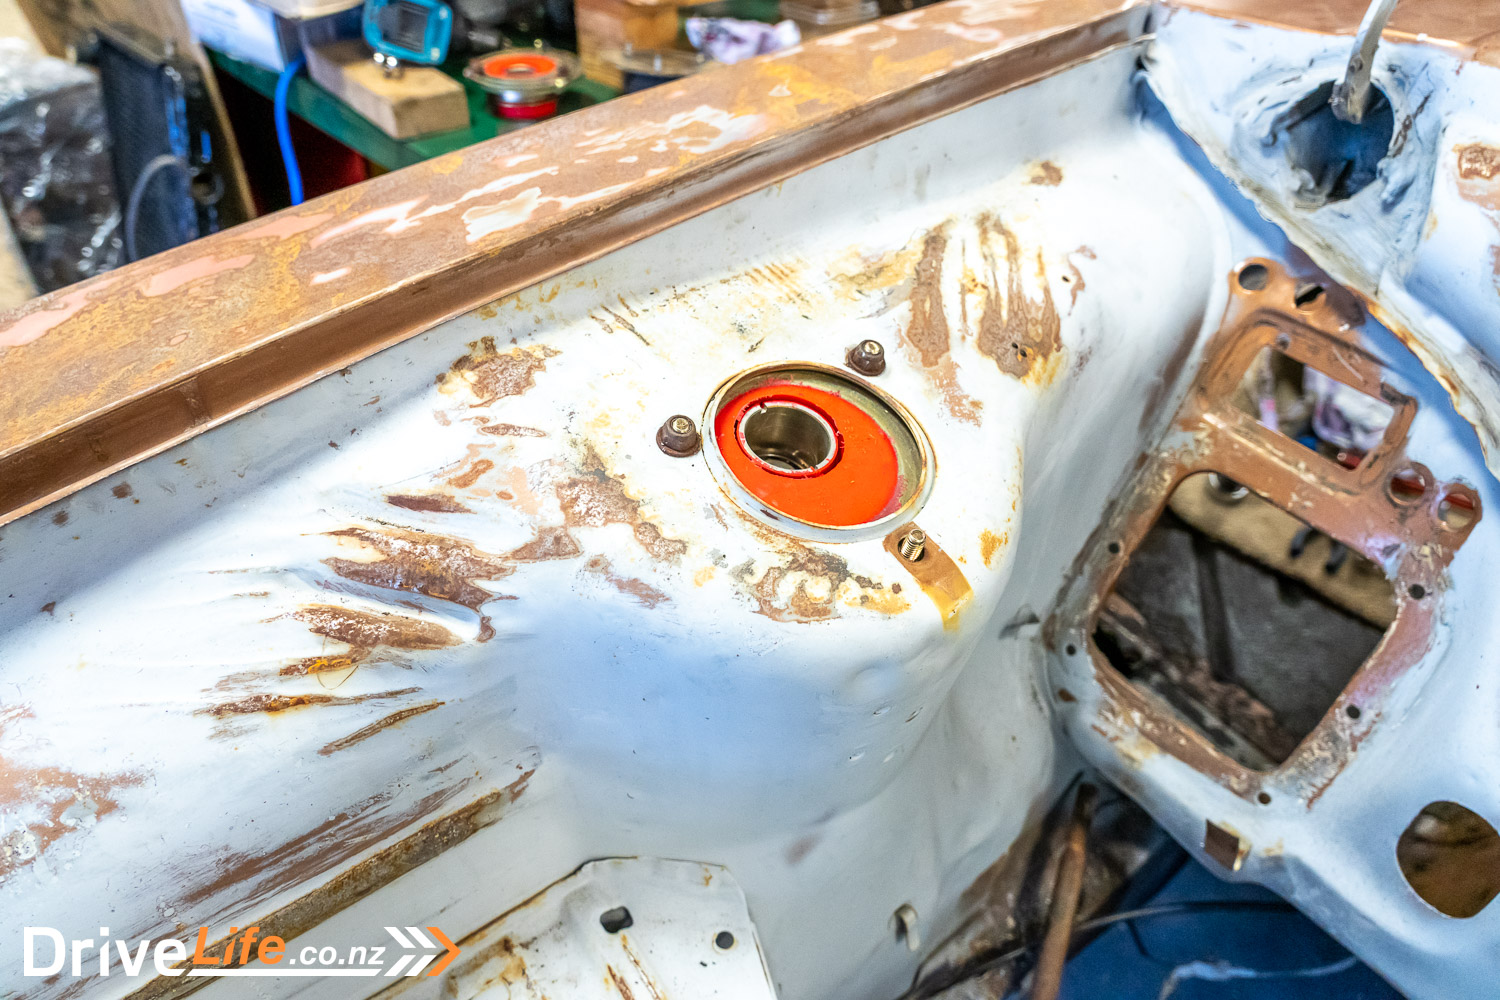
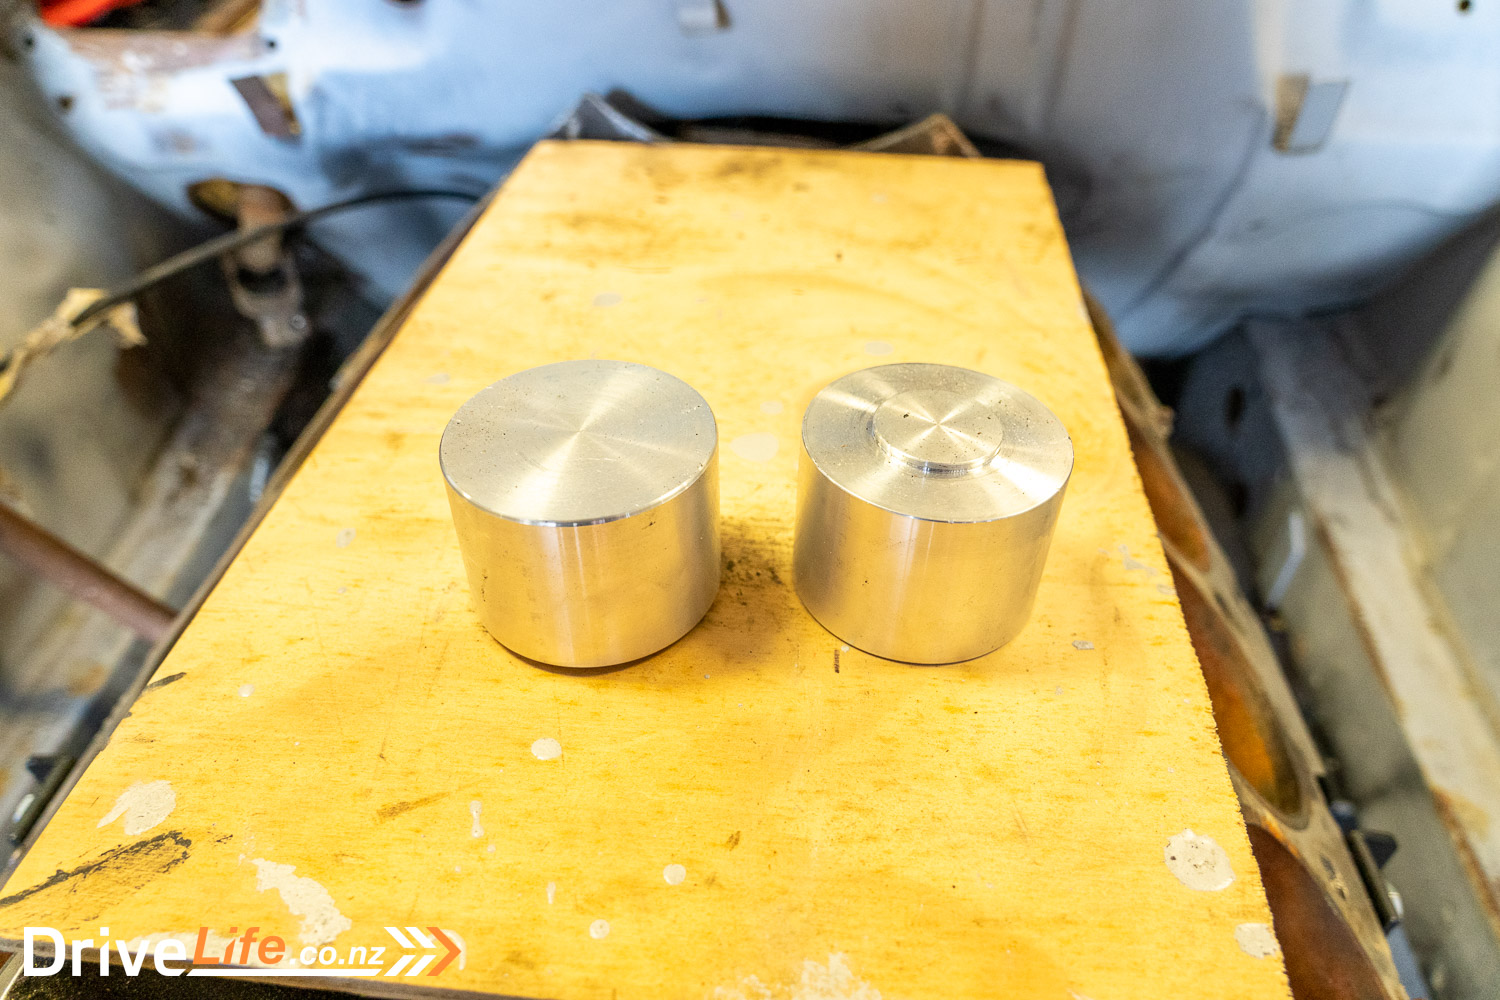
I also measured up the gap between the front of our slightly modified crossmember and the Sunbeam chassis rail, and have given this measurement to an engineer who will make some alloy spacers to go into the gap. Once we have those, we’ll drill a hole through the chassis, insert a crush tube, and then bolt it all up. I know I said it more than once in Part 4 of this series, but the difference in strength between the two crossmembers will be massive.
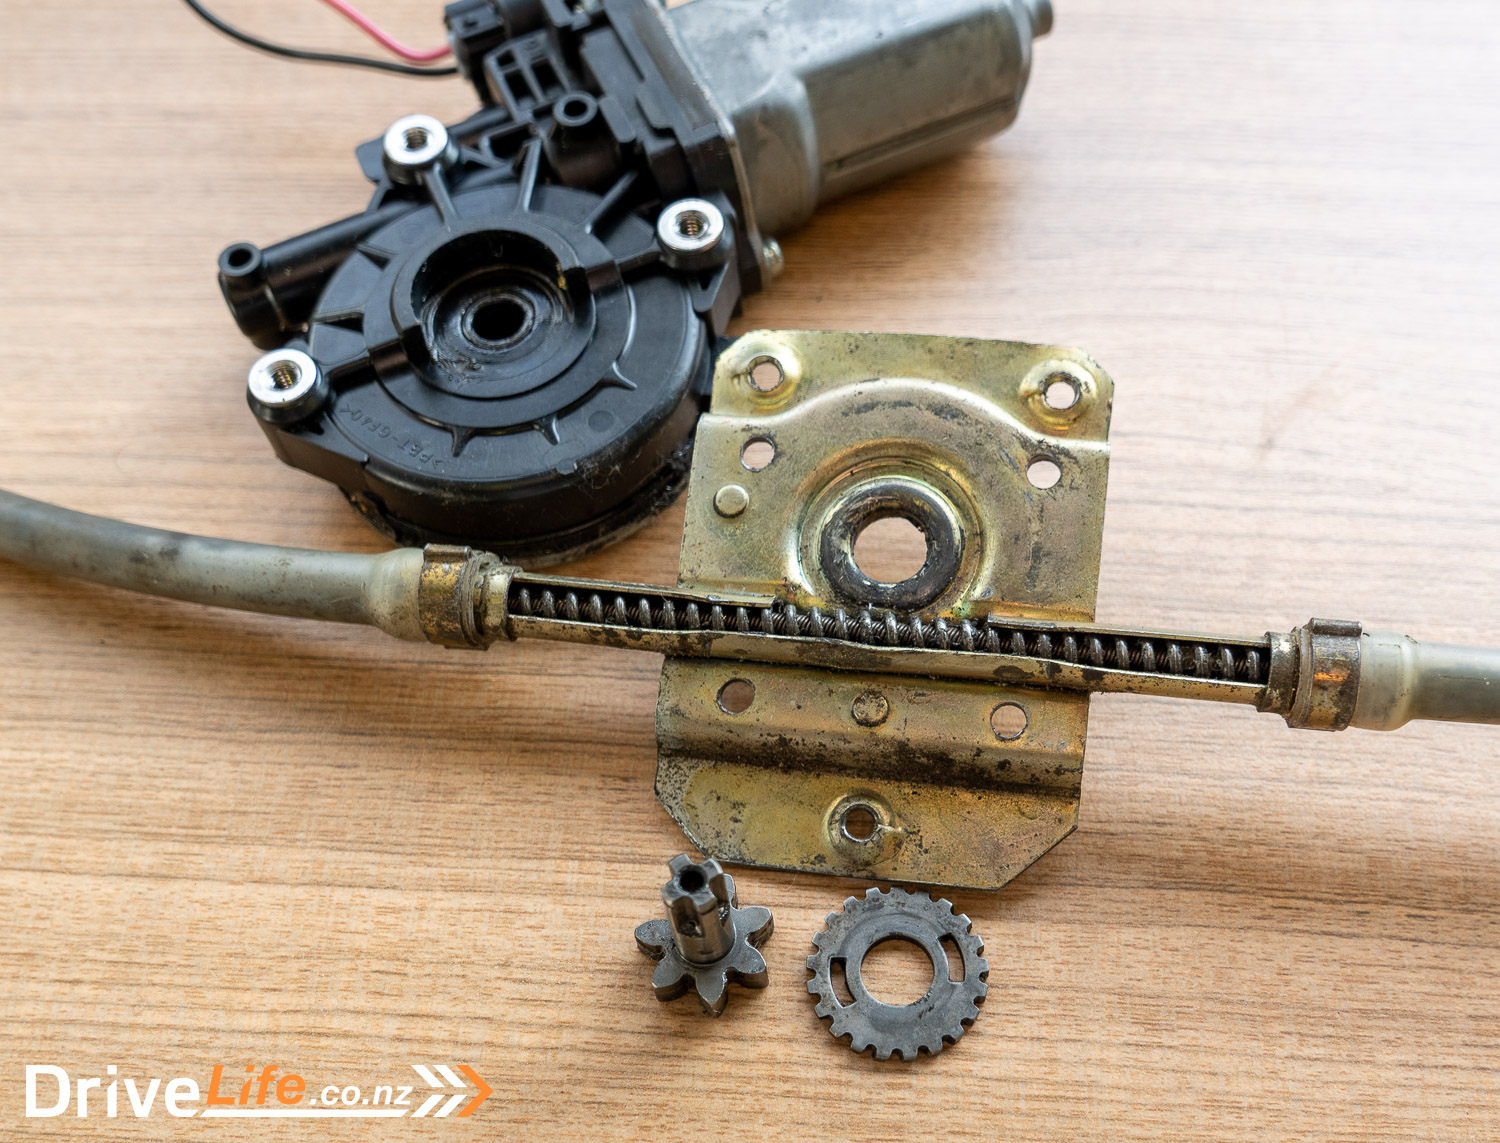
Since I couldn’t do the electric power steering install this weekend, it did mean time for other jobs. I attacked a Toyota Paseo parts car and removed the front electric window motors from it. A quick inspection shows they are nicely slimline so should fit well inside the doors of the Fastback. That’s pretty hopeful, as this isn’t a job I’ve done before.
With that job done, the weekend is over. Hopefully, the next time I’m in Hawera we can get the electric power steering at least trial fitted and then can move onto the engine and gearbox mounts.
Having the Outlander on test while in Hawera was great, as it meant I could chuck the front doors from the Rapier into the back. I’ll take these home to Wellington, and then can work on things like installing the electric window motors and solenoids for the door poppers.
Project V8 Sunbeam Rapier Fastback: Power Windows Installation
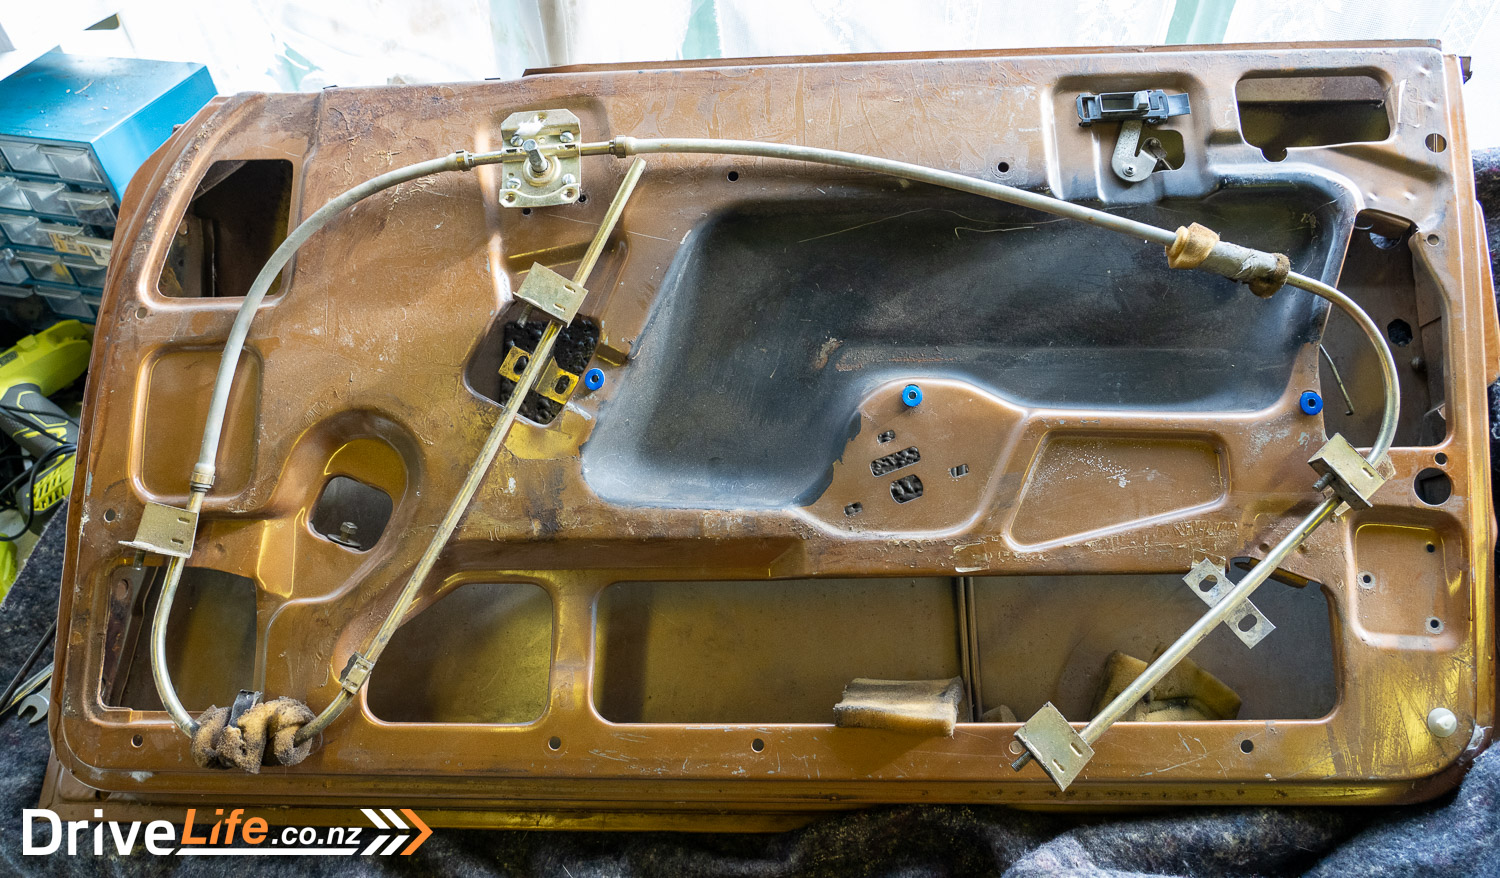
One long weekend, it was time to pull the window mech from one of the doors and see how exactly this was going to work – if at all.
You might wonder why I’m bothering to convert the car to power windows. There are a couple of reasons; it will tidy up the door panels without that ungainly window winder handle sticking out, and since the Fastback has a cool, pillarless design, it means I can lower all the windows from the driver’s seat to make the most of that. I guess if there was a third reason, it’s because at heart we’re all pretty lazy.
The winder mech in the Fastback is terrible. It’s a worm system designed by a two-year-old. If I’m being honest, this was one of the parts of this whole project-car experience that I wasn’t looking forward to, as in my heart I didn’t believe it would be possible. We pulled the mech out from inside the door, and that wasn’t too painful. It looked like someone had already pulled this one apart, as the cover over the main part of the mech was screwed on with gutter bolts.
Regardless, we pulled that cover off to reveal a cog, the one that drives the worm cable.
Then we took to the Toyota electric window motor, and the difference in quality is incredible. You can see why Toyotas last so long; the motor was put together beautifully. We dismantled the whole unit and removed the cog that would normally drive the Toyota’s window up or down. On looking closely at the two parts, it looks like we can shave a few mm off the top of the Toyota cog, simply weld on the cog from the Fastback, and then screw the motor over the top of the worm drive – and it should line up. There’s a small piece of plastic over the top of the Toyota cog – likely to stop dirt and stuff from falling onto it – but we can remove that if needed to make sure that the cog is in the correct position to engage tightly with the worm.
It all seems too good to be true, but I’ll need to wait to get the two parts to someone with the right gear to tackle it. If this plan does work, the other door will be a breeze, and even the rear windows shouldn’t be too hard. I live in hope.
Project V8 Sunbeam Rapier Fastback: Door Poppers/Solenoids
Am I crazy? I want door poppers in the Fastback, mainly so I can remove the exterior door handles to keep the side of the car clean of anything unnecessary. You might think that’s illegal, but it’s not; as long as there’s a mechanical handle inside the car for emergencies, you don’t have to have an actual door handle on the outside. The other legal requirements around this include not being able to pop the doors while the ignition is on, and ditto if the handbrake is off. We can easily manage that with relays.
I’ve ordered a door popper kit, and that comes with a control box (that already has the relays needed inside it), a 7-channel remote, wiring and the solenoids needed to work the latch. The ‘door poppers’ are actually just spring-loaded devices that put pressure on the door itself to ‘pop’ it open, once the solenoid has done its thing. The SPAL kit I’ve purchased doesn’t come with these, but they are easy to find and cheap to buy.
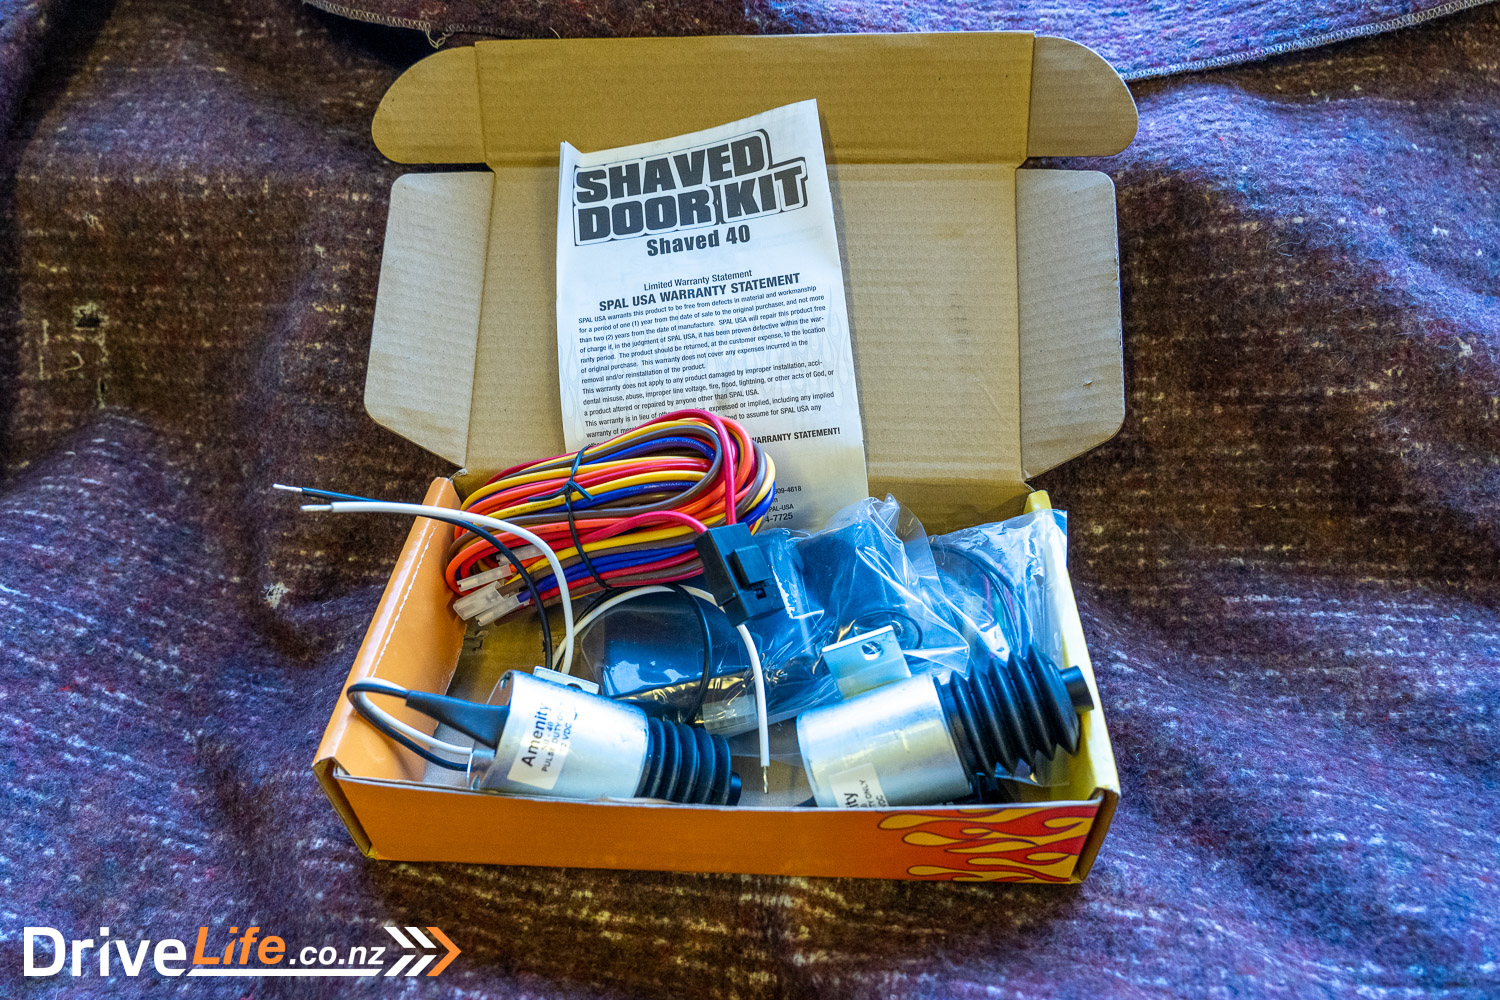
My plan is to install the solenoids but leave the exterior door handles on for now until it’s time for painting, simply to make it easier to work on the car. Before painting, the exterior handles will come off and the holes covered over.
Since the remote is a 7-channel unit, I’ve also ordered an extra solenoid for the boot. I’ve always planned to remove the existing boot button and replace it with a reversing camera, so this boot solenoid will achieve that.
Like the power windows, this isn’t something I’ve done before and really, I hate working inside car doors. No light, no room and lots of cuts are my main memories of installing things like speakers. Looking inside the Fastback door, again, it seems too good to be true. The door mech is well exposed and directly below it is a flat part of the door I can mount the solenoid on, and then it’s a straight path to the door latch, and you always want a straight path if possible.

Project V8 Sunbeam Rapier Fastback: Dash Gauge Pod
This is part of the project that I’m including, just because I think it looks cool. Otherwise will disagree, and that’s fine – this is my Forever Car and I’m building it the way I want it. The normal Sunbeam Rapier Fastback has a huge dash that’s plastic and wraps around the entire front of the car. It’s a huge thing and sticks out a fair way into the cabin.
The Rapier Fastback is also known for having lots of gauges. There are not that many; amps, fuel, oil pressure, water temperature, and a clock as well as rev counter and speedo. I’m looking at completely replacing the dash with a wood one (because I like a wood dash) and installing more gauges than it normally has. Ideally, I’d like to include an oil temperature and voltmeter gauges, and whatever else I want.
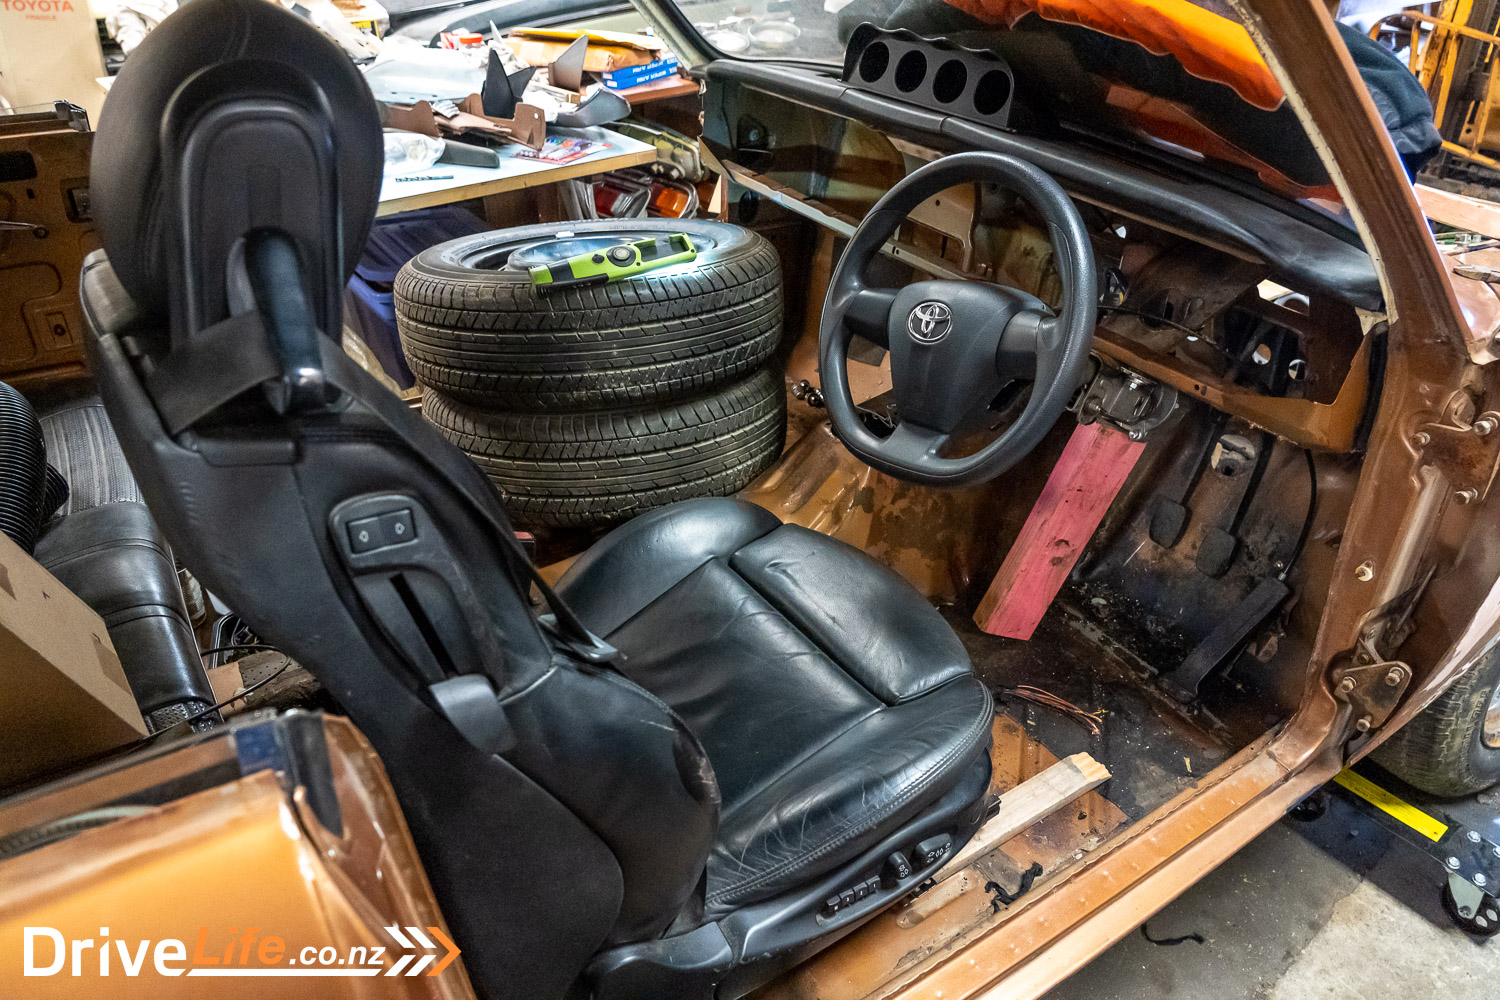
To achieve more gauges I could simply drill more holes in the (yet-to-be-designed) wood dash, but I love the look of a dash pod, so ordered a 4 gauge unit, and that has arrived. It looks exactly like I thought it would.
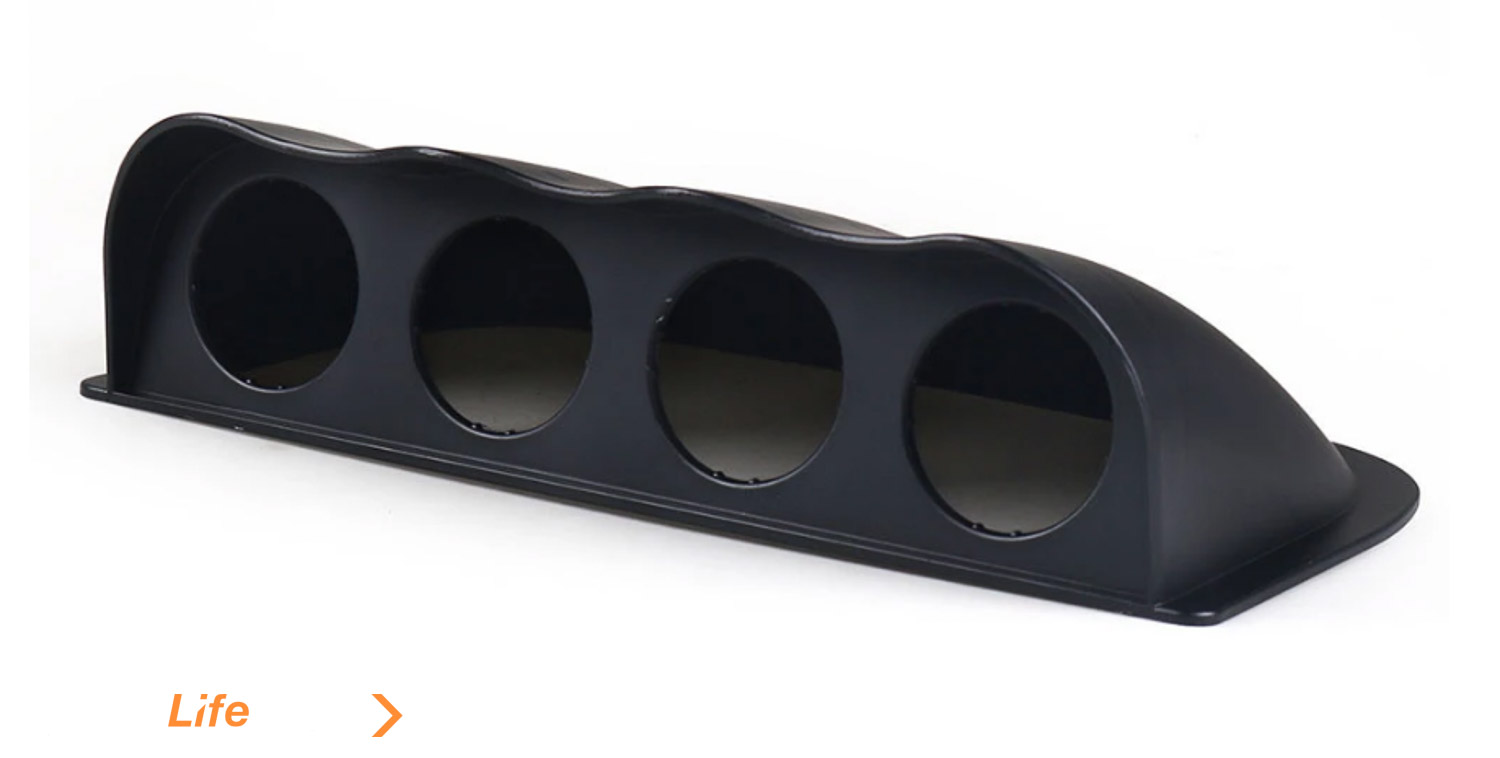
To make this all work, I picked up an early Hillman Hunter dash pad that goes right across the top of the Rapier, and then our wood dash will go directly beneath the pad. I’ll get the dash pad covered in Alcantara (because I prefer that over plastic or vinyl) and then the dash pod will be covered in Alcantara as well and will sit on top.
That’s the plan at least, if it doesn’t work out, the gauge pod cost only $30, so all is not lost.
Project V8 Sunbeam Rapier Fastback: Another Weekend’s Work
Another trip to Hawera, this time in the mid-spec Hyundai Ioniq 5 Elite. I’ve brought a set of Tein adjustable top hats with me, that I purchased from Facebook Marketplace for $130. While we found the Holden Commodore ones fitted, they weren’t mine. We spent a fair while with a spring compressor to get the Teins in, but they fitted the strut towers perfectly. One more thing crossed off the list.
We still need to work out what hubs, brakes and bearings we are going to use in the front of the car, but putting the adjustable top hats in meant we could get it back on its wheels for a while.
Next up was checking out the electric power steering install. We’ve now got a unit from a Toyota Wish, complete with upper and lower cowls, controller, the steering wheel and its controls. The Wish this unit came from had keyless start and since I’ve already purchased an after-market keyless start unit, that means no untidy hole in the steering cowl where the key would have gone, so that’s perfect for us.
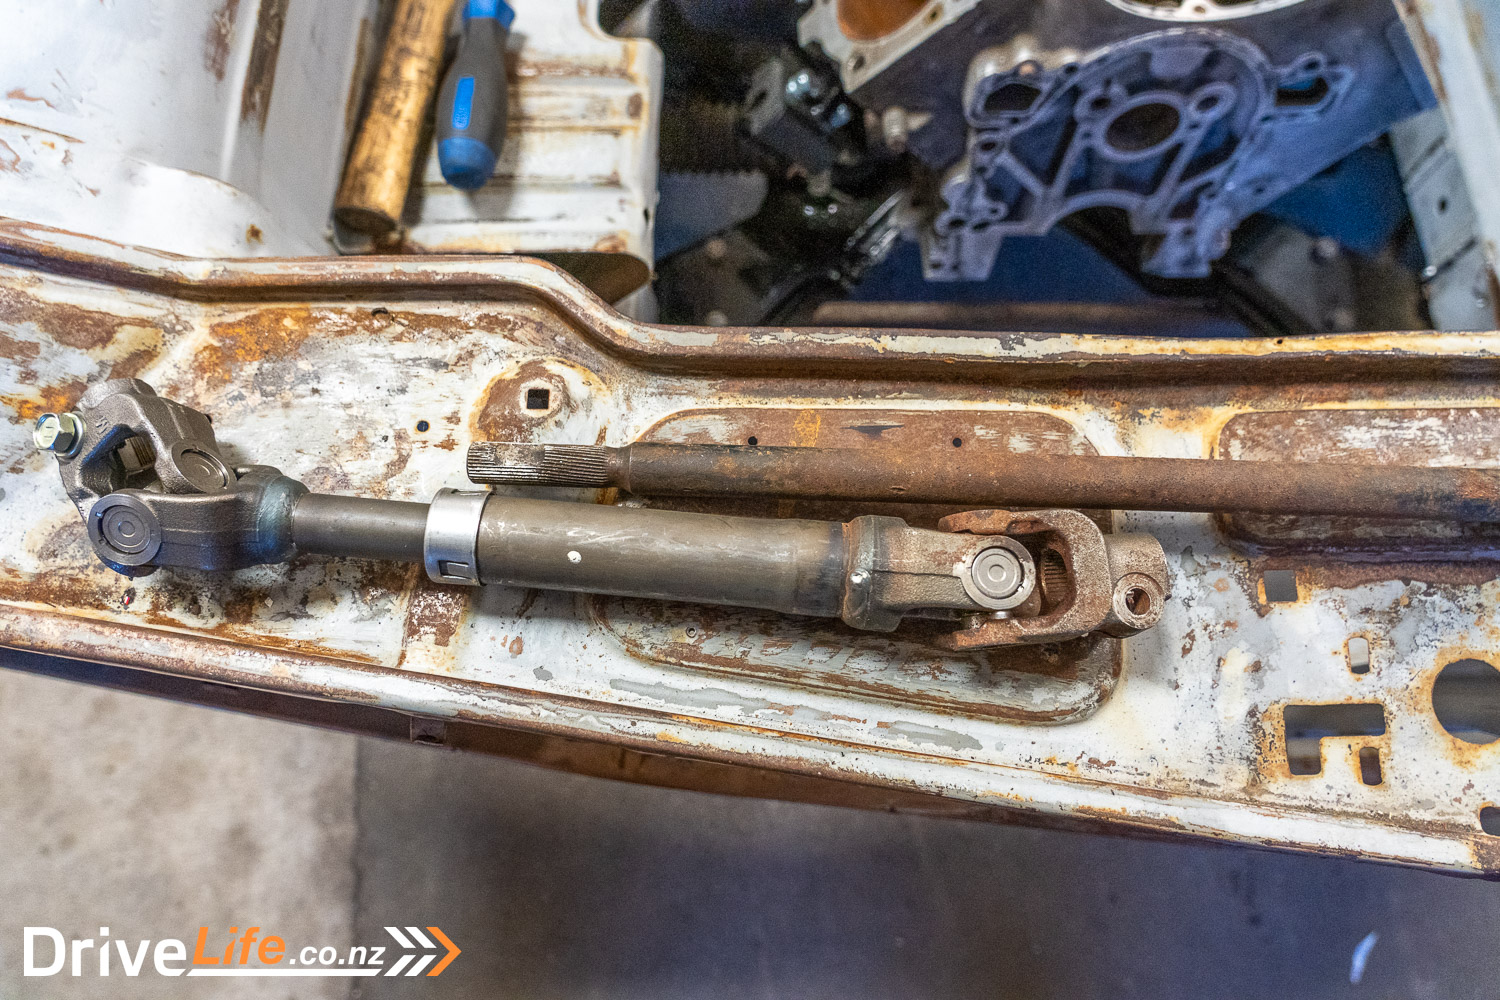
We managed to get the steering column bolted up to the Fastback lower dash mount, but we’ll still need to make up a lower mount out of steel. There’s actually plenty of room back there so this shouldn’t be too hard. We’ll design a mount and get our LVV Certifier to ok the design before we go ahead with it.
Of course, the rack and pinion steering is from a Triumph TR7 and the steering column is a Toyota, so the splines are different. I removed both parts and sent them off to an engineer to cut 30mm off the Triumph shaft, and re-spline it for the Toyota unit. Cutting 30mm off the Triumph shaft actually makes it the perfect length for our setup.
Naturally, the steering wheel – which has a flat bottom, a nice, sporty feature – has a big-ass oval Toyota badge in the middle of it. Once we’re certain the Toyota electric power steering is all go, we’ll make up a new centre cover for the steering wheel out of fibreglass, and fit a round Sunbeam badge in the middle of it.
Next up are the engine mounts. We spent a lot of time looking at the driveshaft angles, clearance from bell housing to firewall, clearance from the front of the engine and other things. Once happy we had the engine in exactly the right spot, I made up some cardboard templates for the mounts from the chassis to the Rover V8 engine mounts. We’re making these up to mimic a Triumph Stag’s engine mounts, but we’ll add an extra gusset in for additional strength. Like we’ve done with the crossmember design, we’re taking things above and beyond what is required. The mount will be welded on the top of the chassis rail as well as the front face.
Soon, we’ll get some 3 or 4mm steel and make up the 4 plates from the cardboard template. We won’t actually do this until our LVV Certifier sees the design and approves it. Once approved with any changes needed, we’ll make up the mounts and weld them in place, and bolt the engine to them. At that point, we can start working on the gearbox mount.

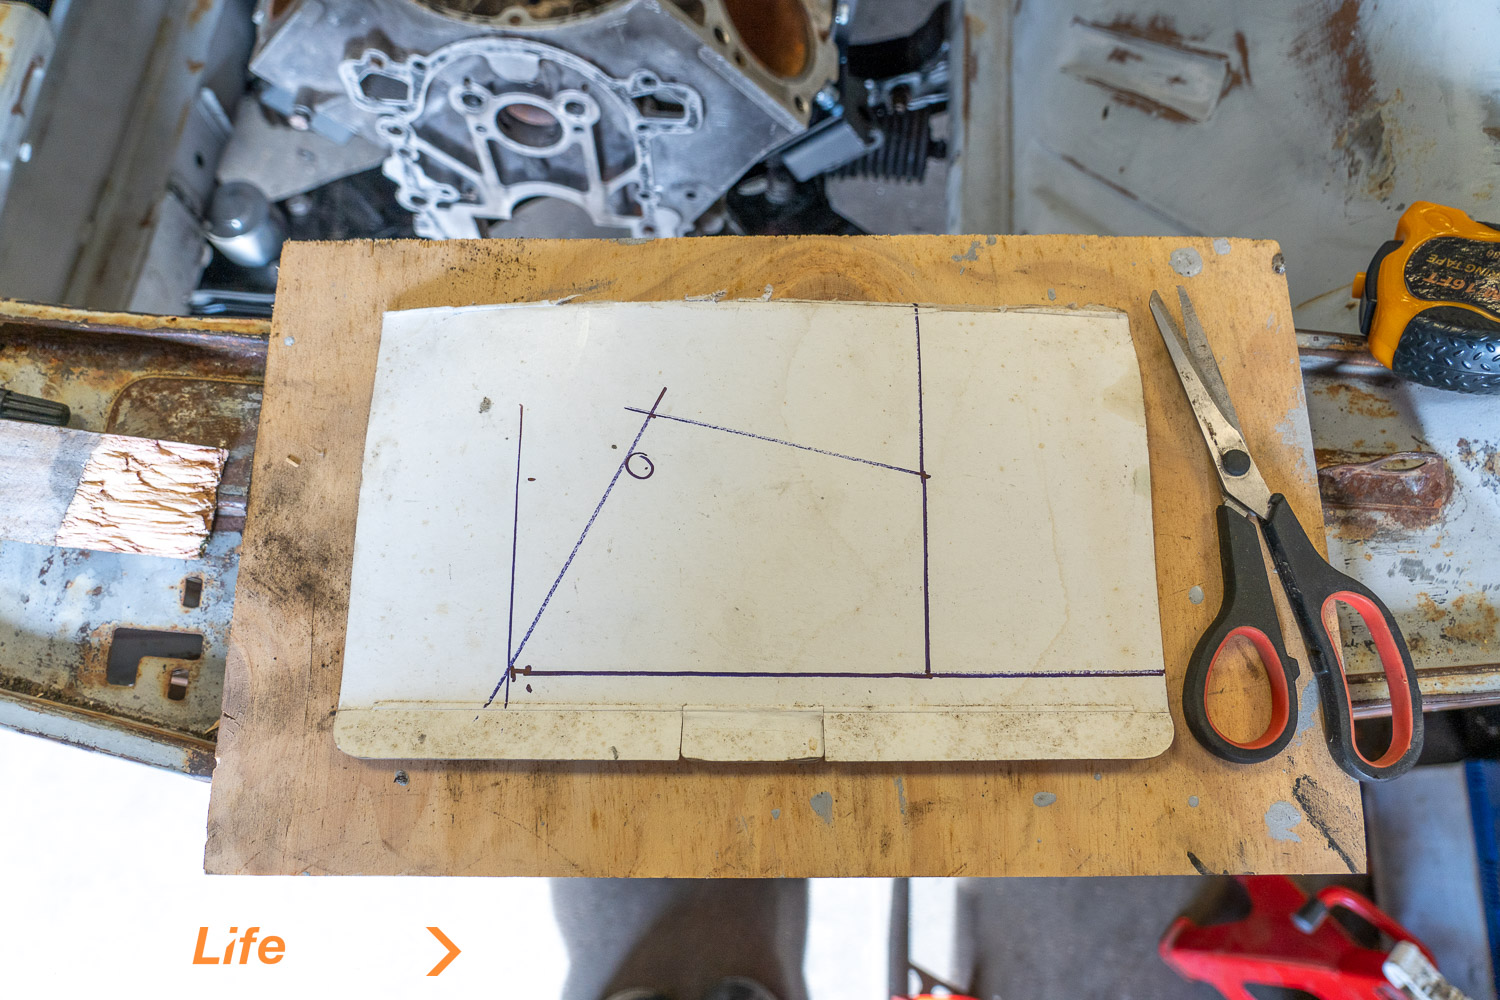
The only other thing I got done on this weekend’s list was trial-fitting the Humber Sceptre dashboard. Back in Part 2 of the series I purchased a wooden Sceptre dashboard, glovebox and centre console. I intend to use the dashboard as a template, so at least I’ll have the exact shape and size of the dashboard, but can place the instruments etc wherever I want. Since we’re going to use a 4-gauge dashpod on top of the dashboard, it means more space for things like switches, and also a central touchscreen unit. We’ll likely change the heater controls to something modern with stepper motors, so no more horrible and stiff cables to operate the heater or air con.
Back at home, I spent some time doing something that’s always been on my Bucket List: designing my own dashboard. Yes, I am easily pleased. But I enjoyed mucking about with different designs and placements for the gauges, and eventually came up with this (to scale):
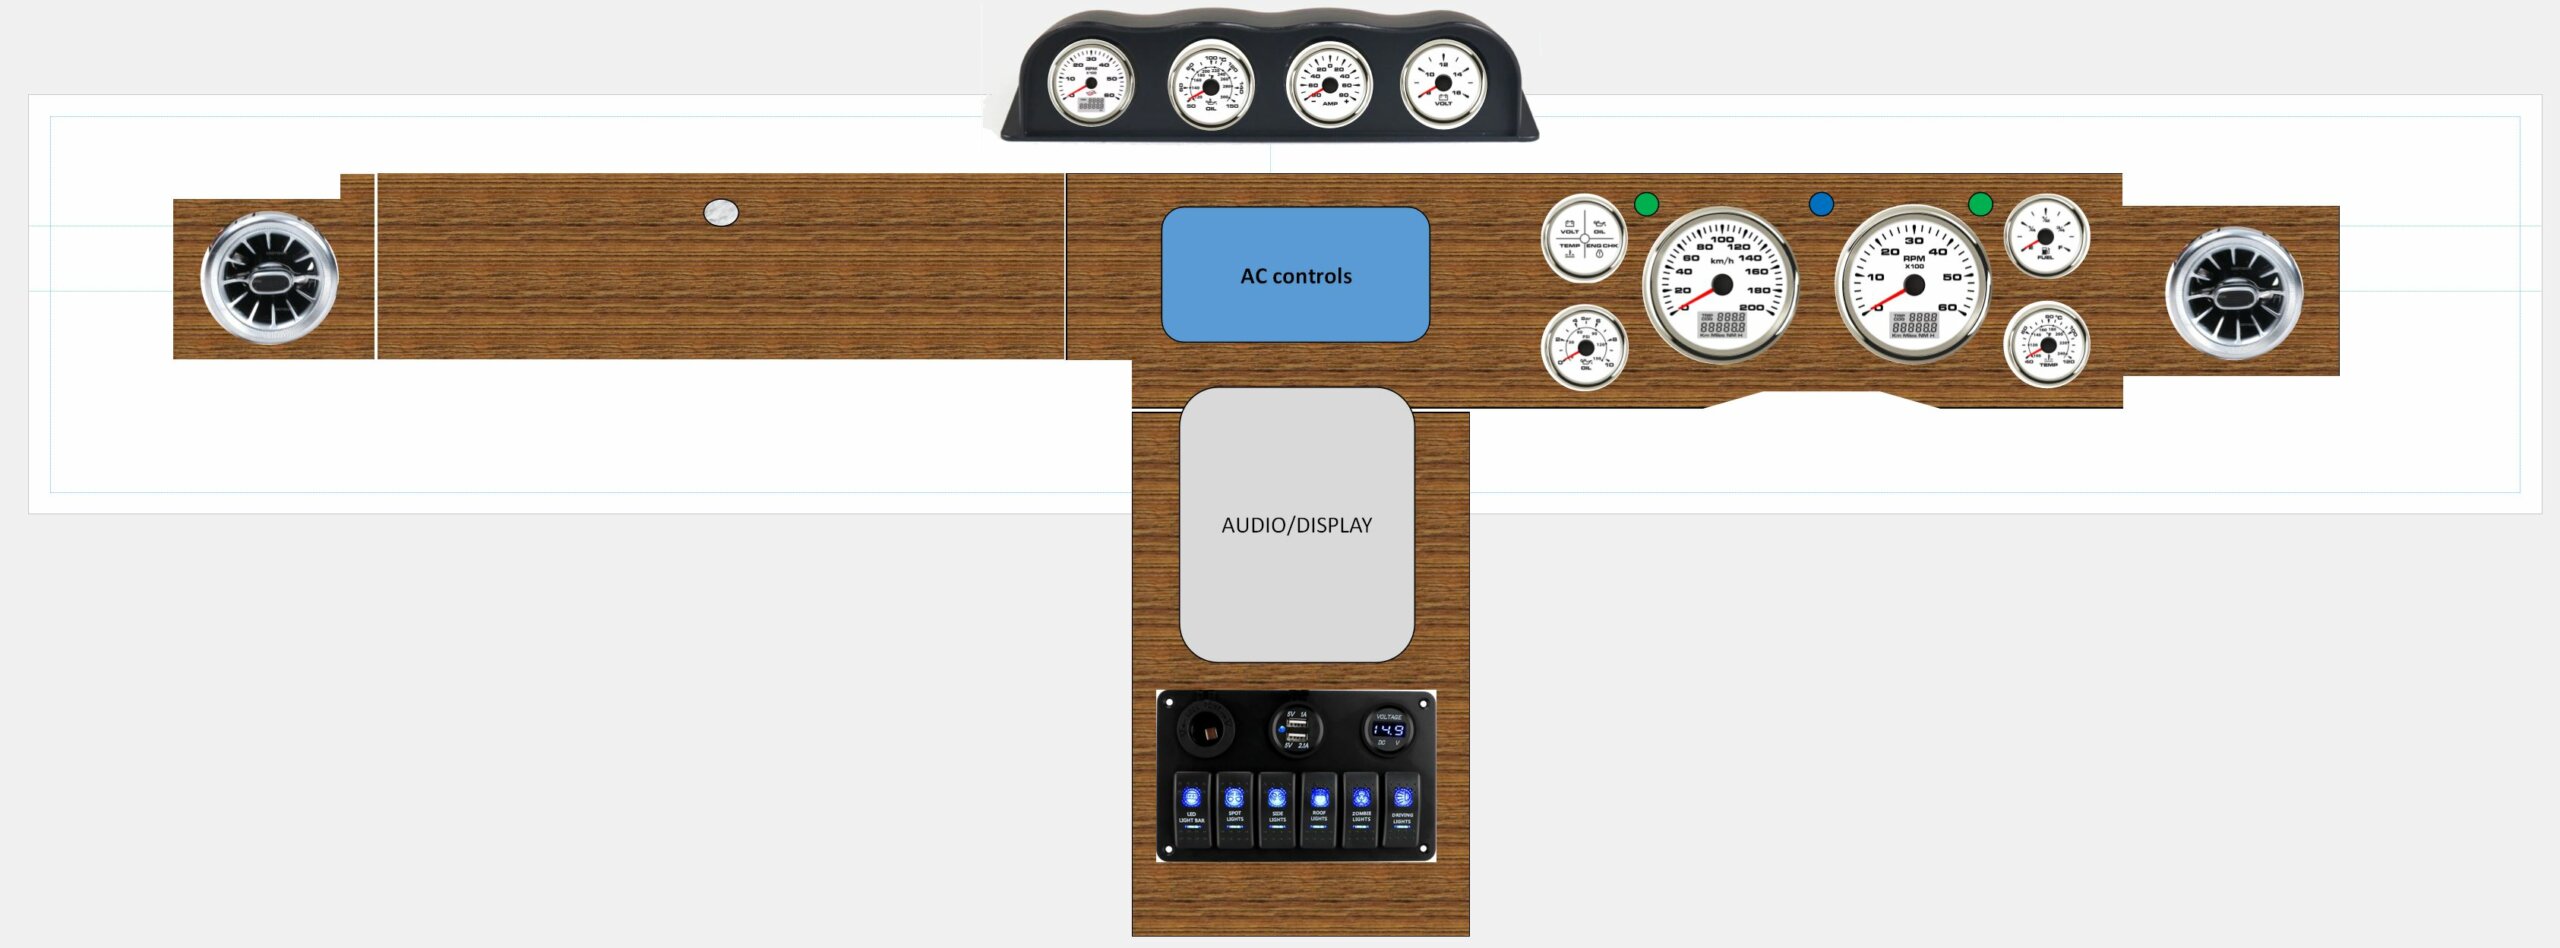
We may move the AC controls up to a roof console that we’re going to make, and then that will allow space for two more AC vents in the middle of the dash. If they can’t go on the face of the dash, we can put them coming up from the centre console. We’ve ordered some Mercedes-Benz turbine vents simple because I love the design of them. We’ve actually ordered 6 vents, so there will be two for rear-seat passengers.
The ECMS gauges have arrived. I went for full-sweep gauges, as I can’t see the point of them not being full-sweep. There are a lot of speedometers out there but nearly all the aftermarket ones are driven by GPS, and that is illegal in New Zealand. You simply cannot have a GPS speedo, and the regulations specifically say this. So that narrowed down my choices, especially since I wanted all the gauges to have matching faces.
So the speedometer is a pulse-sensor-driven unit, and we’ll need to make up a mount that goes right over the brake disc and mount the sensor to it. The pulse sensor will pick up, well, pulses, and send these back to the speedo.
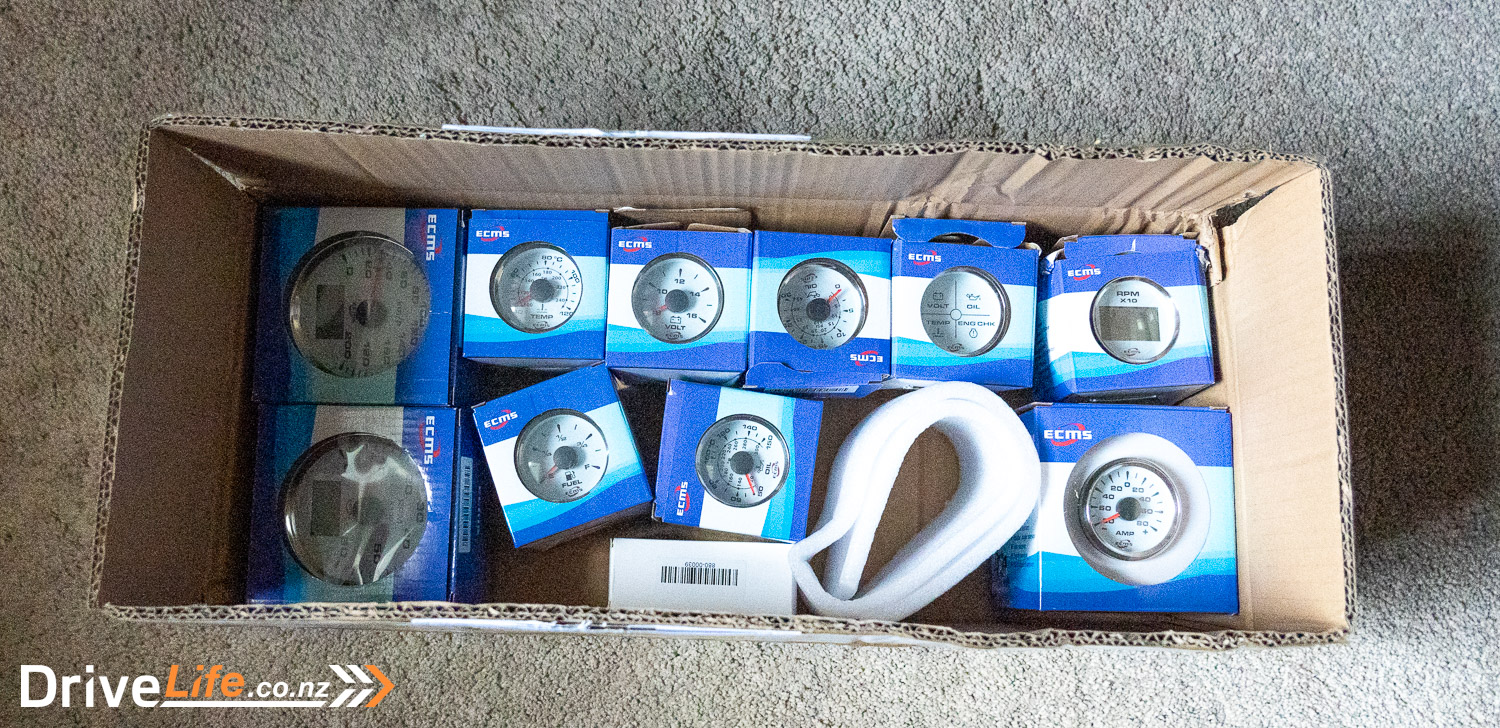
Surrounding the speedo and 6,000rpm rev counter will be fuel, water temperature and oil pressure gauges. There’s also a 4-way warning gauge that will do engine over-temperature, ignition, low voltage, and an oil pressure warning. The dash pod will hold oil temperature, volts, and an ammeter. The fourth gauge in the pod is a digital rev counter. We don’t actually need this but there was a spare hole and we needed something to go into it.
Once the dashboard is mocked up from a piece of ply, we can build the centre console and the piece that rises up to meet the dashboard. This will give us the amount of space we have for a central screen, but we’re hoping for around 9 inches. This screen will be the reversing camera display, as well as things like tyre pressure monitoring, SatNav, and Apple CarPlay/Android Auto capability.
After all measurements are checked and numerous trial fits are done, we can get the final veneer applied to the dash, console, and riser.
That’s it for now. We’re heading back to Hawera in a few weeks to continue on with the mount for the electric power steering, and also the engine mounts. Meanwhile, in Wellington, work continues on creating a mount system for the power window installation.
Join our mailing list so you don’t miss another article in this series.
Read Part 1 of this series here
Read Part 4 of this series here.
Read Part 6, the next episode, here.


