


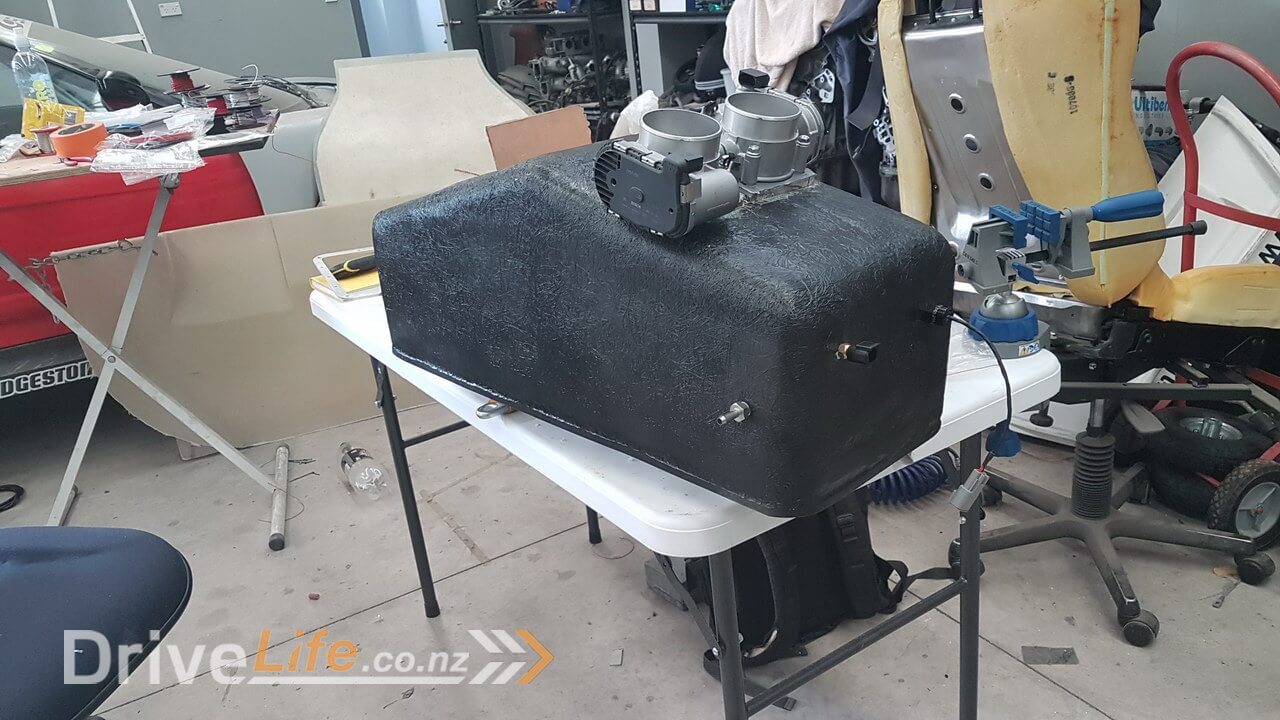
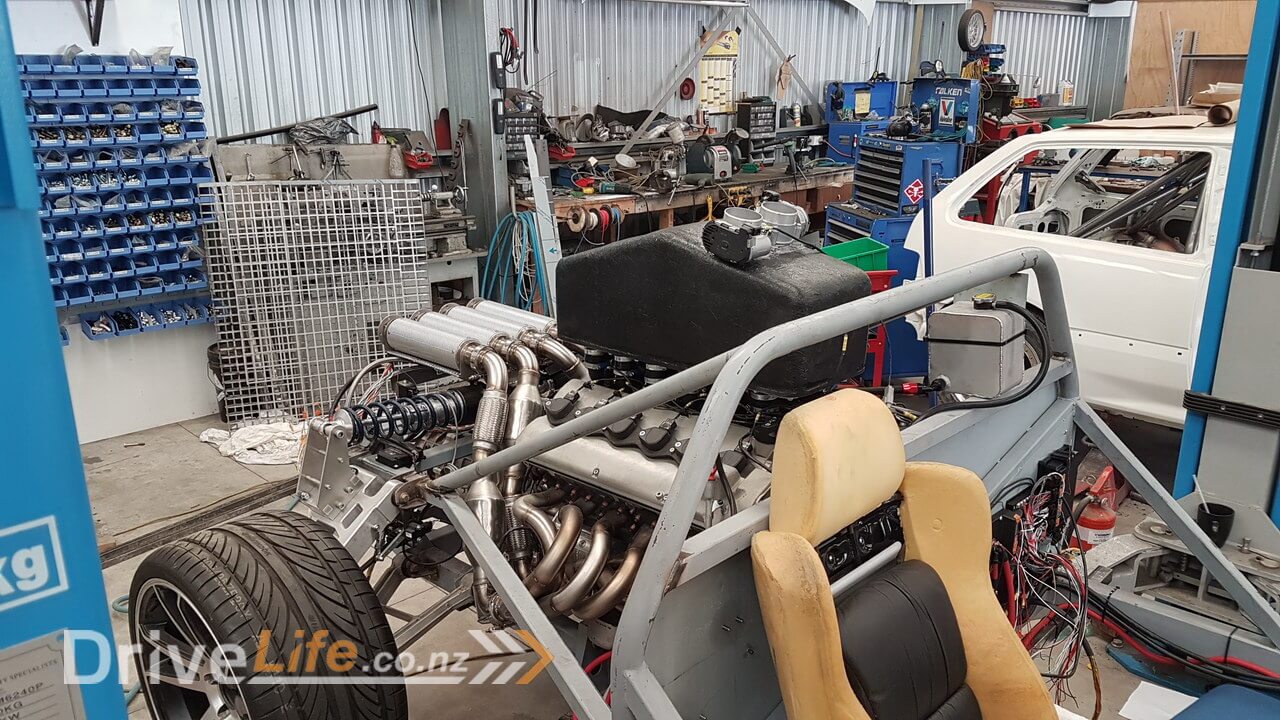
So hopefully by looking at the pictures it will become obvious very quickly that this isn’t our final airbox design. This airbox is for one reason and one reason only and that is to allow us to be able to start, run and give a basic tune to the FZ12’s beating V12 heart.
Lets call the design functional shall we, because it certainly isn’t pretty. We aren’t able to settle on a final design for the proper airbox yet since we don’t have a roofline in place and we can’t do that until we’ve finalised the chassis and we can’t do that until the LVVTA come and ……….well you get the picture.
Zac as always provided the knowledge and equipment when it comes to anything composite we have to do, and we shaped a block of polystyrene. Then I wrapped the polystyrene in tape and then Zac fibreglassed over that to give us a basic shape. Once we had the shape we simply removed the polystyrene from the bottom leaving a hollow shell. Once we had the basic shell it wasn’t any trouble at all to glue some flat sheet to the top where we planned on bolting the throttle bodies.
This was the end result. As I said, she’s no looker, but will do until we can finalise a design when we’ll be making something much nicer out of carbon.
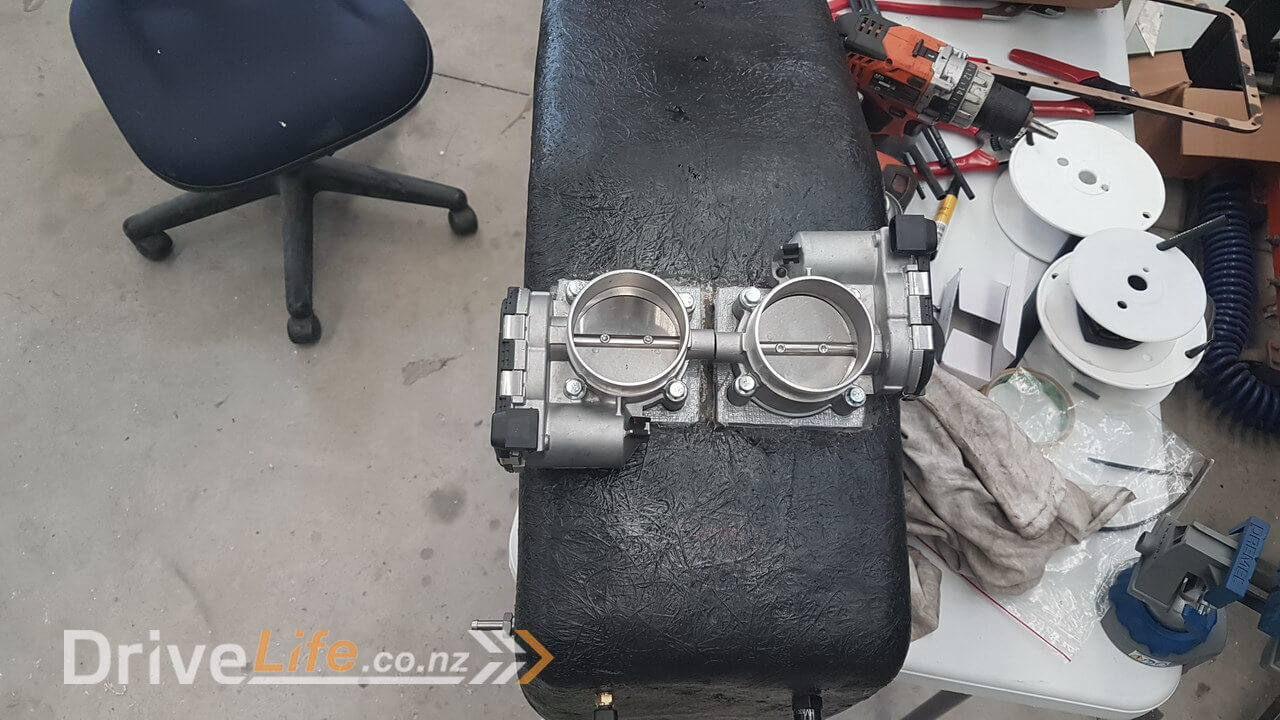
I had to drill and tap holes for the air intake temp sensor, MAP (manifold air pressure) sensor and a vacuum line to go to the fuel pressure regulator, but that was all really easy.
Next I needed to drill and tap the many holes along the bottom to allow me to bolt the main manifold plate to the bottom of the airbox to make an air tight seal. You might remember that Mitch from O.L.S helped us a while back to laser cut a seal out of neoprene material and it worked perfectly.
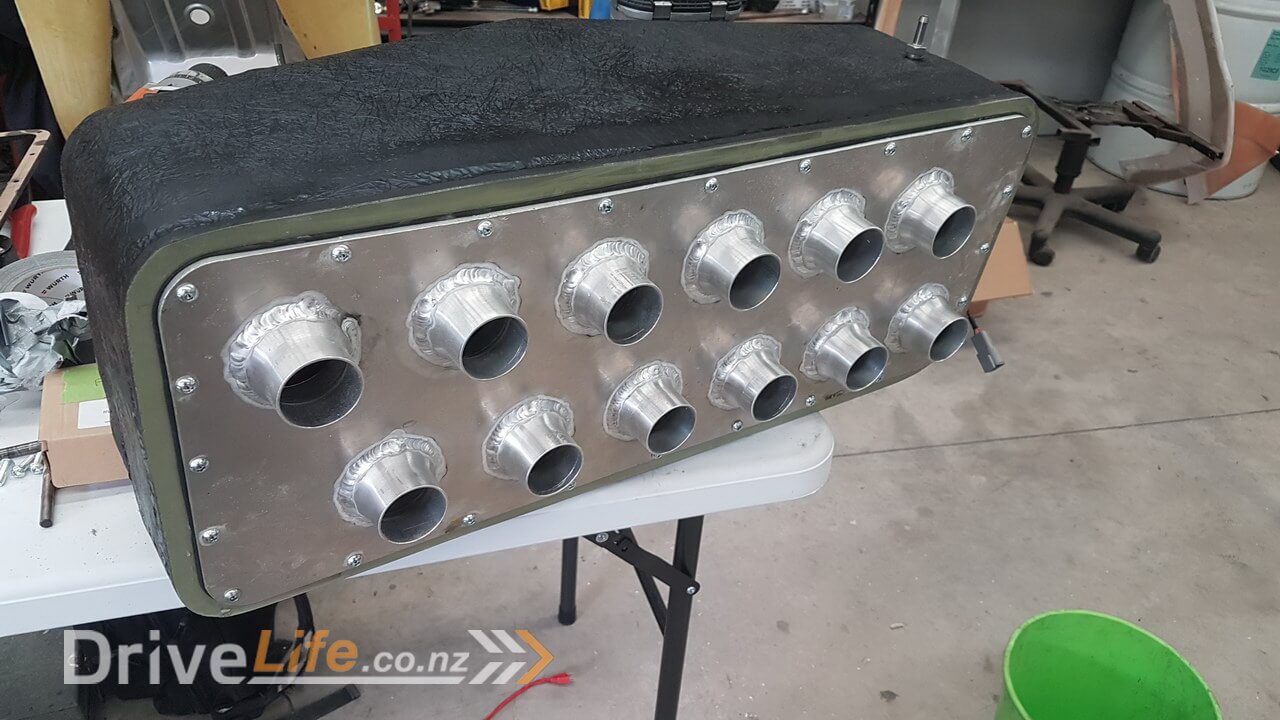
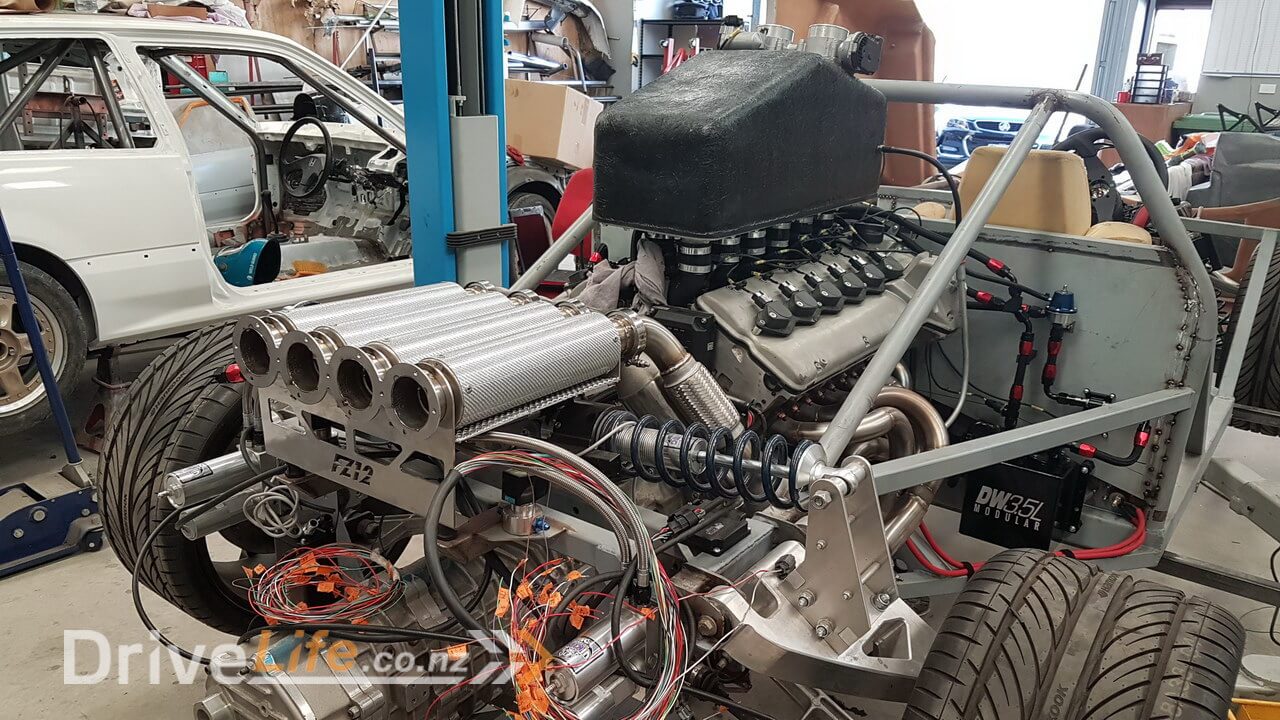
Next was the very fiddly process of lining up all 12 intake tubes and tightening up all of the clamps. This takes approx 1 hour to do from start to finish, so when I say fiddly, I mean it.
But as always seems to be the case with this stuff, you never seem to care about time or anything else once you’re done and you can see it all together and I’m super happy to know now that this is the last mechanical part we need to start this engine !
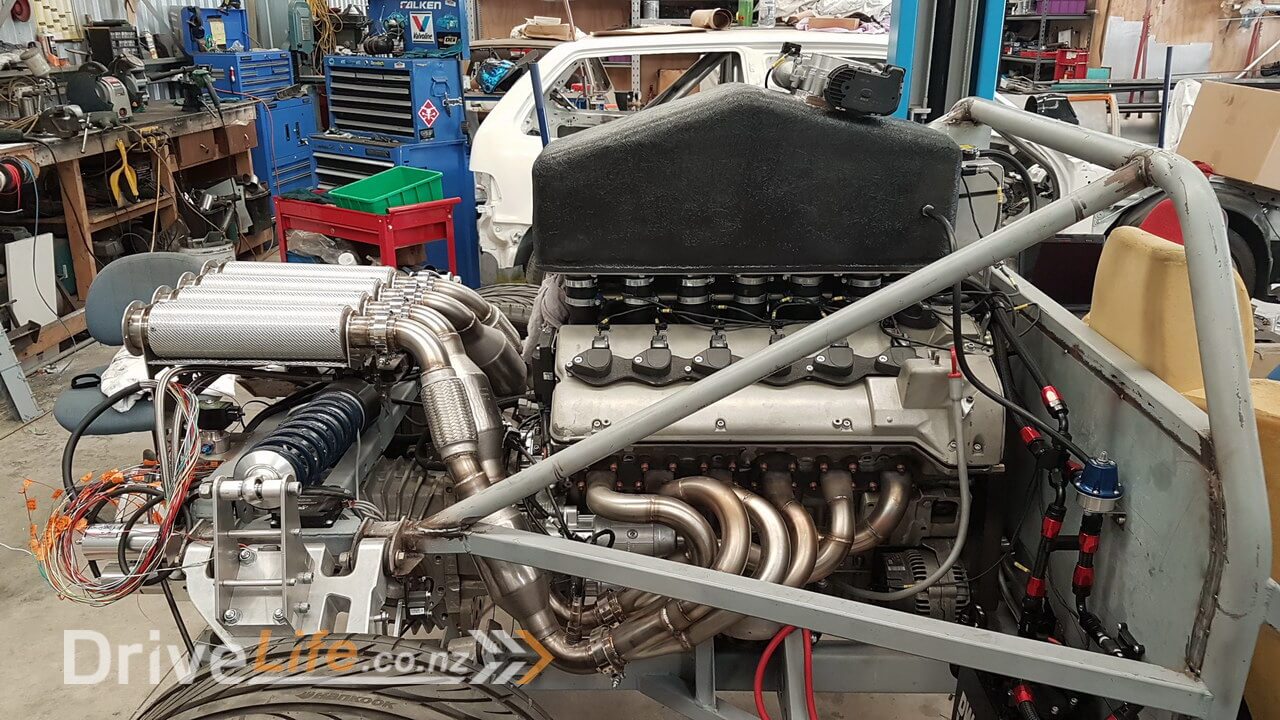
I suspect Chris from Prestige Tuning and I will be spending quite a bit of time together in the near future to get this thing fired up and given a basic tune.
I will cover this off in the next episode and let you know how it goes !
Please feel free to comment or ask questions, I really love sharing and discussing our build and cars in general with other readers.
There’s a newer entry in this story, please click here – FZ12 – Part 33
If you’ve missed the last part of our story then click here FZ12 – Part 31
or if you want to go right to the beginning then click here FZ12 – Part 1


Hey Fraser,
Love the build and have been following it for quite some time.
The M120 really is the best v12 there is, all things considered, so I pulled the trigger and went for an M120 for my project car as well.
I saw you made some pretty detailed drawings for your transmission adapter plate and flywheel.
Do you have the drawings of the bolt pattern on the back of the engine and the position of the driveshaft available somewhere?
Maybe I could do all the measuring myself, but I’m sure you’ve taken better measurements than I ever could with your well stocked toolbox :P.
Thanks for getting in touch…….as you say, the M120 is a whole lot of engine for the money and when stripped down you can really appreciate the engineering and effort that went into these engines ! Sure there’s probably other engines that you can make more power out of cheaper, but hey, I never like to fit in with others !
The engine to gearbox adaptor we didn’t do drawings for unfortunately so we don’t have that easily to hand. What we did model was the gearbox and clutch side of things, but that’s only going to be useful if you plan to use a Mendeola gearbox also. If you want a clutch then I can put you in touch with the guys from ACS as we worked with them to get the crank bolt patterns correct because they’re quite complex, but as mentioned the front side of the clutch will need to suit your gearbox, but they can easily sort that side of things for you as they did with us……
Sorry I can’t be more helpful on that one. We will be drawing up our adaptor later as we plan to make a new aluminium one (current one is steel and super heavy, but all we had at the time and we wanted to make sure it was right first) so depending on how soon you need it, we may still be able to help you out once we’ve scanned and drawn up the engine to gearbox adaptor.
Fraser
I don’t think you use a v12 for the power anyway, I’d gladly sacrifice the hp (and weight penalty) for the v12 noise, v8’s are so pedestrian :P.
I’m going to be using an e90 M3 6 speed with the standard e90 twin plate clutch, just to keep the number of custom parts to a minimum and I can make the adapter plate myself.
I’m from europe, so I will probably be sourcing a flywheel from a custom drivetrain shop a bit more local, who have already made custom flywheels for M120’s, so they should at least have the crank bolt pattern figured out.
The only thing I really need to do is take all the measurements accurately enough, maybe I need to find myself a friend with a Faro arm…
I really appreciate the detailed reply, even though it wasn’t much help as you say 😛
Can’t wait to see (or actually hear) your engine running with those exhaust manifolds.