


In the last episode we finally got our V12 engine running and it didn’t sound as I’d expected. I started looking at a few different things including the exhaust design. We did finally find the issue with the cam on one side being out of position, but whilst looking at the exhaust design I found some more information about the Pagani design for this engine that I hadn’t seen before.
All of the pictures I had seen up till this point seemed to indicate that the cylinders would go 3 into 1 and then travel to the back of the car, giving us 4 exhausts at the rear. The new information that I found when looking again quite a few months later was that in fact it appeared that in fact the cylinders did go 3 into 1, but then just after they went 3 into 1 they also crossed over to the other exhaust from the same side.
This is a very common thing called a “crossover” or “X pipe”. However when I was putting this original design together a couple of people had asked me if I was going to put a crossover in to the design. I had said no because I was following what Pagani had done as much as I could, but it seems like I didn’t do enough research. In my defense, there is in fact a part of the exhaust that is very rarely shown in photo’s and is hidden behind a part of the chassis, but it’s at this point that the crossover seems to happen so in most images you just see 2 pipes going in and 2 pipes coming out of each side and so I assumed it didn’t crossover, but it seems it does !
That’s 2 episodes and 3 mistakes ……. Jeez, maybe I need to rethink this custom car thing !
The original design we had would most likely have worked just fine, however I wanted to get the best chance to having that nice V12 howl that Pagani does so well and so I figured that if they’re doing that, then we shouldn’t argue and it should be better for performance also.
We originally allowed for a catalytic converter and flexible joint on each exhaust pipe. This was for 2 reasons. 1. in expectation of a legal requirement to have them (not currently required) and 2. to help keep exhaust noise down since the exhaust is so short.
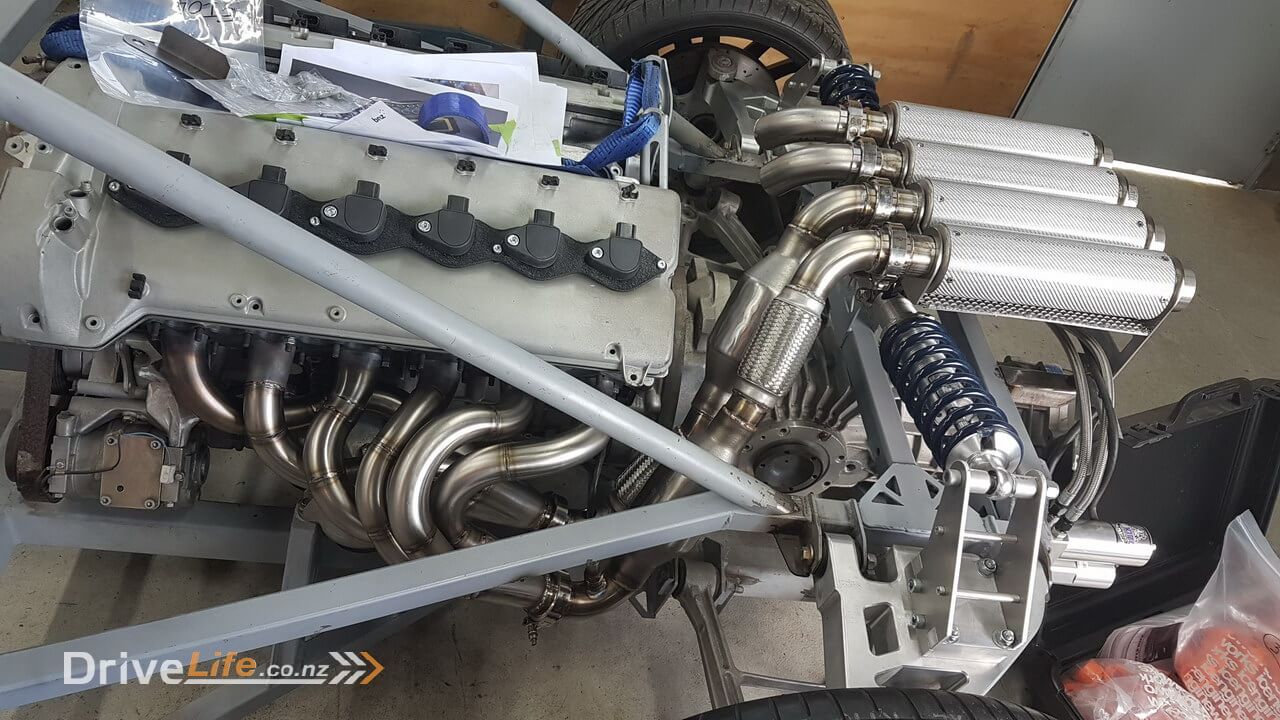
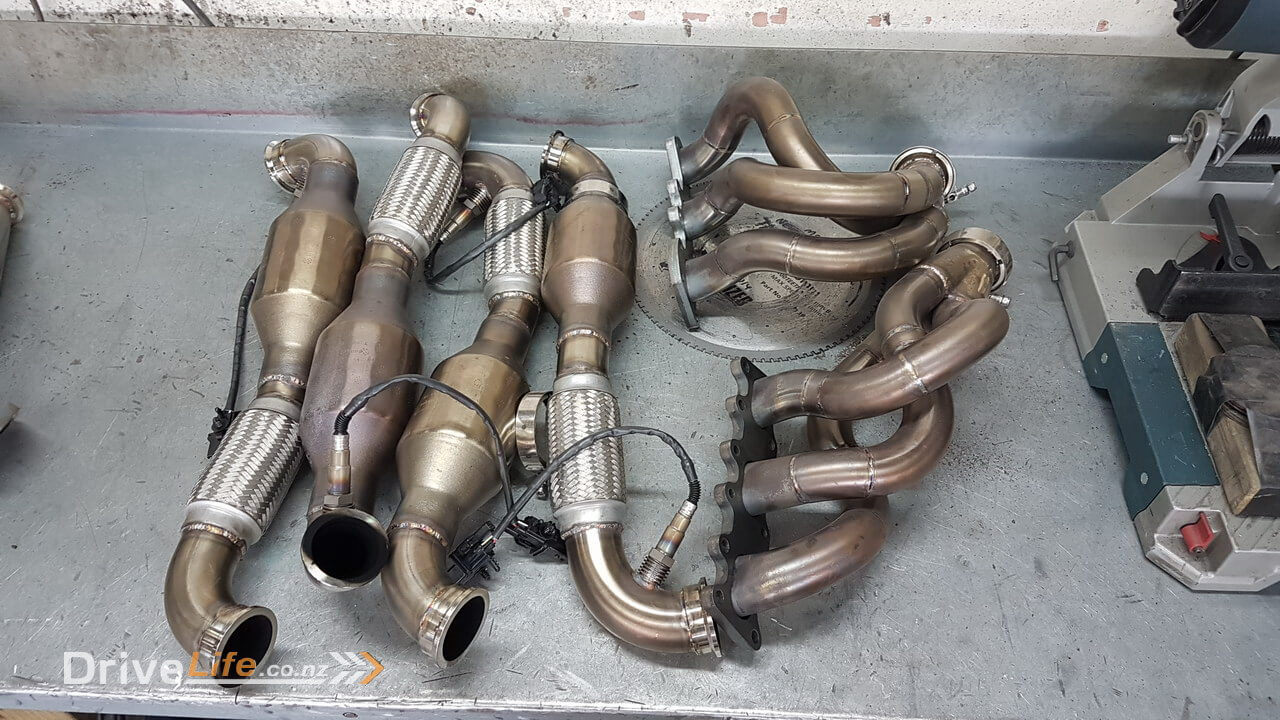
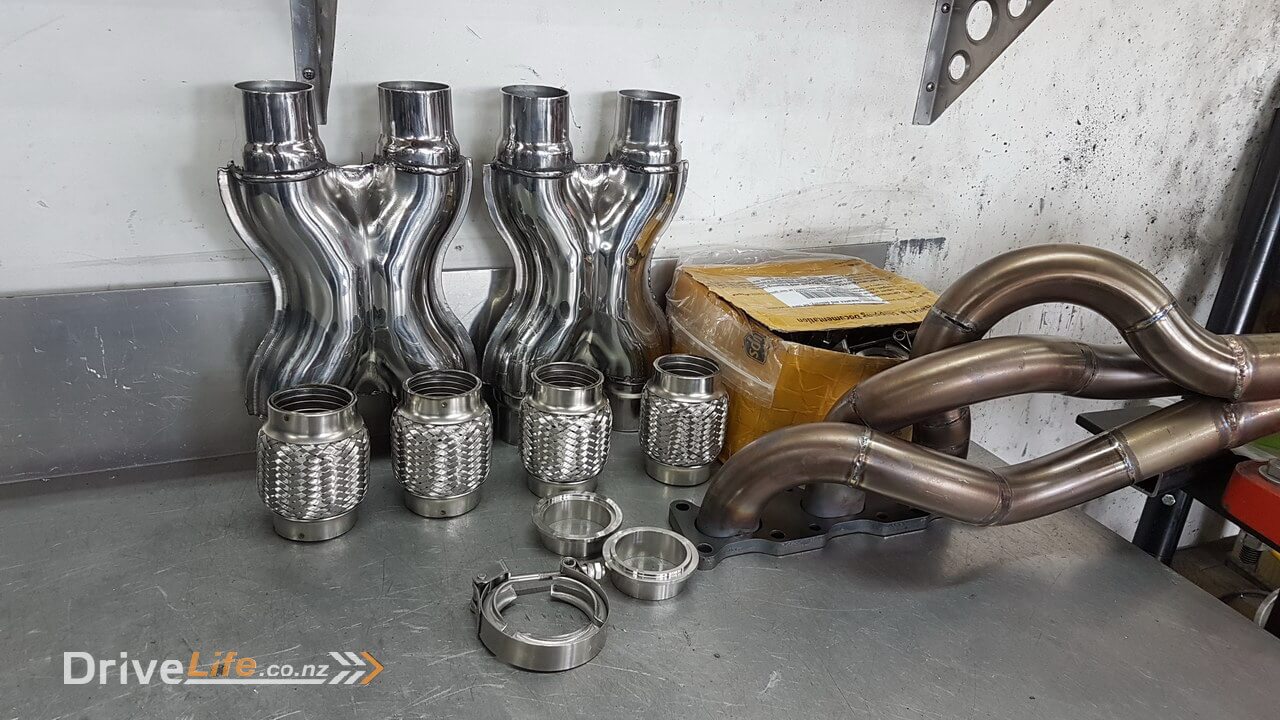
You can hopefully see from the photos of the exhaust that there are 3 parts to it. There are the exhaust manifolds which blend 3 cylinders into 1 collector and then there is a v-band clamp. The next part is where we are going to be working, where there is currently a flexible joint and a catalytic converter, then the last part is the muffler. There is going to be a 4th and 5th part which will be the exhaust butterfly system for controlling the noise of the exhaust when cruising and the last part will be the small run of exhaust pipe and tips from the mufflers to the rear bumper.
We started by simply undoing the v-band clamps at both ends and removing the O2 sensors so we could fit them to the new exhaust when complete. We basically can’t re-use anything here.
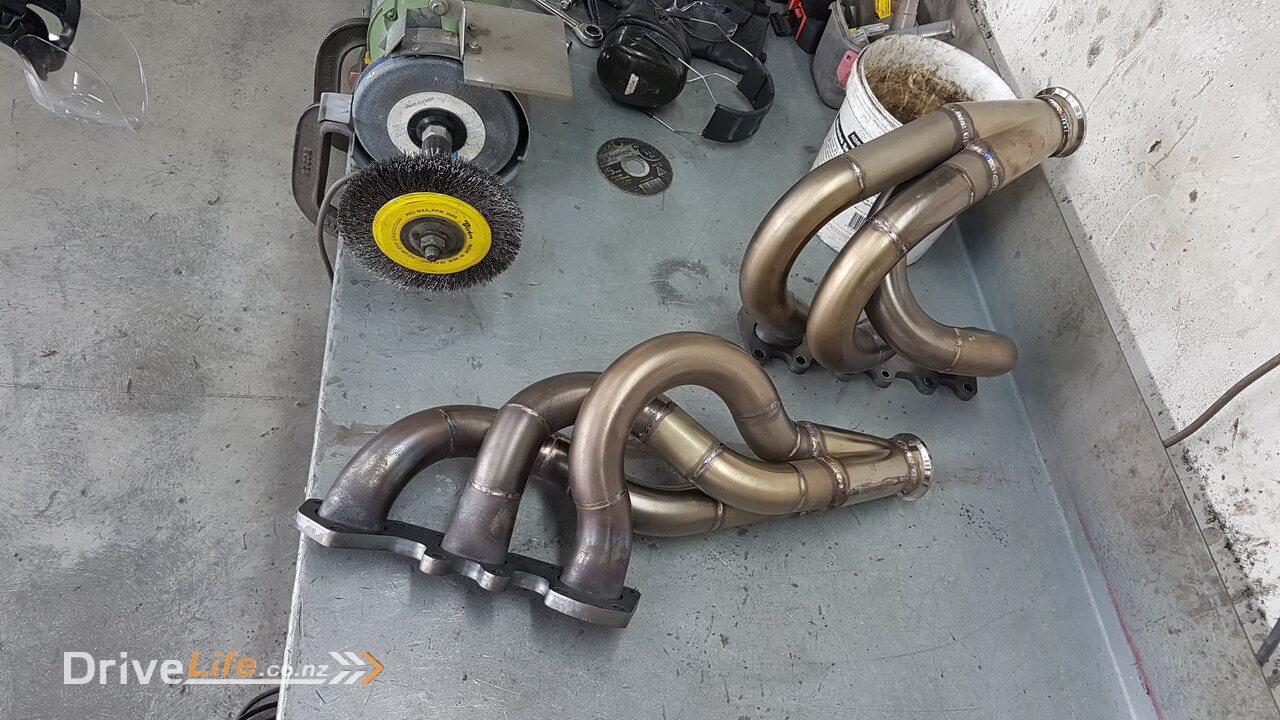
We had to remove the exhaust manifolds because they have one side of the v-band welded on and we were changing to a better type of v-band so they needed to be removed also. Usually we wouldn’t have need to remove these since the v-band clamp wouldn’t change.
I had purchased some pre-made crossover pipes from the USA as they were a perfect match for the spacing of our exhaust, looked good and were going to save us time and money making our own so it was a no brainer. I also purchased some shorter flexible joints also to give us more mounting flexibility (pardon the pun) since the shorter distance used up by the flexible joint would let us fit the longer crossover.
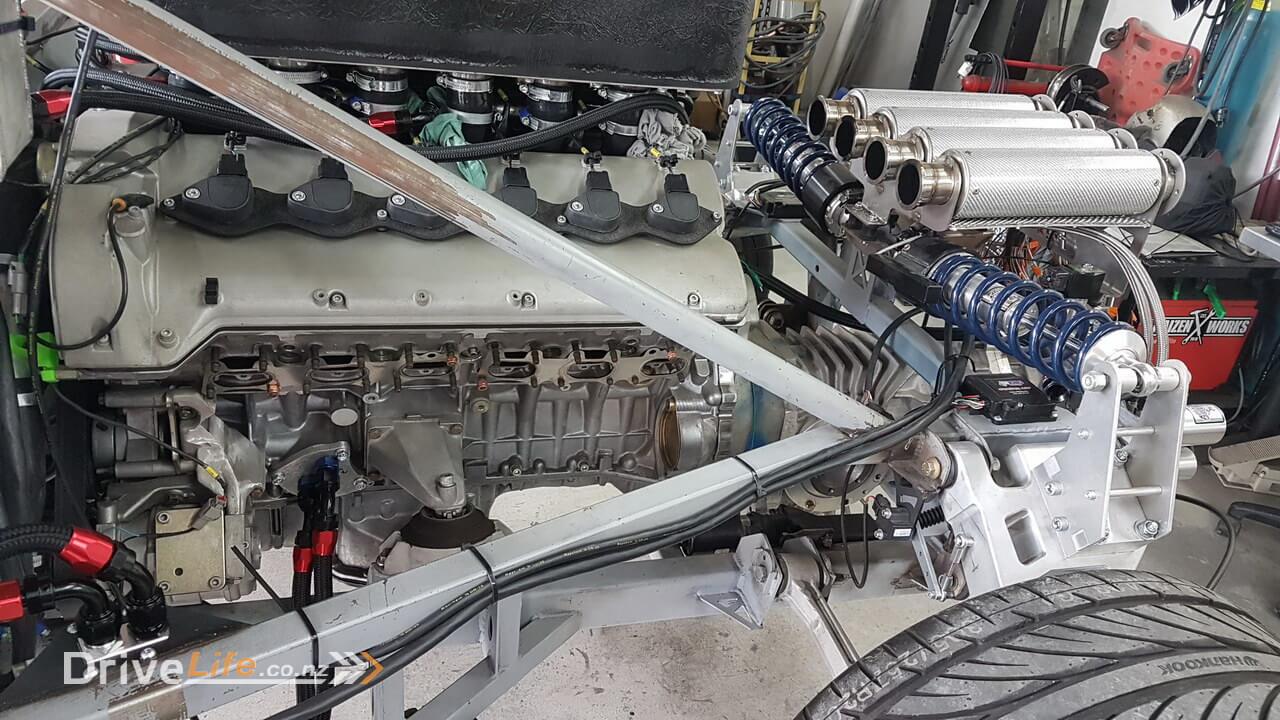
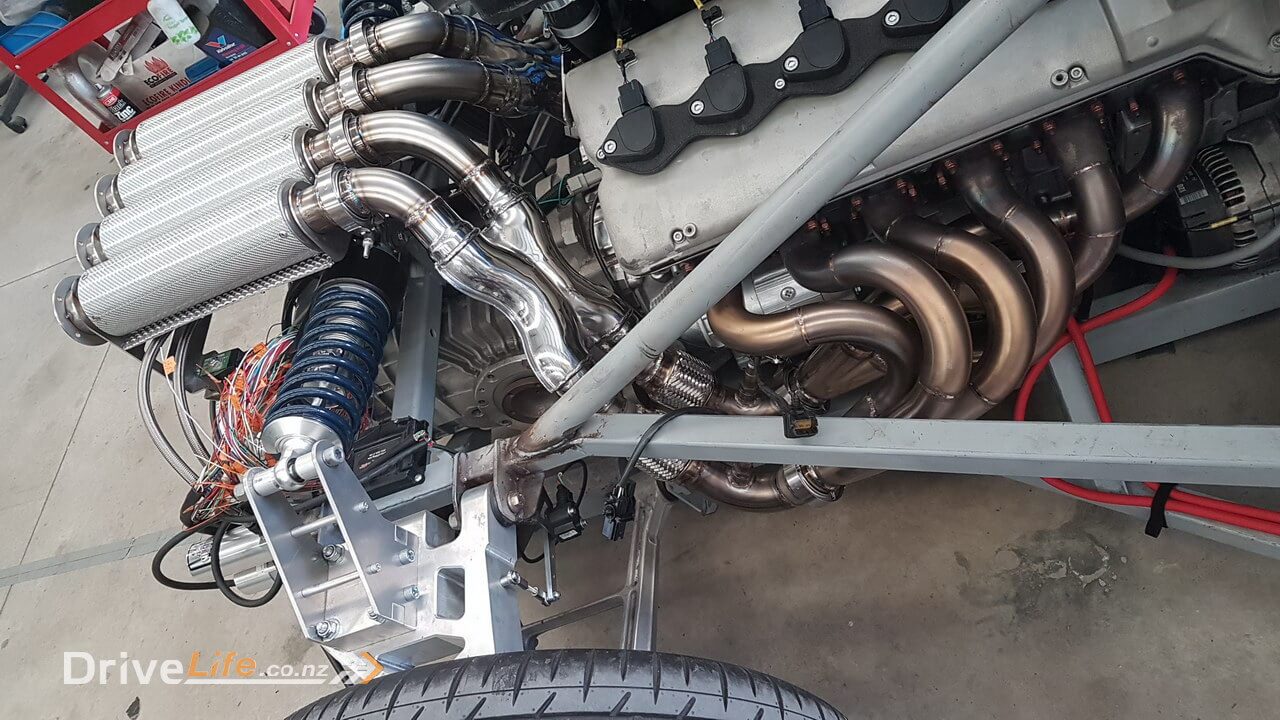
A few hours later, Ash from Kaizen Works had whipped us up a finished mid section for both sides………Legend. I think they look fantastic and I’m sure they’ll sound better too.
In the next episode we will have our engine running properly and we’ll be able to rev it properly and get a real idea of what it’s going to sound like !
Please feel free to comment or ask questions, I really love sharing and discussing our build and cars in general with other readers.
There’s a newer entry in this story, please click here – FZ12 – Part 35
If you’ve missed the last part of our story then click here FZ12 – Part 33
or if you want to go right to the beginning then click here FZ12 – Part 1


Hi Fraser,
Heard you on the radio yesterday and just had to check out your build. Your attention to detail is way above what I was expecting – so many beautifully hand-crafted components! Can’t wait for the next installment 🙂
I do have one small OCD issue though. Can you please swap the rear wheels over so that the tread is running the right way? I’m sure that it’s no where near your to do list yet, it just really bugs me 😉
Hi Levi,
The radio interview was totally unexpected, but glad that it got you interested in our build. Also, thanks very much for the kind words about what we’ve done so far. There’s still a long way to go, but we’ve tried to do the best we could with the equipment and experience we have.
You’re not the first person to mention the rear tyres being on the wrong side and I also knew they were on back to front, but didn’t need to remove the wheels for anything else so they just stayed as they were, but the wheels have been off since those photos so now they’re on the right sides you’ll be happy to hear ! 🙂
Thanks again for following…..